Documentation Index
Fetch the complete documentation index at: https://launchdarkly-preview.mintlify.app/llms.txt
Use this file to discover all available pages before exploring further.
Overview
This topic explains how to assign roles to members in LaunchDarkly.How base roles interact with additional member roles
Every organization using LaunchDarkly is made up of members. Members are people who work for your organization or use your organization’s LaunchDarkly account. You assign roles directly to members when you invite them to LaunchDarkly. You must assign a role to each member when they are invited, even if that role allows no access. If a member is directly assigned a role, such as a preset role or a role that you create, that role is used *instead of the member’s base role- to determine the member’s access.
- to determine the member’s access. To learn more, read How team roles interact with individual member roles.
Assign roles to new members on invite
When you invite a new member to your LaunchDarkly account, you must assign them a role as part of creating the invitation, even if that role does not allow any access. To learn how, read Add members to LaunchDarkly.Assign roles to existing members
To assign a role to an existing member:- Click the gear icon in the left sidenav to view Organization settings.
- Click Members. The Members list appears.
- Find the account member you wish to give a role.
- Click that account member’s name. The member’s Access tab opens.
- Click Assign access. The “Assign access” dialog appears.
- Choose a role from the dropdown.
-
(Optional) If the role includes a role attribute, enter a value for the attribute and click Enter. For example, if the role includes a role scope with a role attribute of
developerProjectKey, enter a project key in the Resources field:
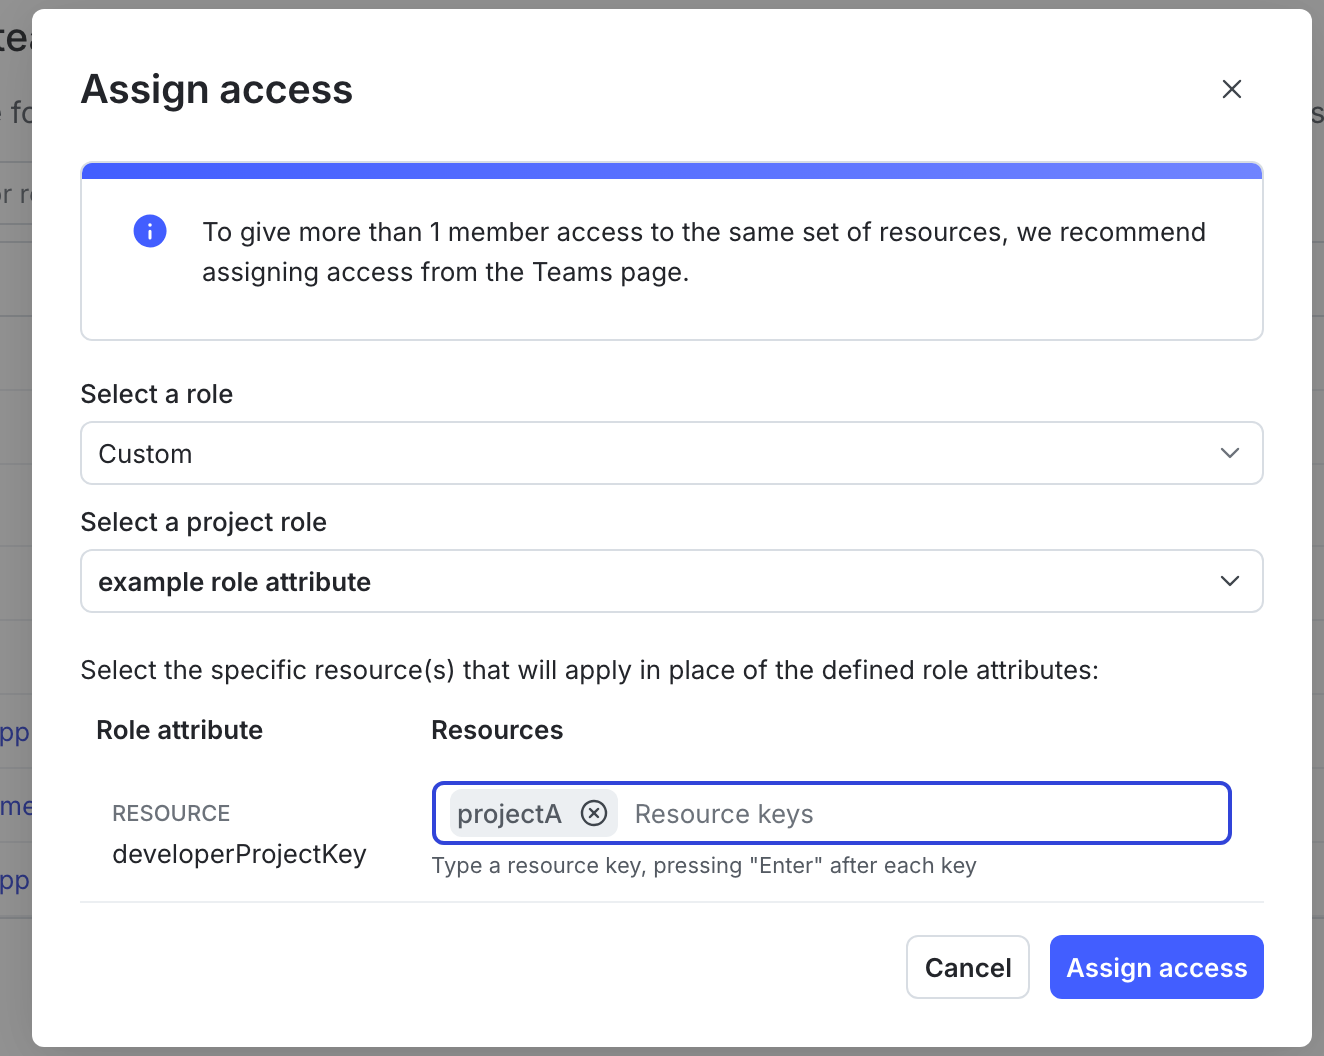
- Click Assign access. You are returned to the Access tab.
You can also use the REST API: Modify an account member