

Welcome to Launch
Darkly! Hello and welcome to LaunchDarkly! We’re excited to meet you. LaunchDarkly lets you release faster, break nothing, and build products customers love. This guide explains why feature flags are useful and then takes you through steps to accomplish the following:- Sign up for a free LaunchDarkly trial
- Install a LaunchDarkly SDK
- Create your first feature flag
- Retrieve the value of the feature flag from your code
- Create and target an audience with the feature flag
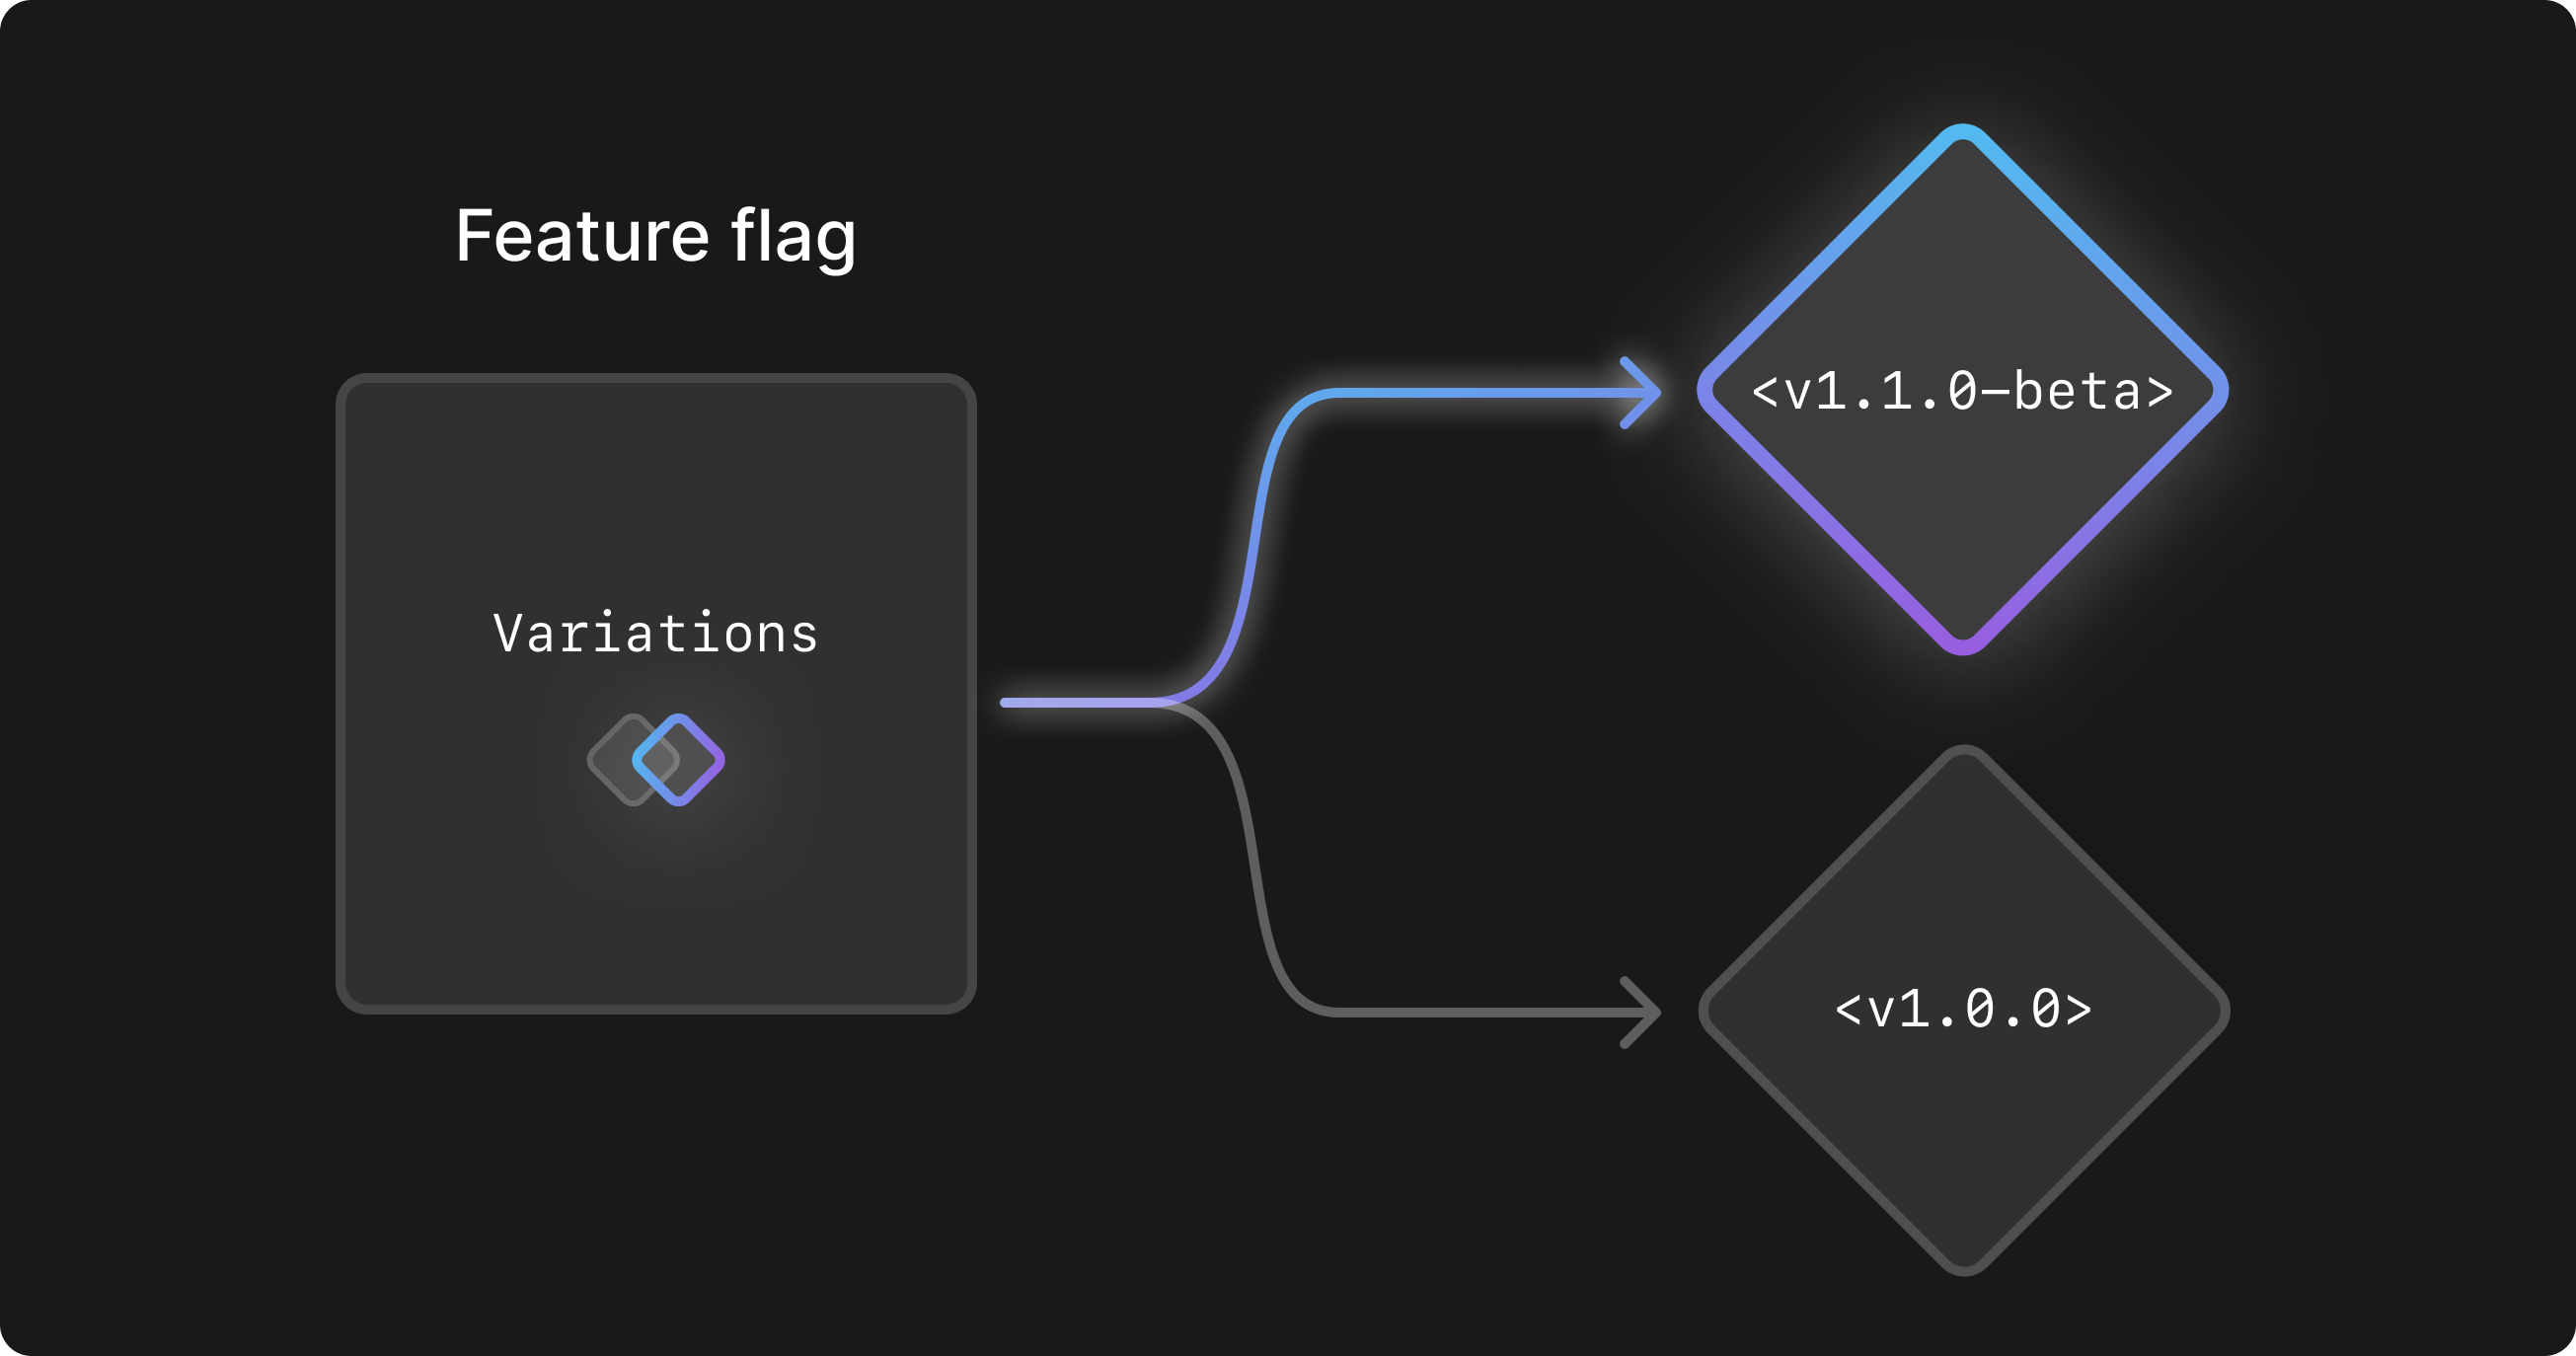
An illustration describing a feature flag.
What is a feature flag?
What is a feature flag?
How feature flags work
How feature flags work
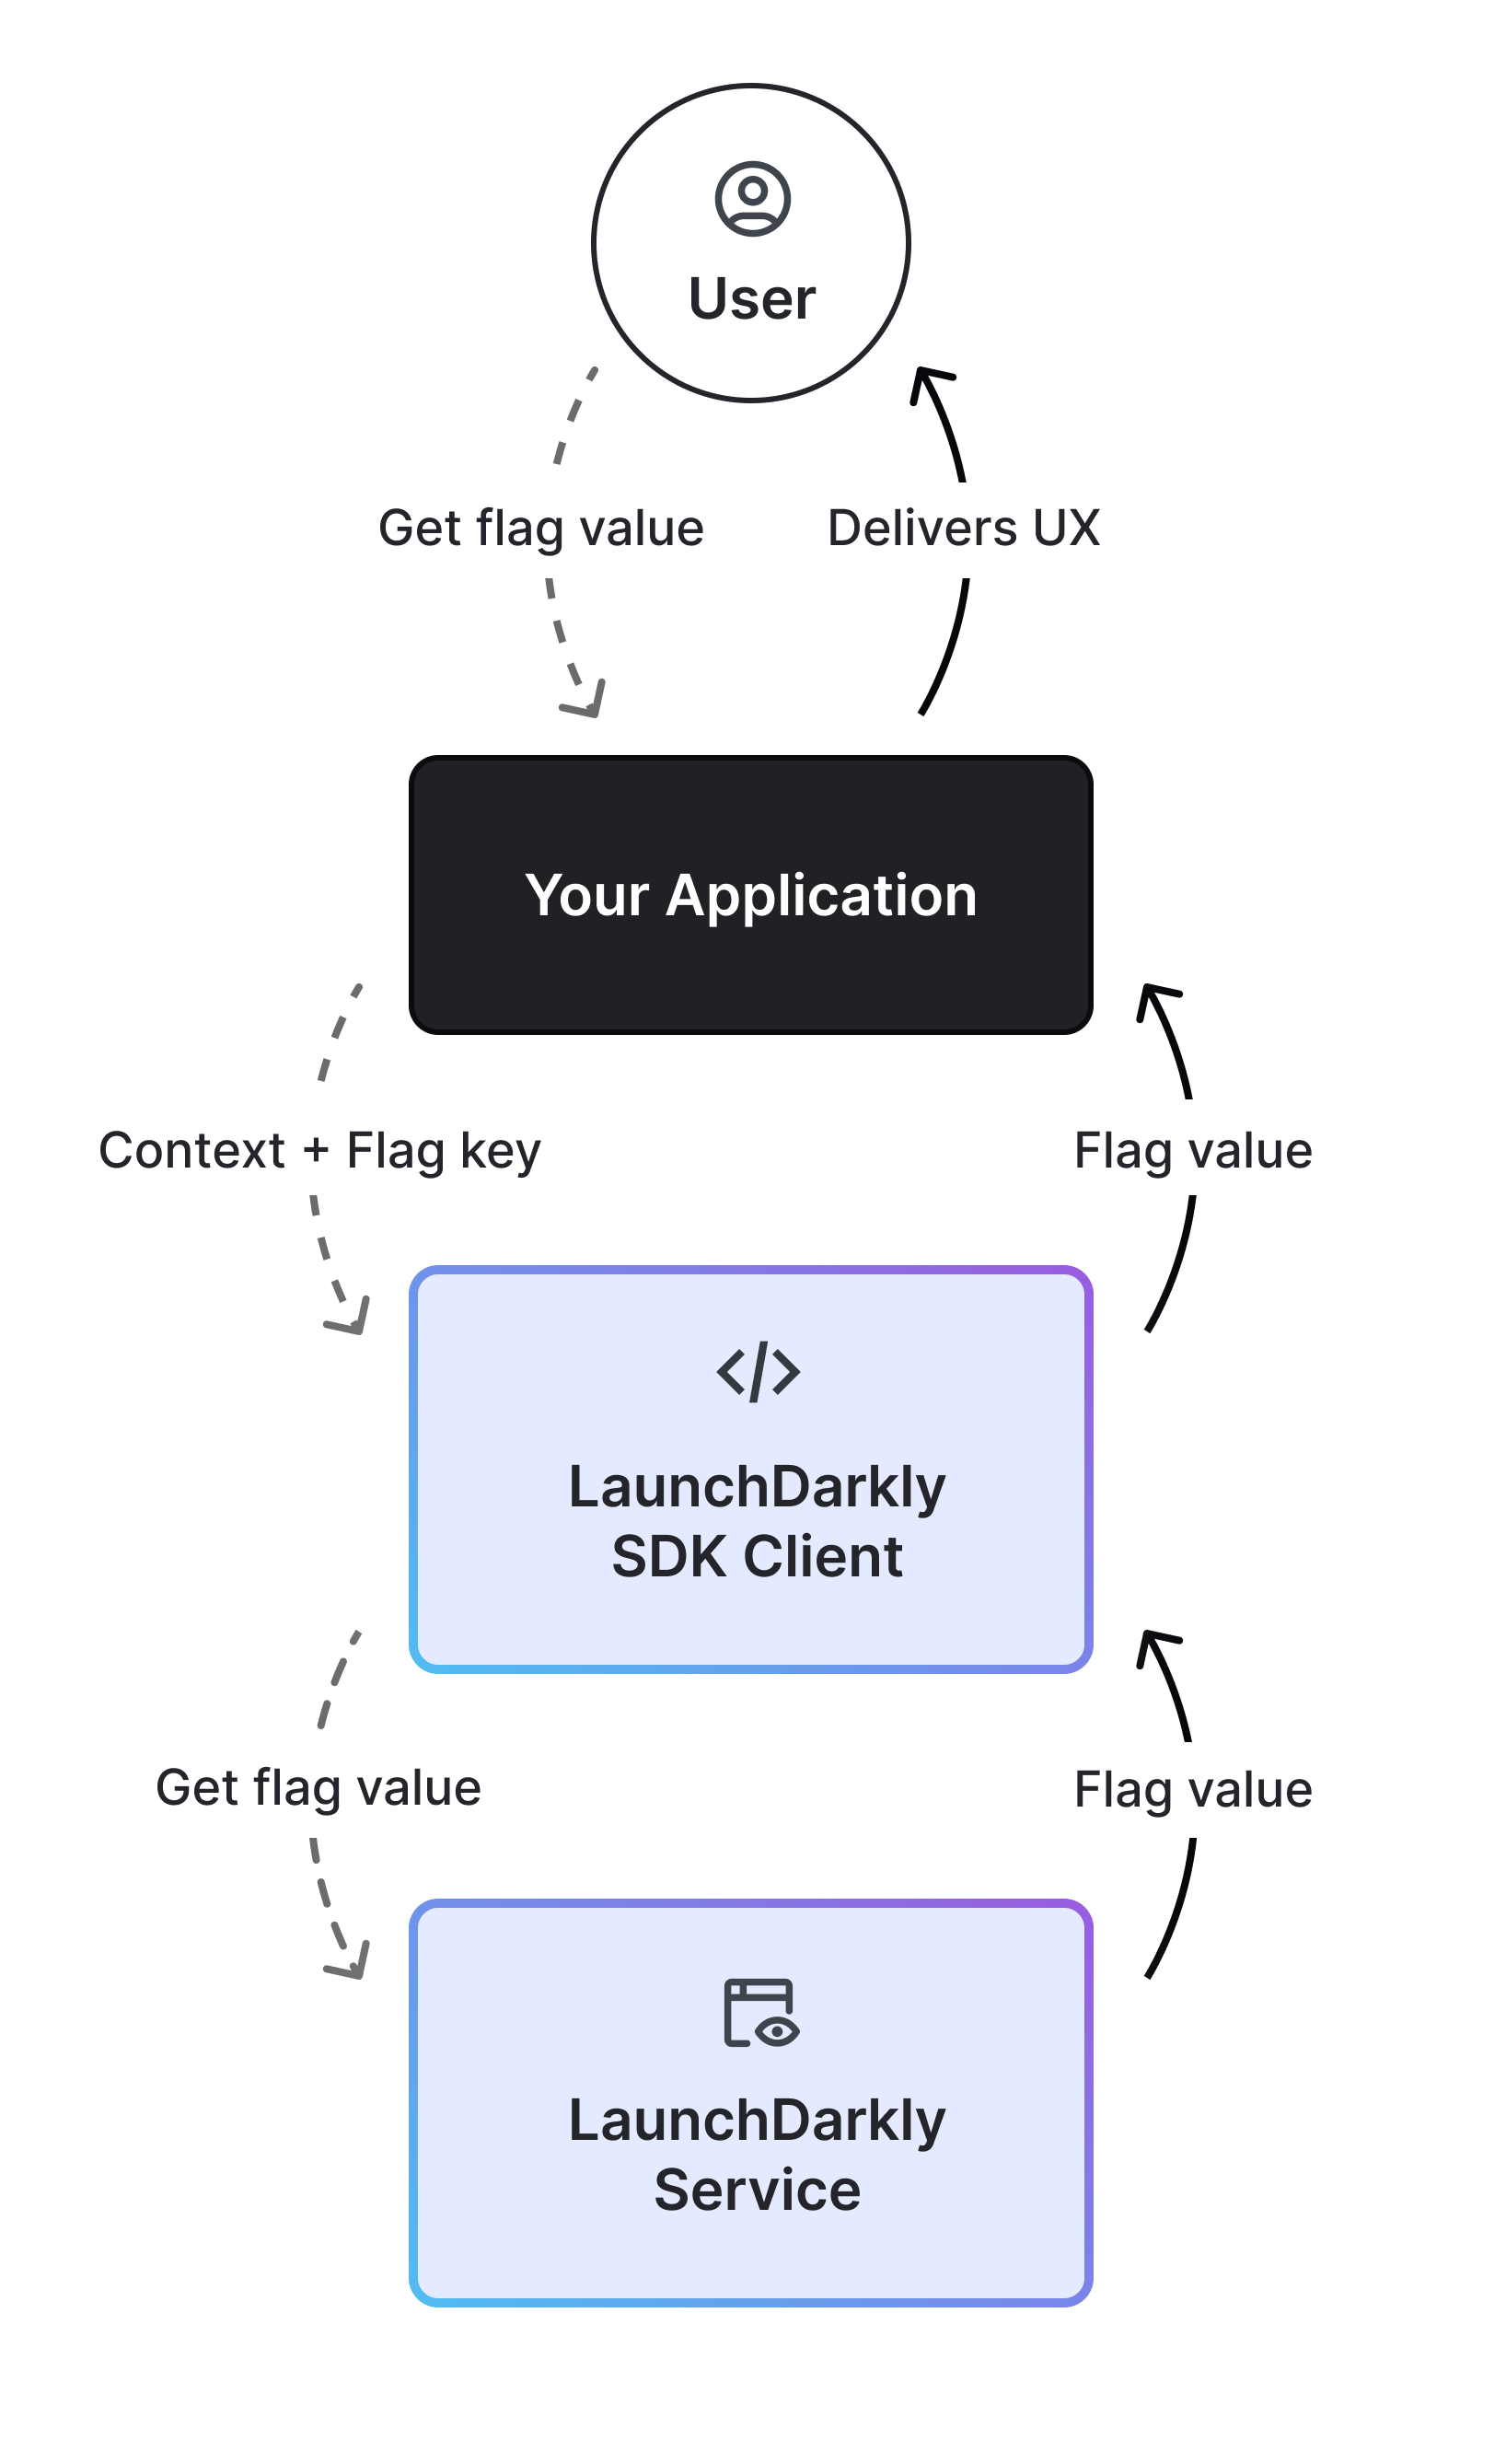
How a client-side SDK retrieves a feature flag value from LaunchDarkly.
variation().Why are feature flags useful?
Why are feature flags useful?
- Sign up for a free trial
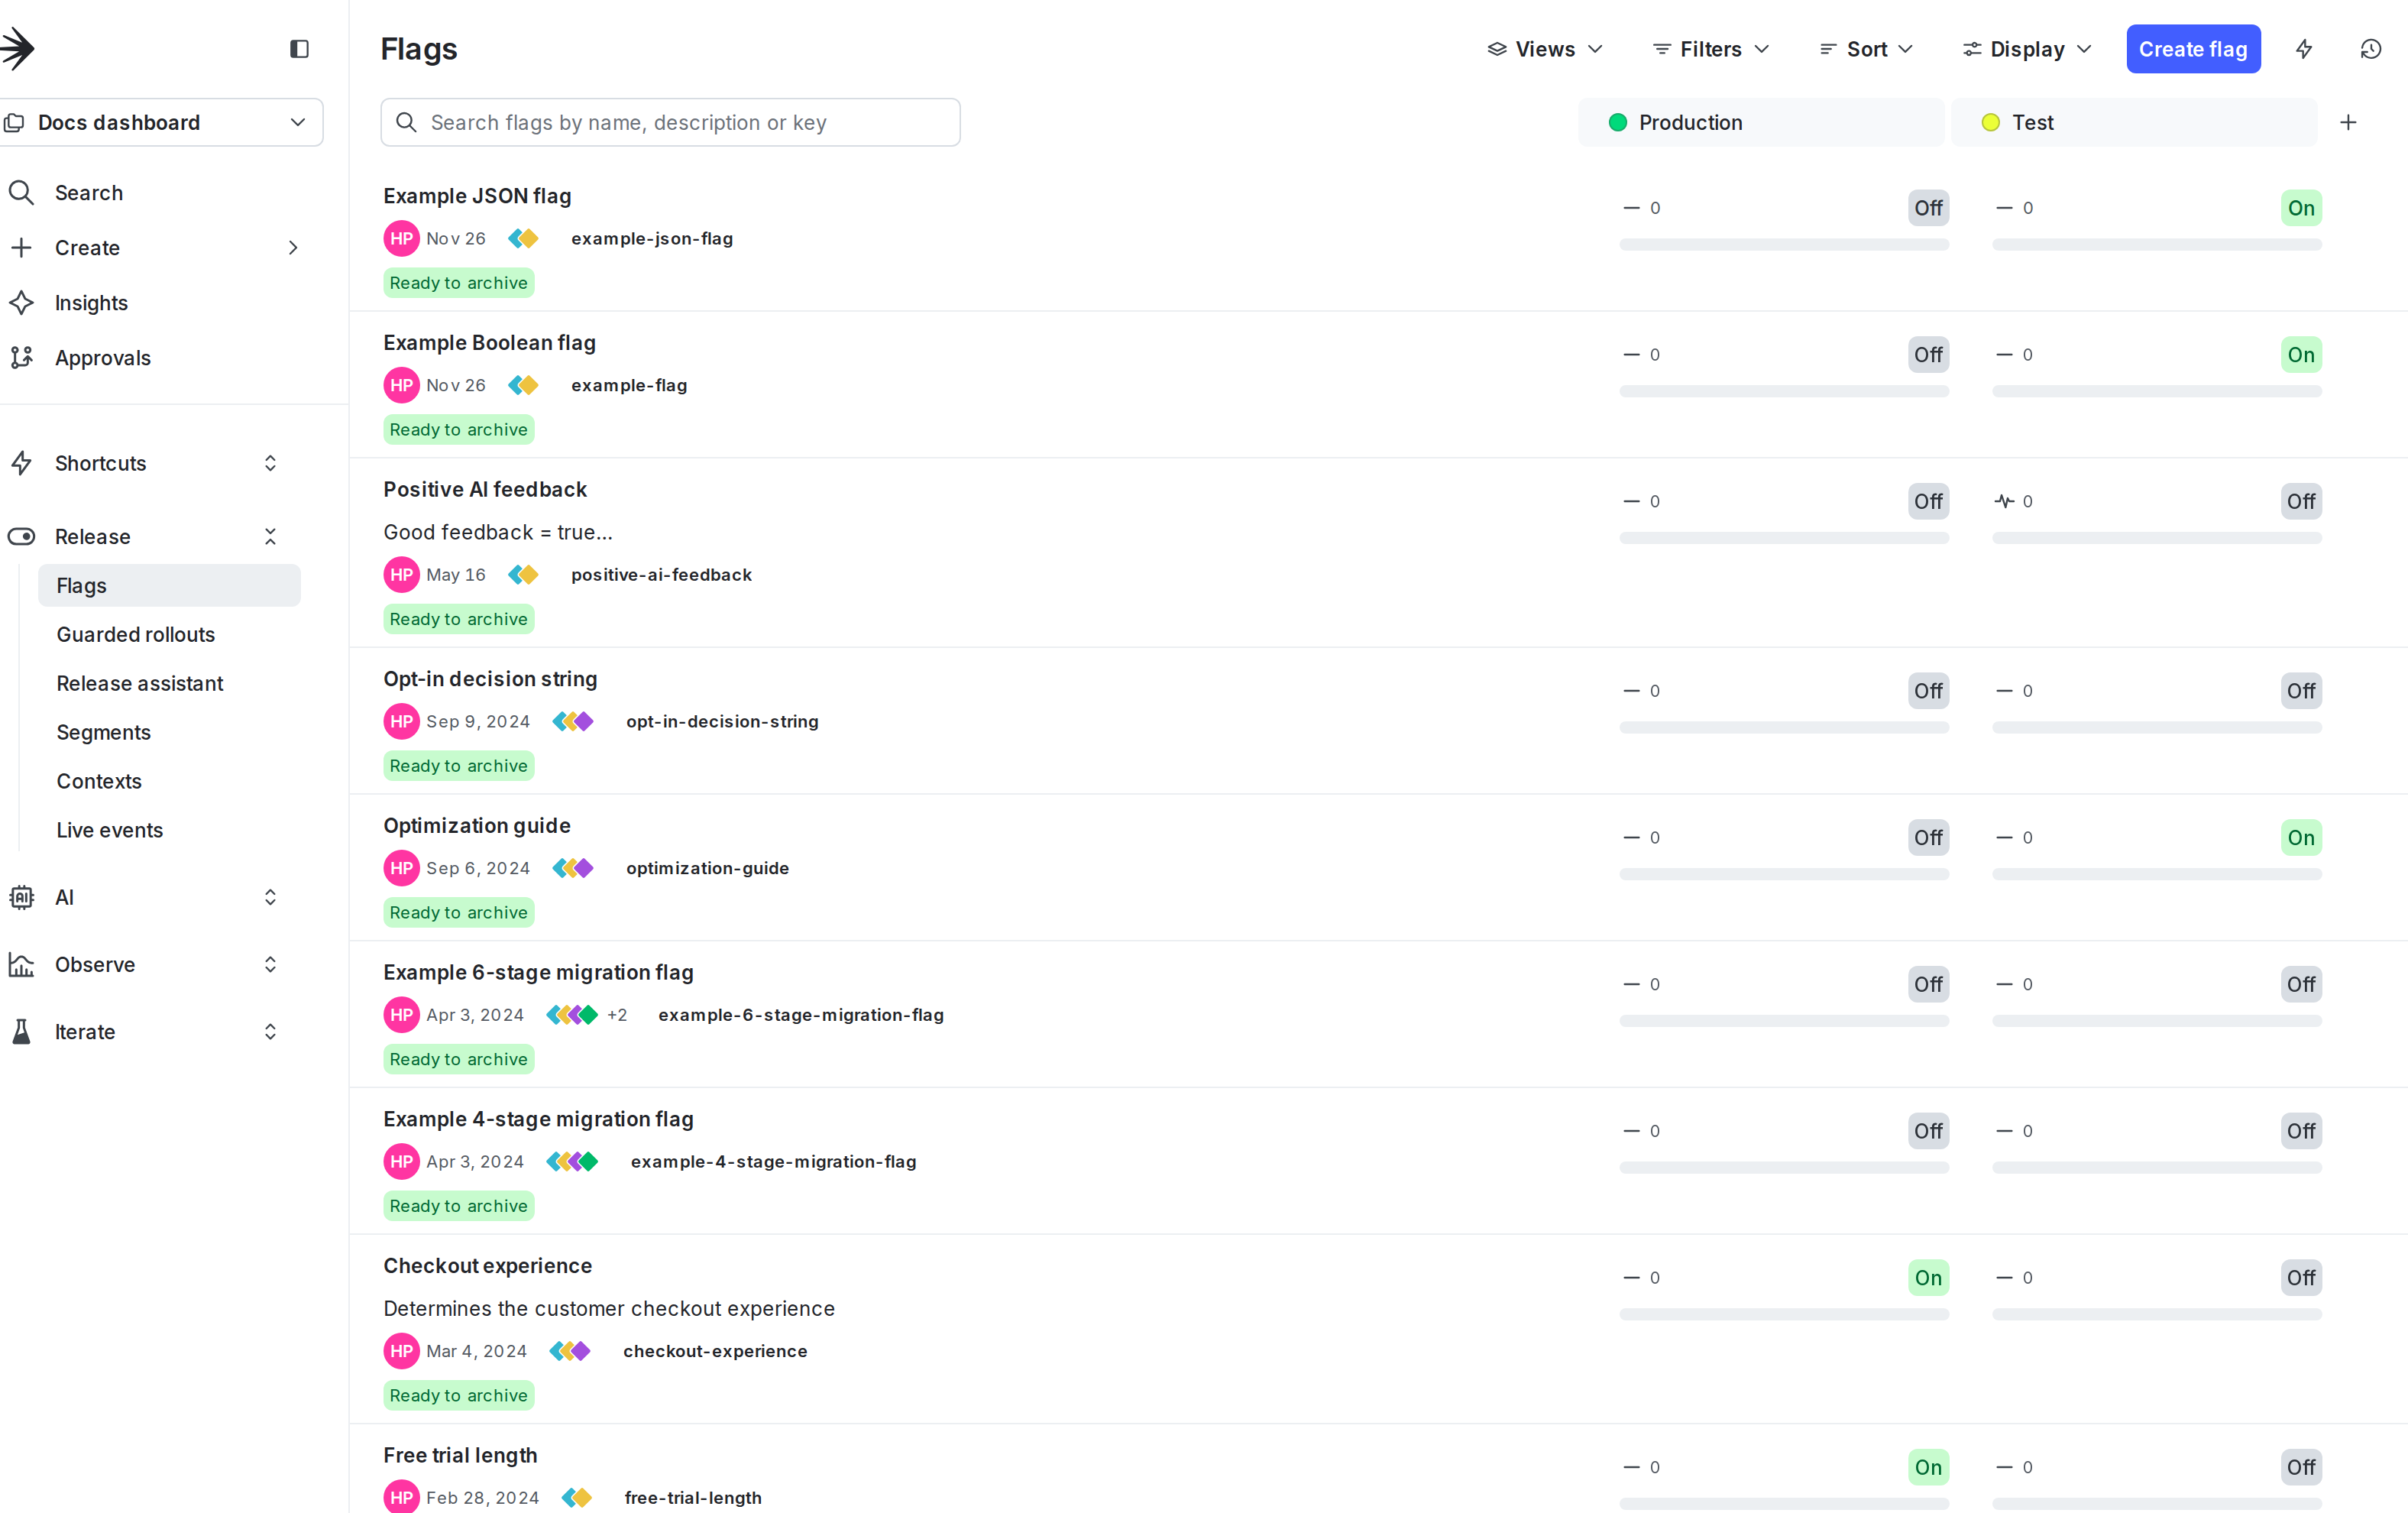
The Flags list in LaunchDarkly.
- Install an SDK for your codebase
- Create your first feature flag
- Create a feature flag.
- Build your first context.
- Retrieve the value of the feature flag.
- Integrate the feature flag into the demo code.
- Navigate to the Flags list in the LaunchDarkly UI. The Flags list is empty because this LaunchDarkly project doesn’t have any feature flags yet.
- Click Create Flag. The “Create flag” dialog opens.
- Give the flag a name and write a description explaining what it does. The flag key automatically populates based on the name you enter.
- Click Create flag.
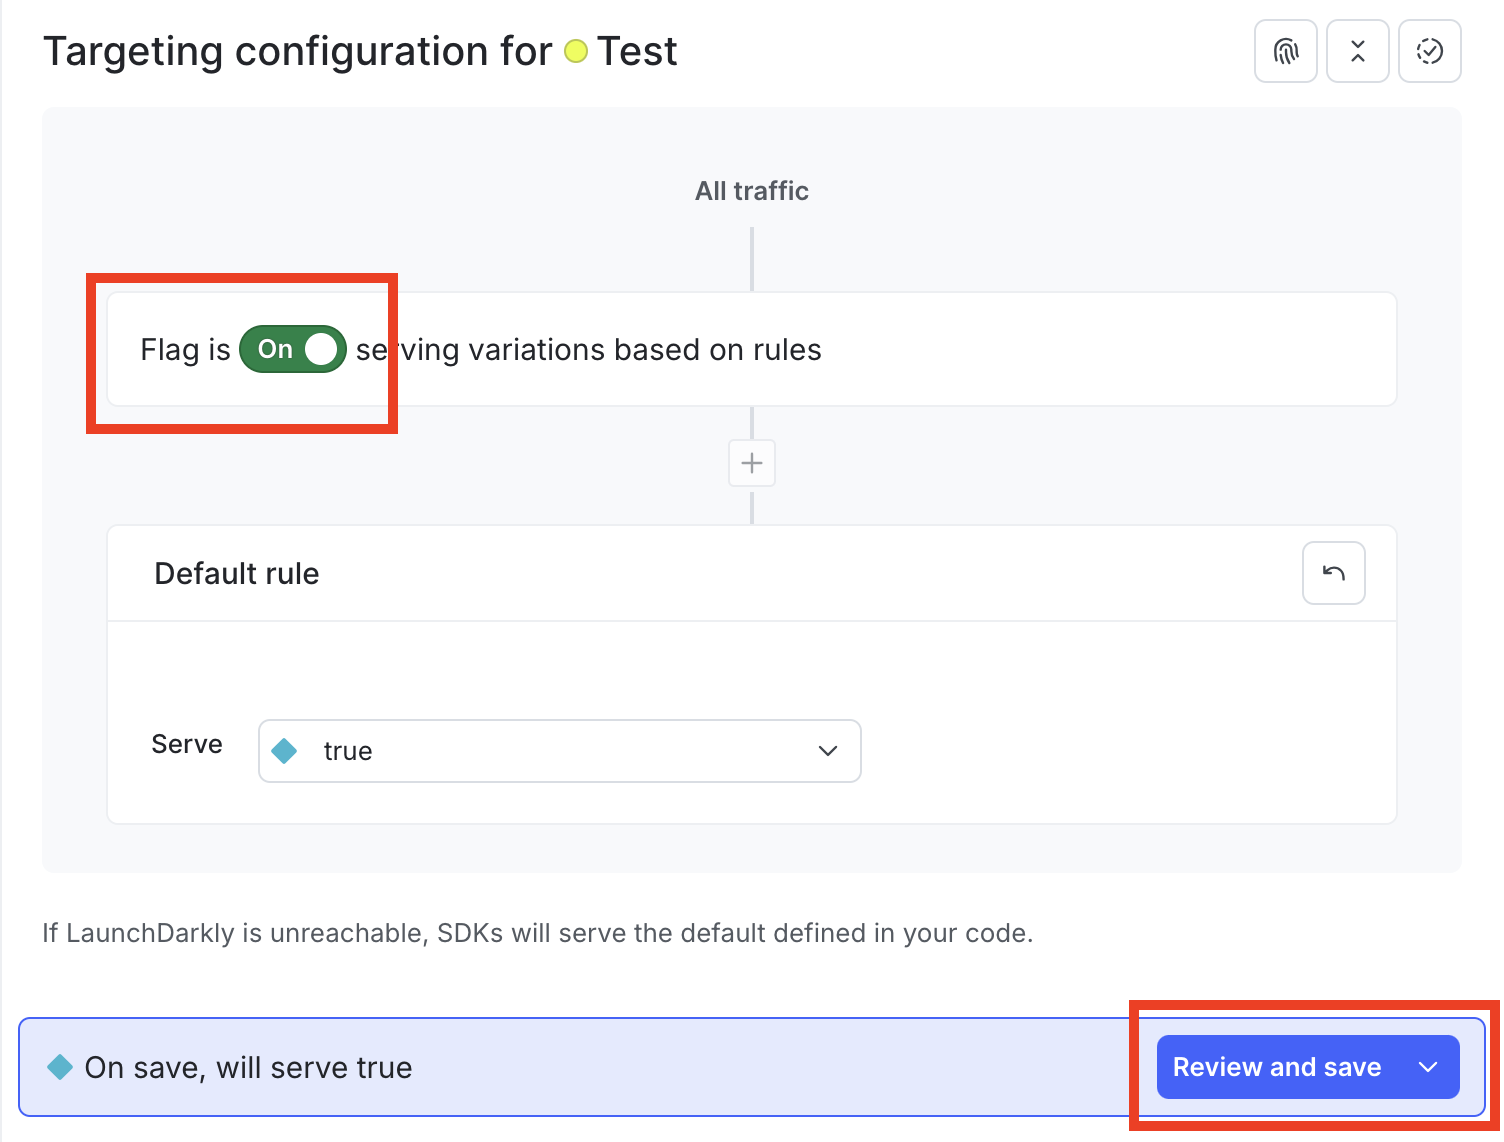
The toggle button to turn on the feature flag.
- Retrieve the value of your first feature flag
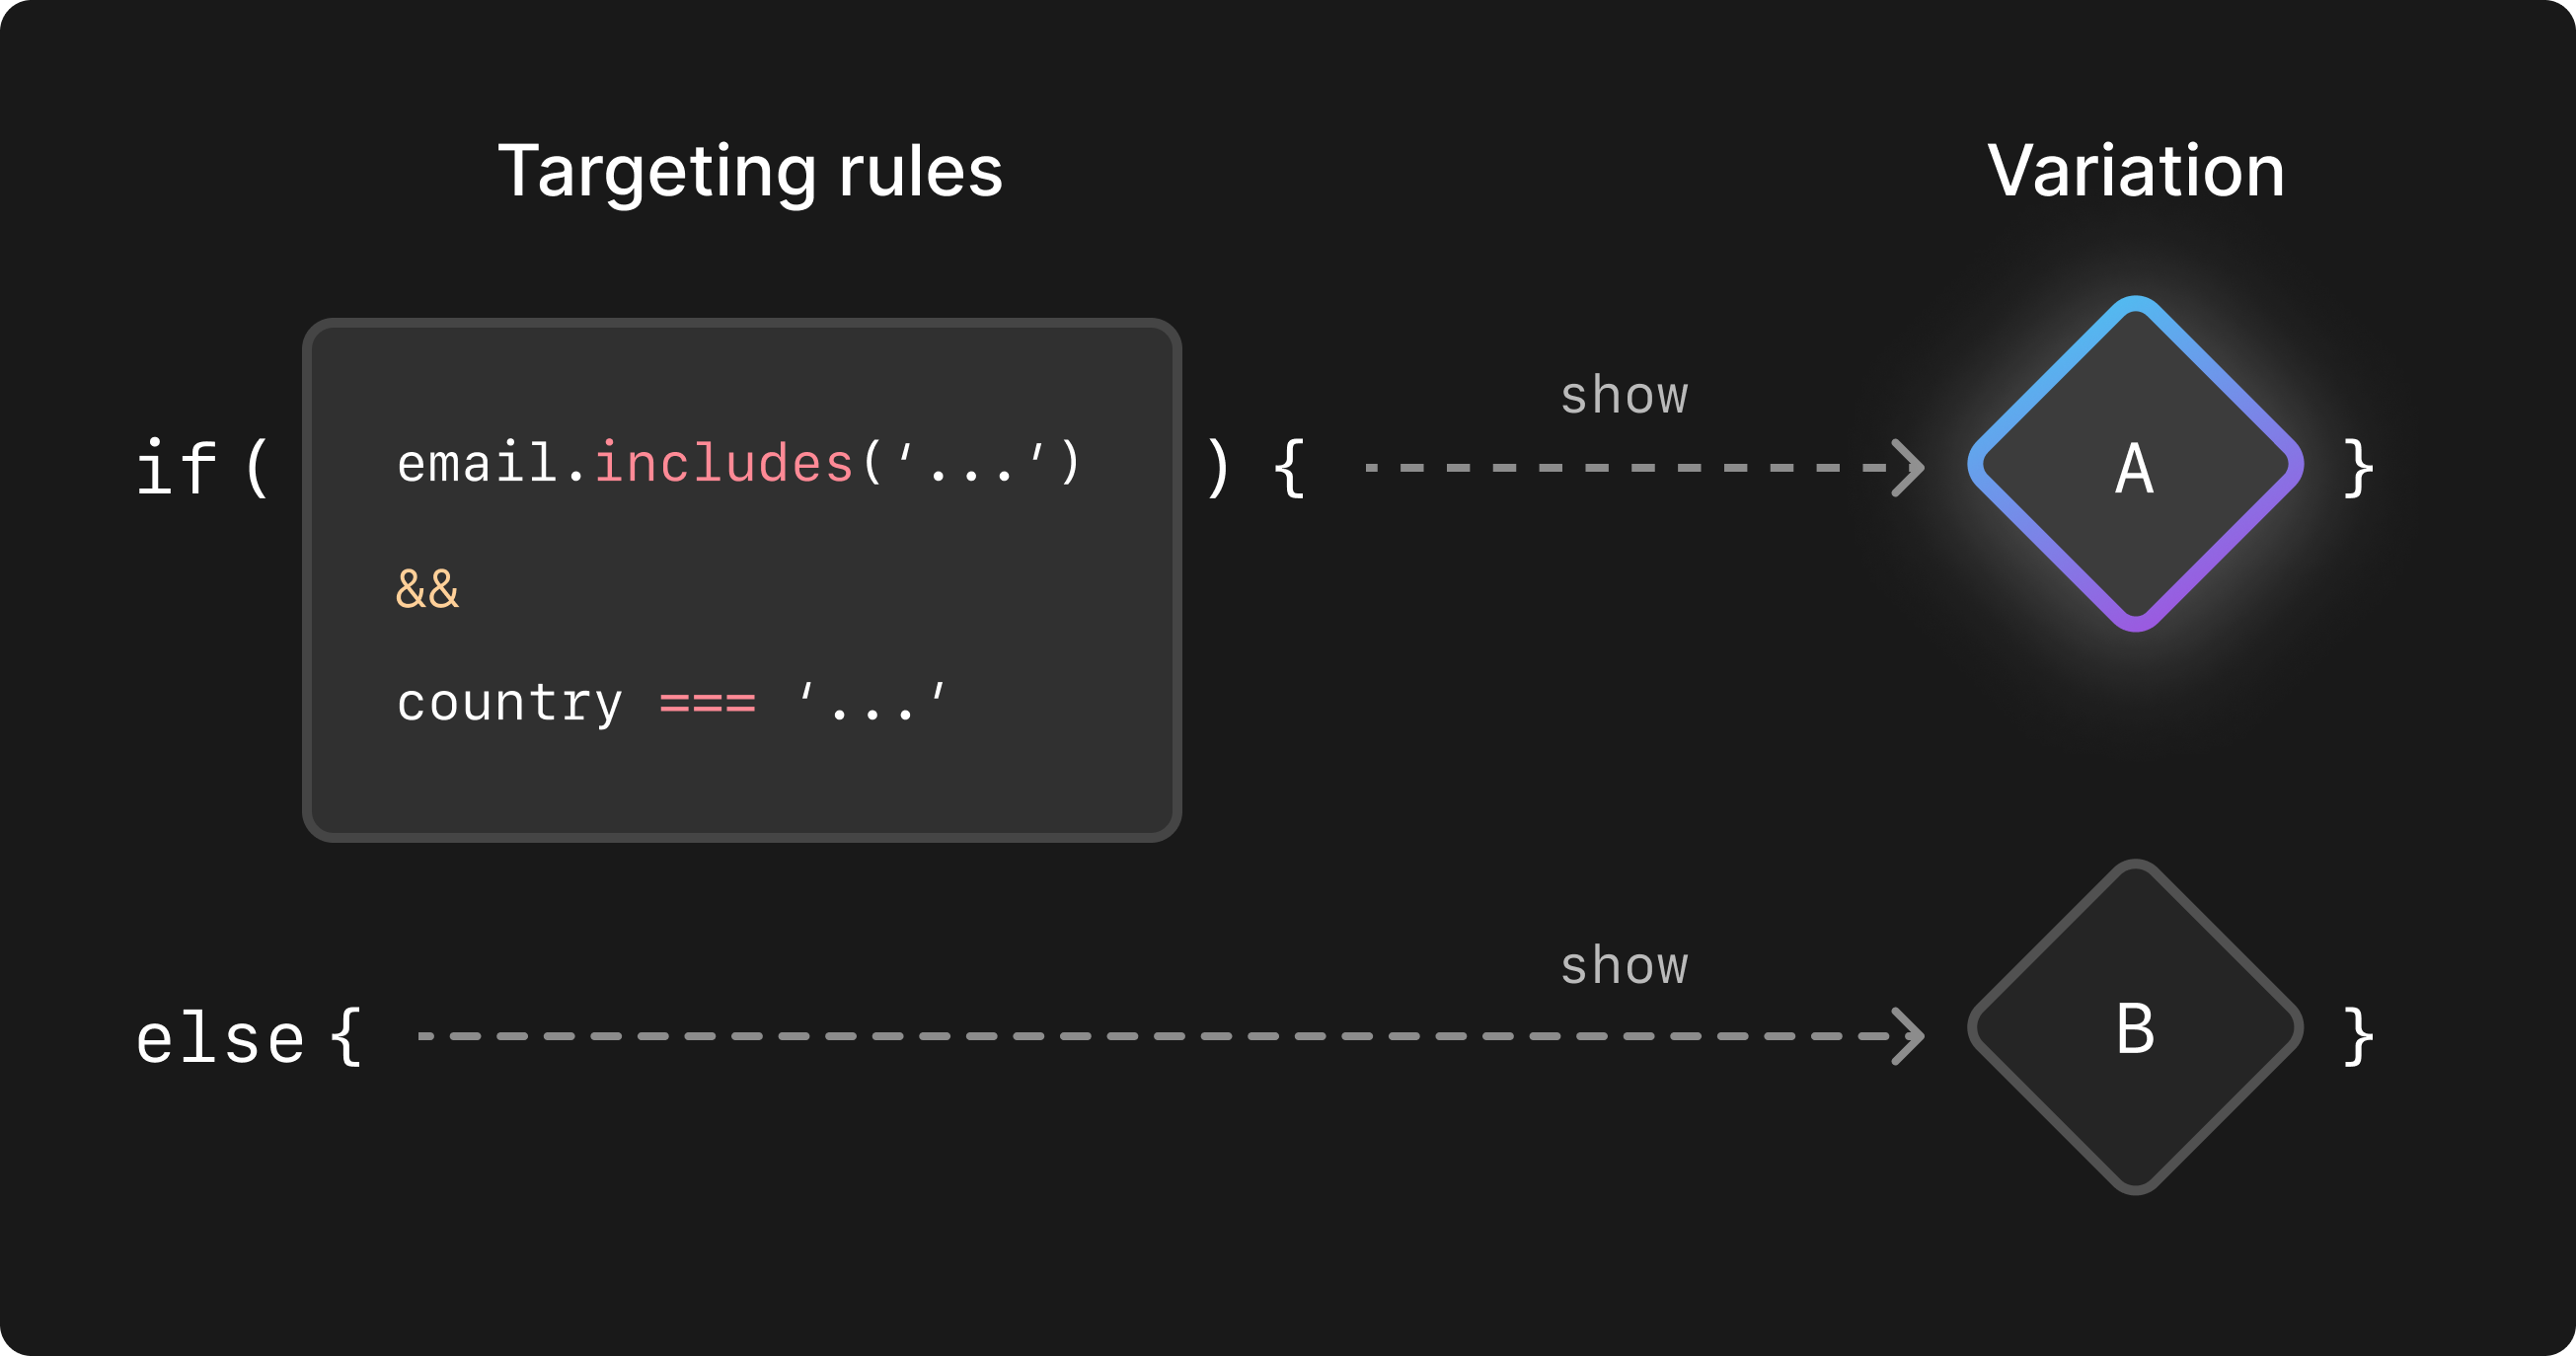
An illustration of retrieving a feature flag.
Initialize your Launch
Darkly client Return to the software project where you installed the LaunchDarkly SDK. Now you can configure the LaunchDarkly client to your account. After you have authenticated, you can retrieve the feature flag you created in Step 3: Create your first feature flag. Different credentials are available in LaunchDarkly. Here are their names and how they are used:- Environment key: a unique string that identifies each environment in your project. By default, your account is configured with “Production” and “Test” environments. This key is not used in the LaunchDarkly SDKs.
- SDK key: this string authorizes a LaunchDarkly client to connect from your server. It is a secret that you should import into your code securely. A common way of doing this is by importing it into your code as an environment variable.
- Mobile key: this string authorizes a LaunchDarkly client in a mobile SDK, like iOS or Android. Mobile keys can be reset, so they do not need to be kept secret.
- Client-side ID: this string authorizes a LaunchDarkly client for client-side and edge SDKs. The client-side ID does not need to be kept secret. Unlike the mobile key, it cannot be reset.
Expand Implementing LaunchDarkly on the server
Expand Implementing LaunchDarkly on the server
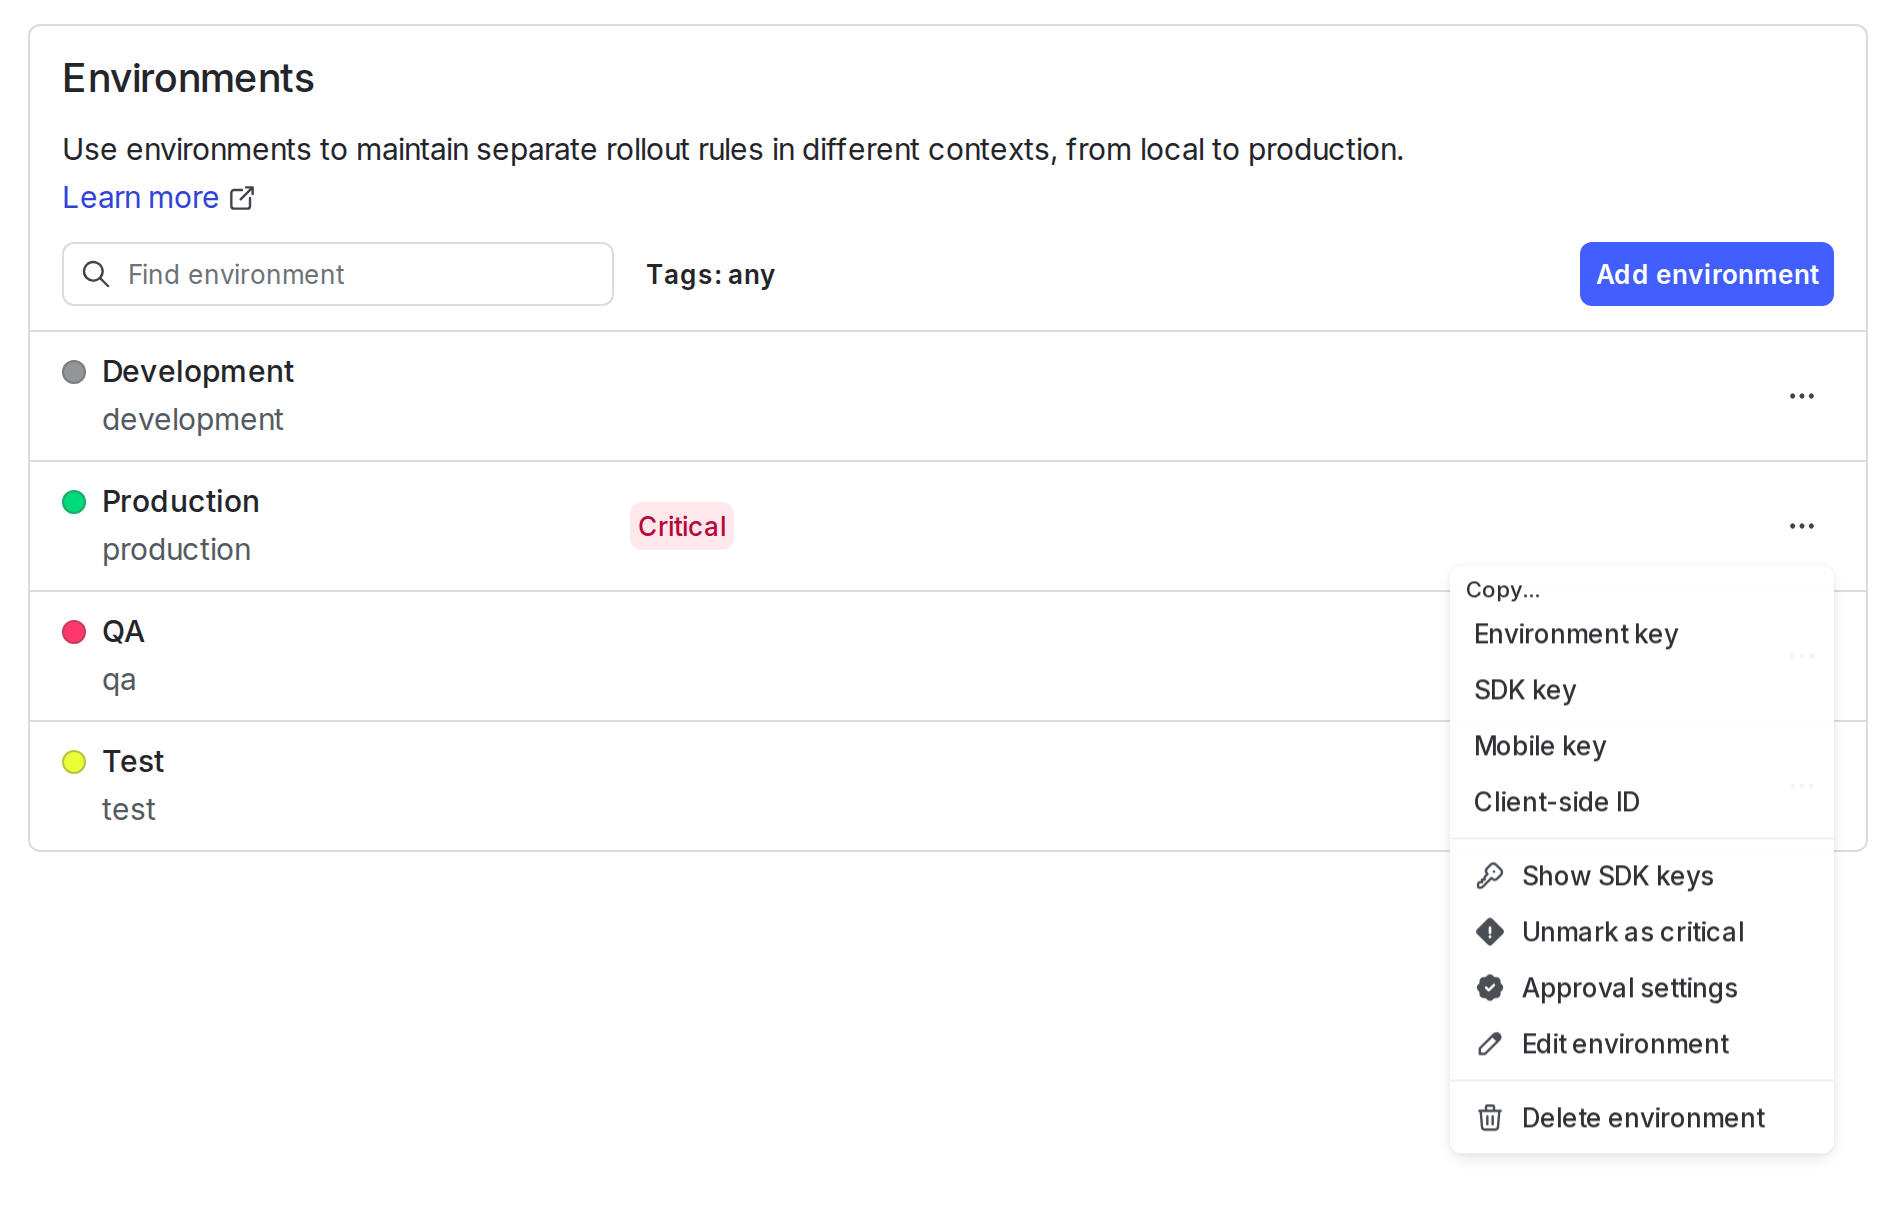
The "Environments" page in LaunchDarkly with the overflow menu for an environment displayed.
Expand Implementing LaunchDarkly in the client
Expand Implementing LaunchDarkly in the client
The "Environments" page in LaunchDarkly with the overflow menu for an environment displayed.
Expand Implementing LaunchDarkly on mobile
Expand Implementing LaunchDarkly on mobile
The "Environments" page in LaunchDarkly with the overflow menu for an environment displayed.
Config with the SDK key, client-side ID, or mobile key passed as a string:
SDK successfully initialized!
Great! Now you can build your first context.
Build your first context
When you use the LaunchDarkly client to retrieve a feature flag, you need to pass LaunchDarkly a context that describes the audience encountering the feature flag. A context can include any attribute of an audience that your app has captured: email address, user type, company or organization, device type, screen size, demography, geography, or any other descriptor you can define. If you need to, you can pass more than one context to LaunchDarkly simultaneously when retrieving a feature flag. For the purposes of this example, start by defining a context as a user. Using the code samples below, expand the test code from earlier in this tutorial by creating the first context with a demo user called “Sandy.” The code samples define the user’skind, name, email address, and a demo user ID string.
context, you can get the value of your first feature flag.
Retrieving your first feature flag
Now you can retrieve the value of the feature flag. To write this code, return to the feature flag you created earlier and copy the feature flag’s key to your clipboard.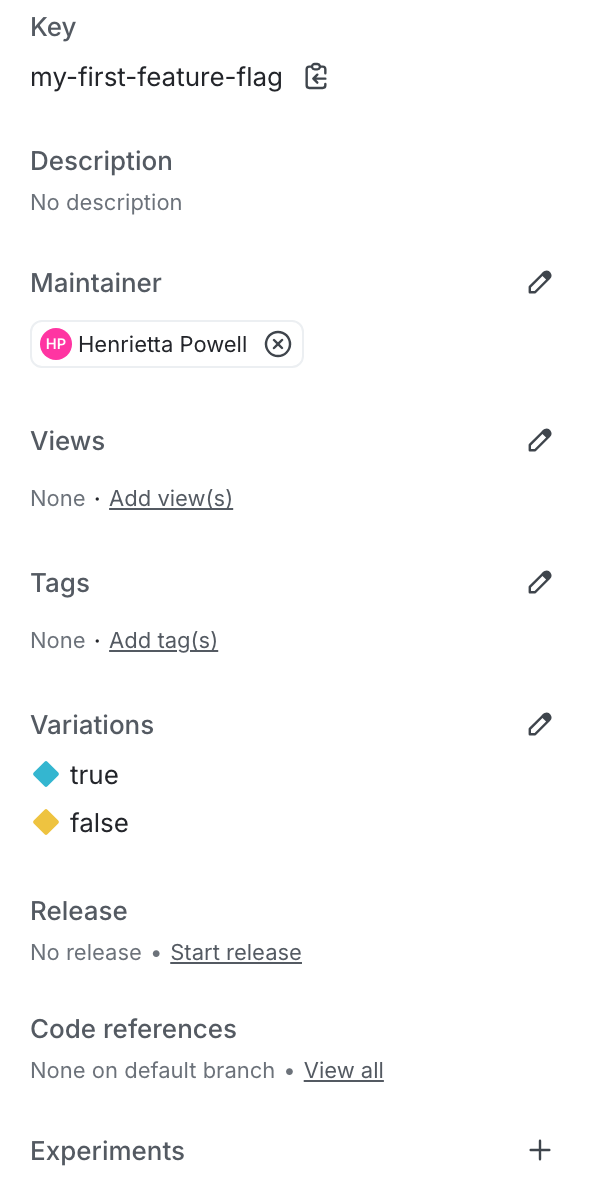
The menu for your first feature flag illustrating the location of the feature flag key.
false:
True. Let’s see what happens if you turn your feature flag off.
Returning to the flags list in the LaunchDarkly UI, find the feature flag you created, click Off underneath “Targeting configuration for Test” and then click Review and save.
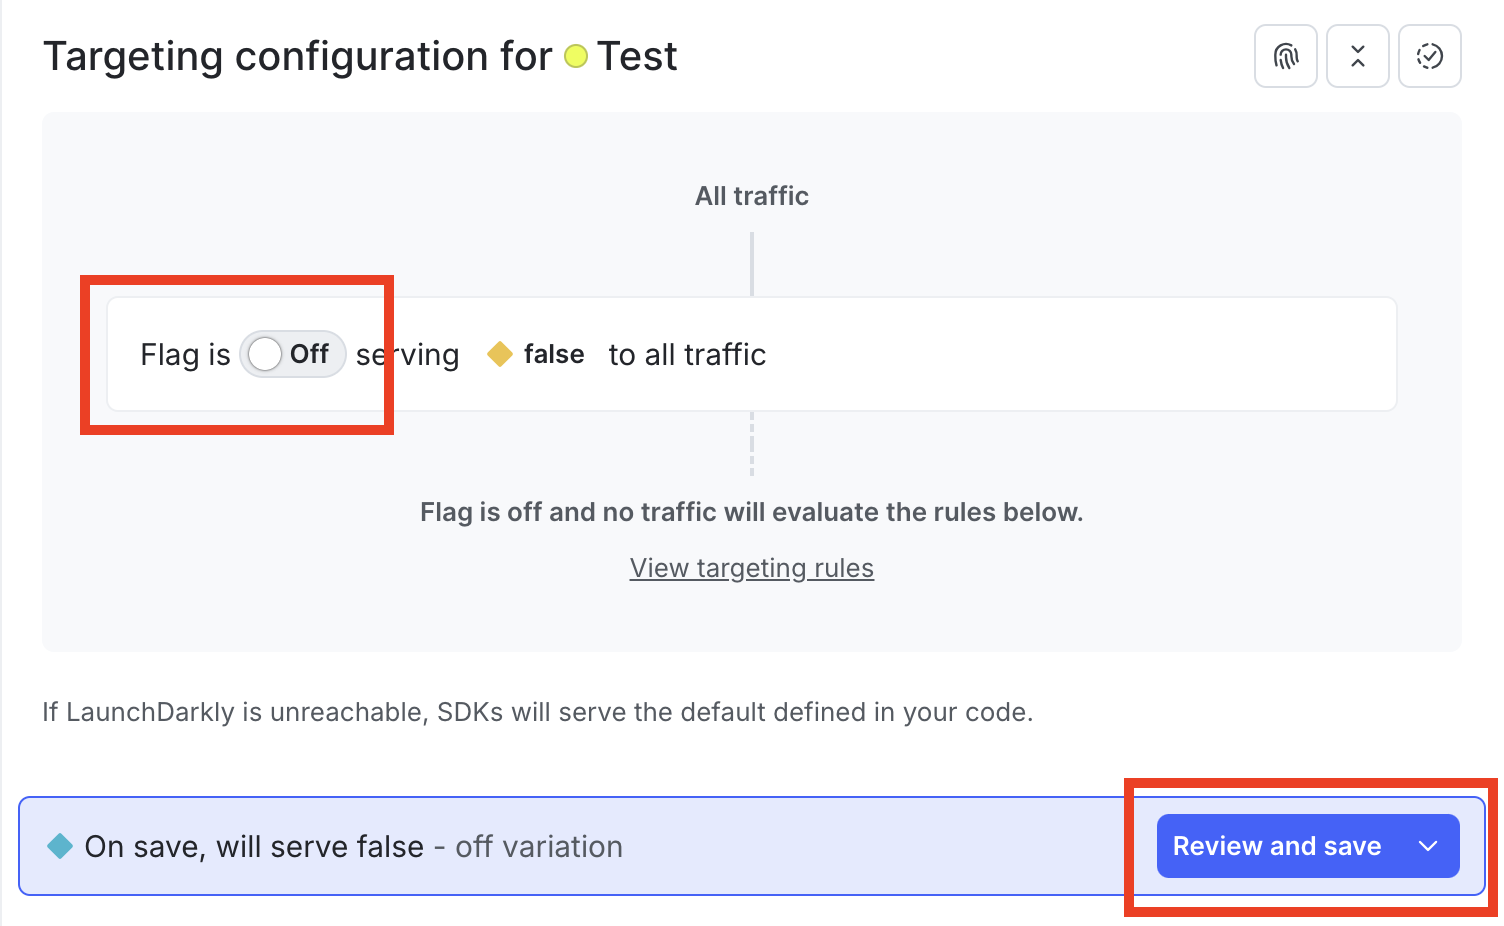
The menu for the feature flag, with the toggle to turn the flag off called out.
Our first feature flag is: false
The flag you just turned off now has a value of false.
Next, let’s explore how you can leverage a feature flag’s value in more realistic code.
Integrate your first feature flag
The demo code you created earlier is intended to introduce you to the three important concepts of LaunchDarkly: feature flags, authenticated clients, and contexts. Now we can explore how you can integrate them in a more realistic software project. Imagine that you have a new template you wish to deploy. Using a feature flag will let you deploy this template to a small subset of users first before rolling it out progressively to the entire user base. Explore this pseudocode that describes how such an implementation could look in production:- Targeting the audience for your first feature flag
- Create your first audience.
- Add your first targeting rule.
- Confirm your targeting rule works.
Create your first audience
Here is some code to create some more demonstration users you can target with the feature flag. This code creates three new users: Alice, Bob, and Carlos. Alice and Bob use the context kinduser, the same as Sandy. Carlos uses the context kind beta-user. You will configure your targeting so that contexts with the kind user receive false, while Carlos, the beta-user, continues to receive true.
false from the feature flag.
Alice’s flag value is: falseBob’s flag value is:
falseCarlos’ flag value is:
false
Return to the LaunchDarkly UI to configure the feature flag so that contexts of kind user receive false and Carlos, the beta-user, remains true.
Add your first targeting rule
Return to the feature flag in the LaunchDarkly UI, then set the feature flag to only target contexts with thekind “beta-user.”
First, click the View targeting rules to display the flag’s existing default rule:
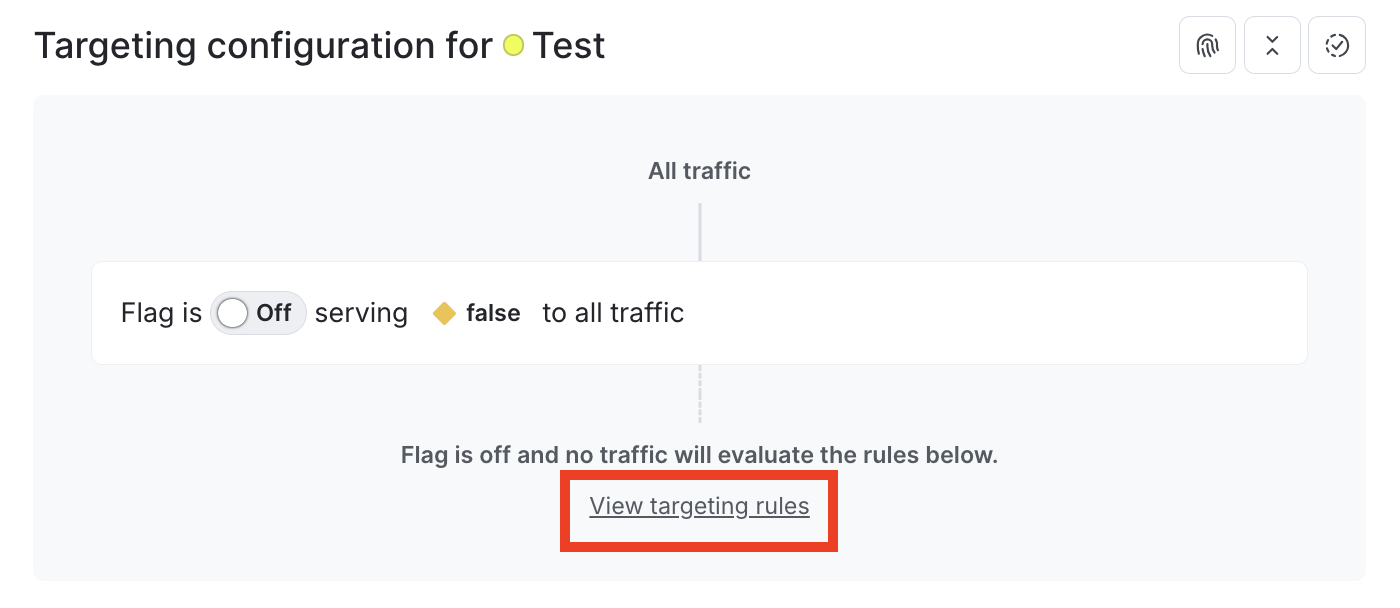
The "View targeting rules" option on a feature flag.
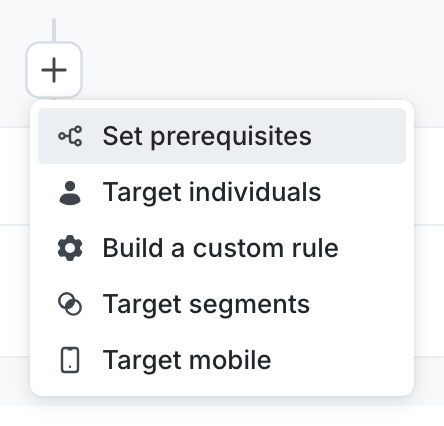
The dropdown menu to add a custom rule to a feature flag.
false to all contexts with kind user. Describe the rule by typing an explanation in the Description field. In the attribute list, choose Context kind. In Values, enter user:
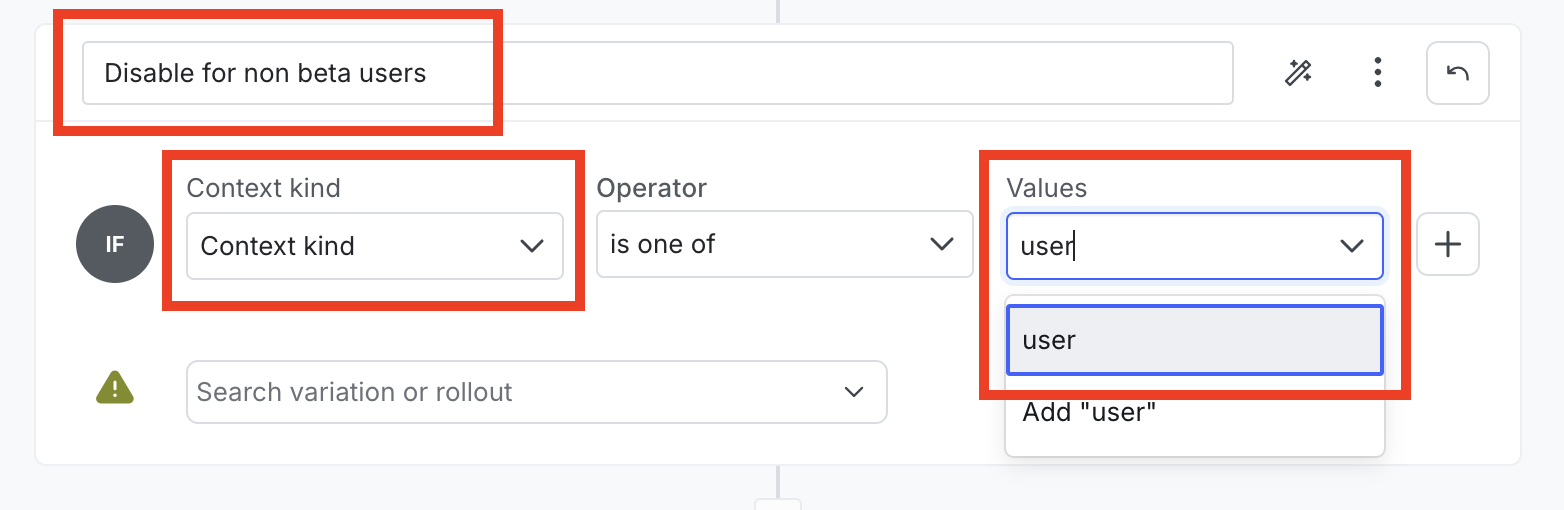
The menu to target a specific context kind called user.
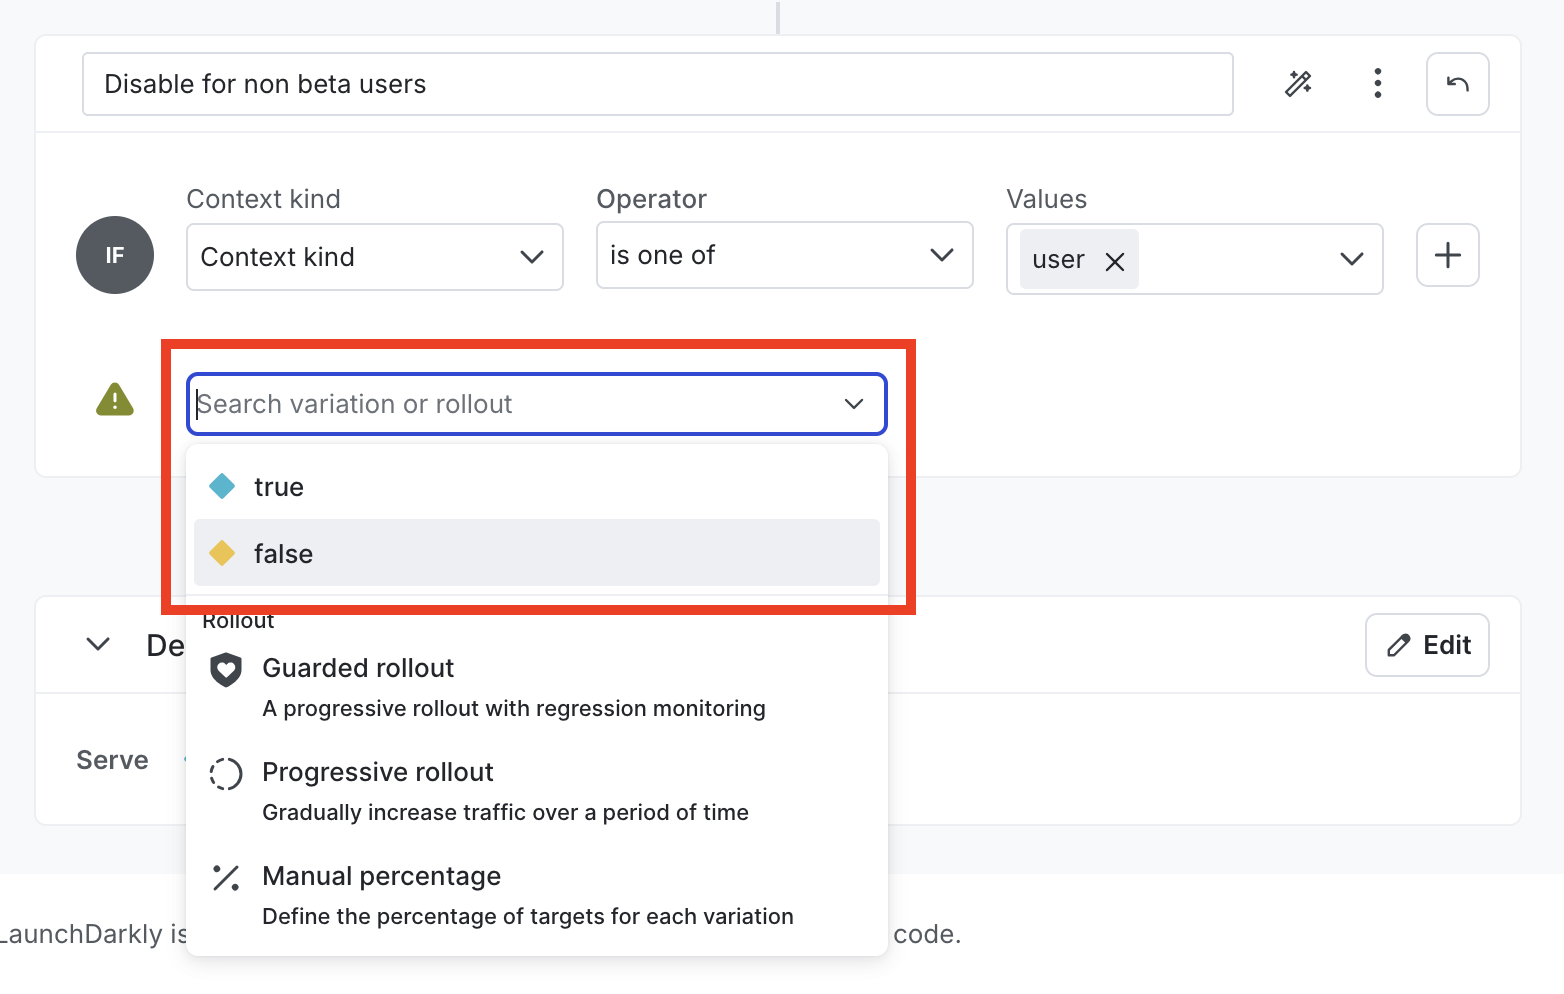
The dropdown menu to set the feature flag's return for the targeted audience to false.
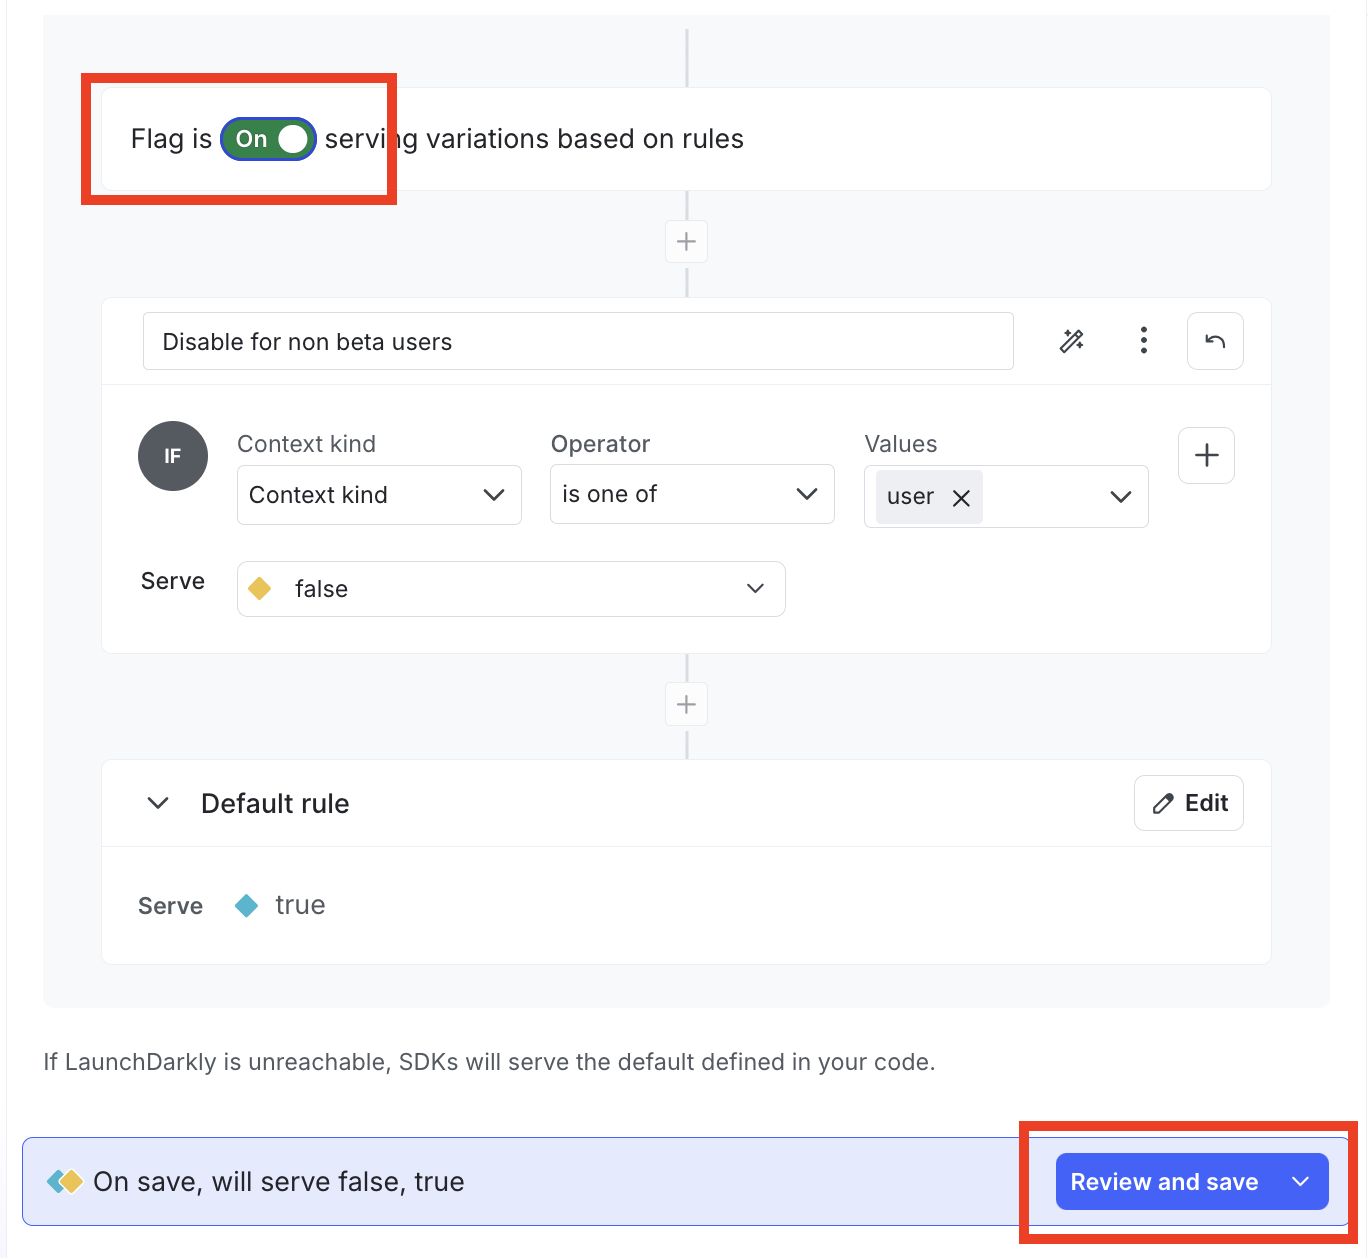
The toggle to turn on the feature flag for the beta users.
false to all contexts with the user kind. Because Carlos is a beta-user, he does not match the rule and continues to receive true.
Return to your demo code to see this in action.
Confirm your targeting rule
Return to the code and execute it again. Alice and Bob now receivefalse, while Carlos, the context with the beta-user kind, continues to receive true:
Alice’s flag value is: falseBob’s flag value is:
falseCarlos’ flag value is:
true
Targeting rules can use multiple contexts to build tightly narrowed subsets with extensible flexibility. Imagine targeting only mobile devices, only users with Gmail addresses, or only users in a certain geography. Each of these can be described with multiple contexts, allowing for granular control on who does and does not get the new feature.
By describing your users with a Context and building targeting rules in your feature flags, your new features can target the precise audience you intend.
And with that, you’re done!
- What’s next
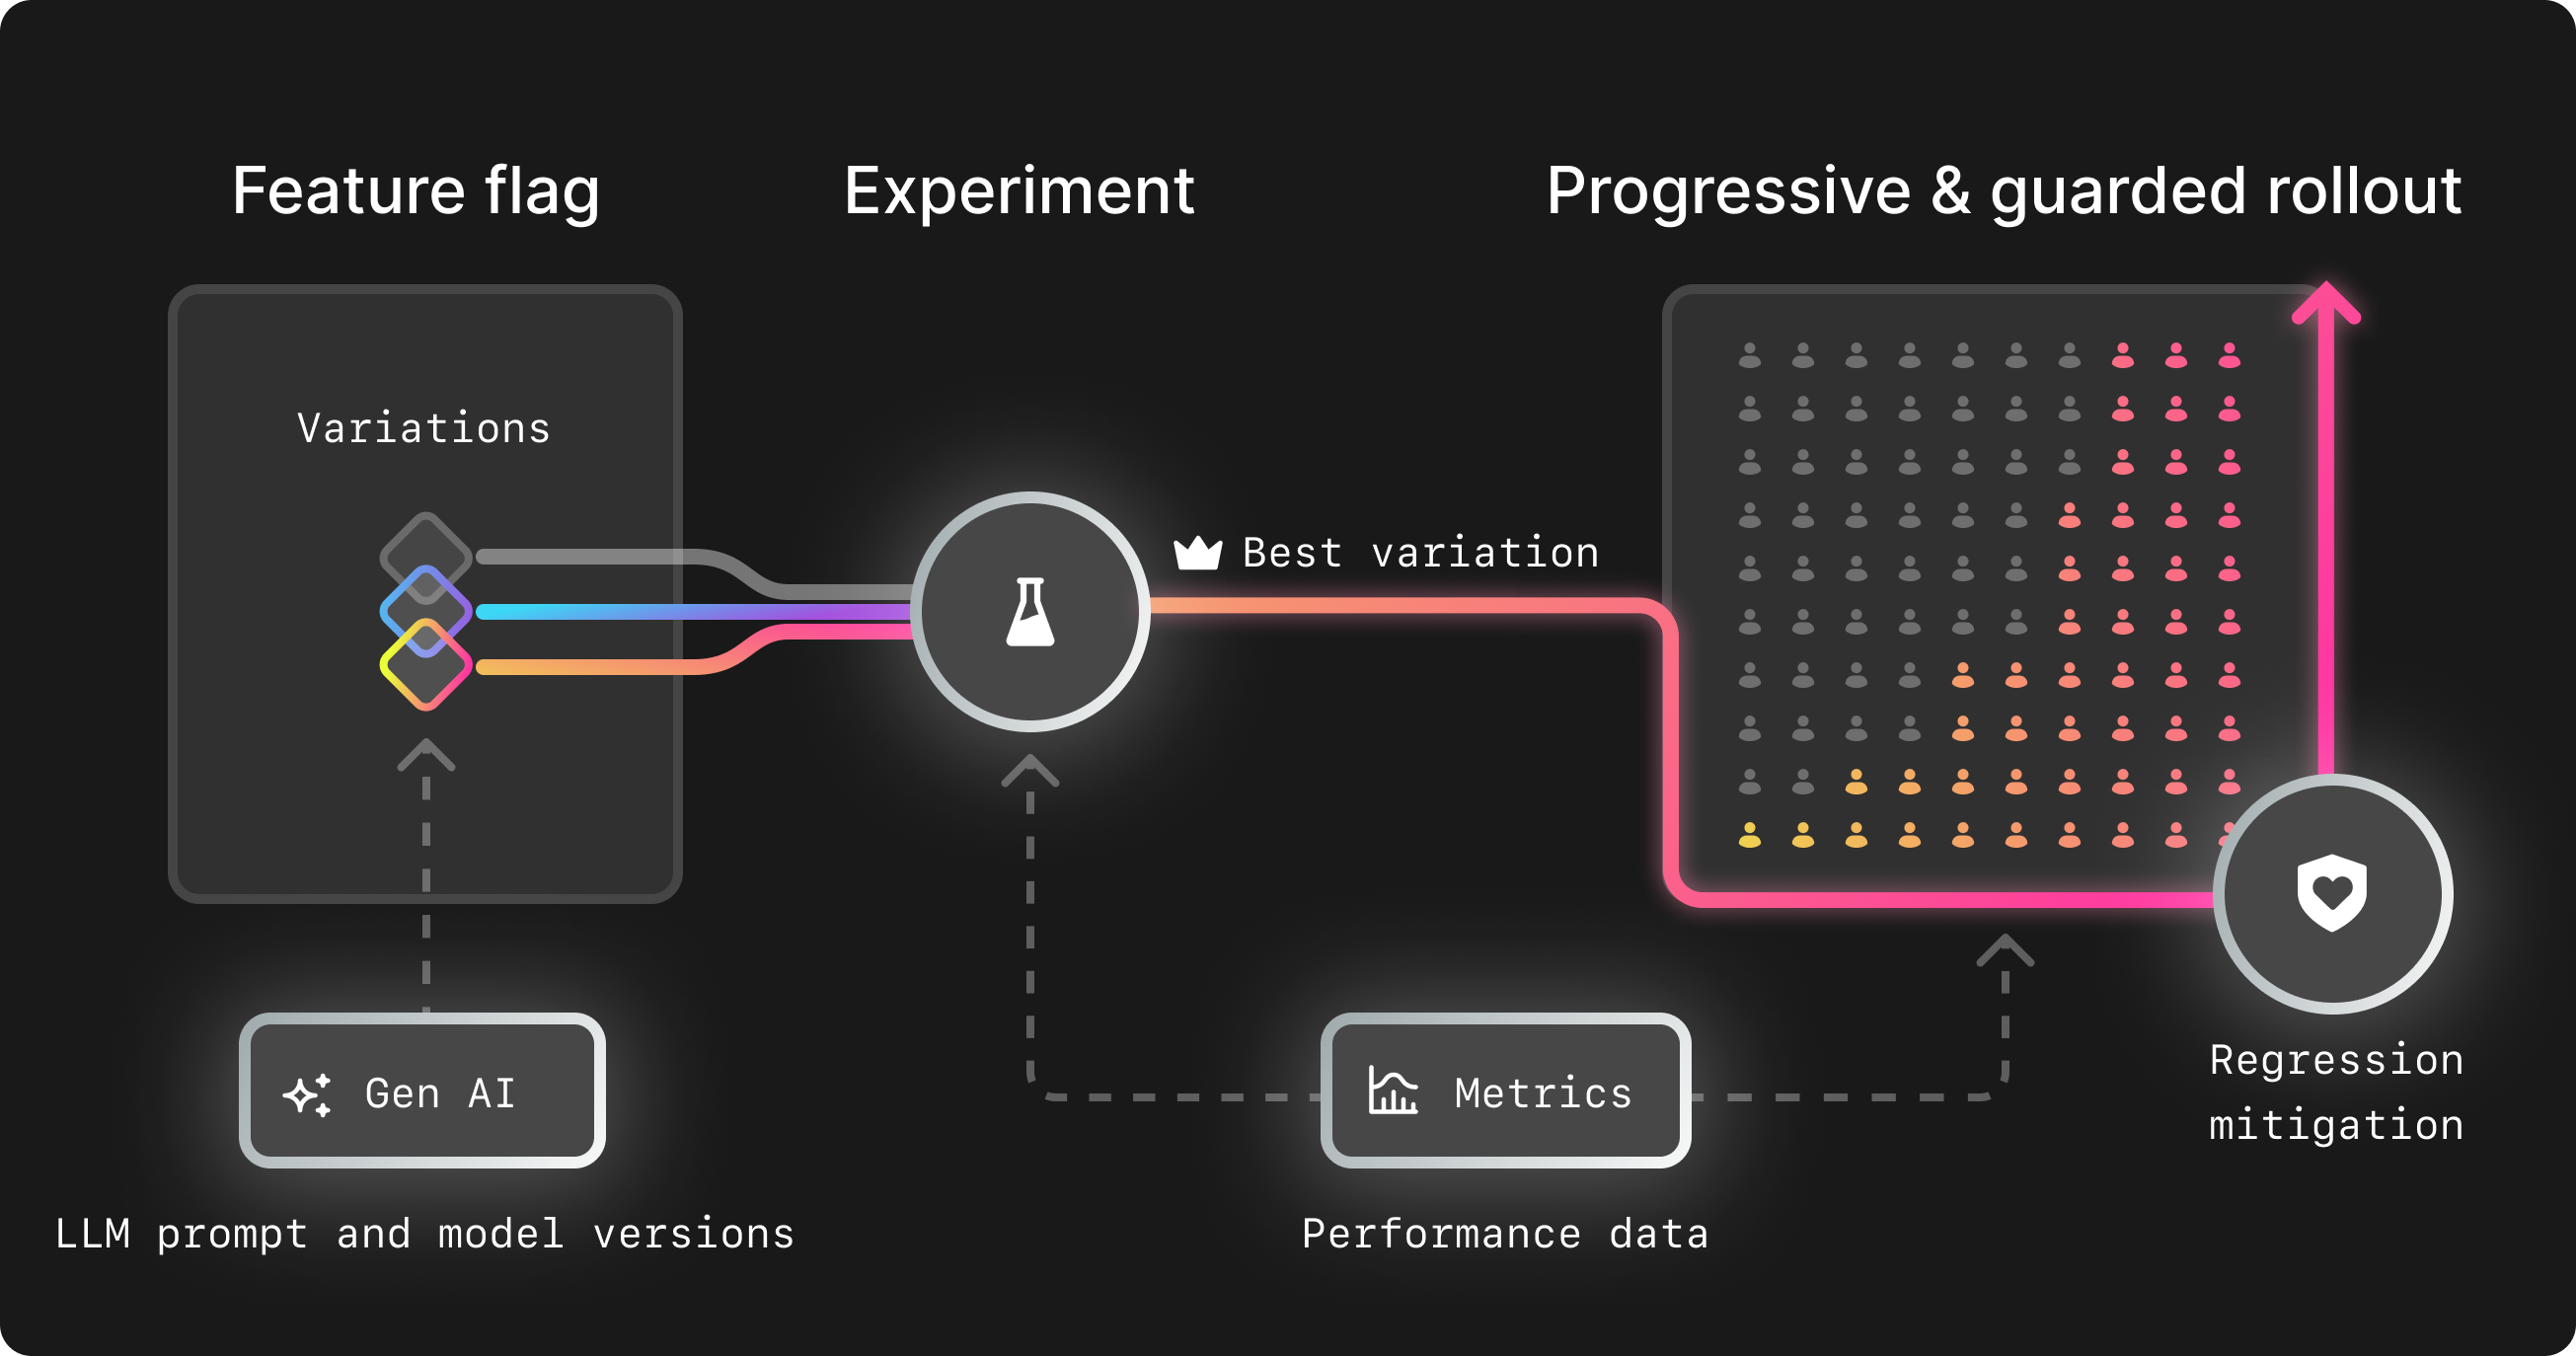
An illustration of feature flags, experiments, and progressive and guarded rollouts.
- Learn more about contexts to describe your users and target them with rules
- Learn to create your first experiment to A/B test new features
- Manage your deployment with a release
- Create your first custom metric to measure the effectiveness of your new features
- Debug your integration with your SDK’s API reference
- Take a course in LaunchDarkly Academy