> ## Documentation Index
> Fetch the complete documentation index at: https://launchdarkly-preview.mintlify.site/llms.txt
> Use this file to discover all available pages before exploring further.
# Application metadata configuration
> This topic explains how to configure LaunchDarkly SDKs to send application metadata to LaunchDarkly.
> For the complete documentation index, see [llms.txt](/llms.txt). For the full documentation snapshot, see [llms-full.txt](/llms-full.txt).
## Overview
This topic explains how to configure LaunchDarkly SDKs to send application metadata to LaunchDarkly. This feature is available for client-side and server-side SDKs.
## Customize application information
Some LaunchDarkly SDKs support configuration options for specifying application information, including application identifier and version. When you configure these options, the SDK automatically sends this application information to LaunchDarkly.
In the LaunchDarkly user interface (UI), the application information appears in the following places:
* Application information appears in the "From source" field on Context details pages. To learn more, read [The context details page](/home/flags/context-details).
* Application information appears in the **Applications** page. From this page, you can also set additional properties, such as whether an application version is supported or unsupported. To learn more, read [Applications and application versions](/home/releases/apps-and-app-versions).
* Application metadata also appears on the **Usage** pages. This information can help you identify which applications are consuming Service Connections.
Additionally, some LaunchDarkly mobile SDKs support the automatic collection of data about the mobile environment where the application is running. When you enable this collection of environment variables, the application information that you configure here is automatically added to an `ld_application` context that the SDK then includes in each evaluation context. To learn more, read [Automatic environment attributes](/sdk/features/environment-attributes).
After the SDK has evaluated at least one feature flag using an `ld_application` context, you can create mobile targeting rules based on application and application version information. To learn more, read [Applications and application versions](/home/releases/apps-and-app-versions) and [Mobile targeting](/home/flags/mobile-targeting).
For the SDKs that support this feature, you can send some or all of the following metadata:
* Application identifier (string): A unique identifier representing the application where the LaunchDarkly SDK is running. For example, `authentication-service`.
* Application name (string): A human-friendly name for the application where the LaunchDarkly SDK is running. For example, `Authentication-Service`.
* Application version (string): A unique identifier representing the version of the application where the LaunchDarkly SDK is running. For example, you could set this to the semantic version of your application, such as `1.0.0`. If you are using engineering insights, you must set the application version either to the full secure hash algorithm (SHA) of the GitHub commit for this deployment, such as `a12bcde3f45ab6c789123456d78efabcde91234f`, or to the tag associated with the GitHub commit for this deployment. Learn more about [sending deployment information to engineering insights](/home/releases/config-deployment#set-the-application-version).
* Application version name (string): A human-friendly name for the version of the application in which the LaunchDarkly SDK is running. For example, `v1`.
For all fields, the value can use only alphanumeric characters and hyphens `-`, periods `.`, and underscores `_`. Spaces are converted to hyphens.
You can set these values when you configure the SDK. All connections to LaunchDarkly from a client will send the same value to LaunchDarkly, whether the connection is through streaming, polling, or events. You cannot change the value after you configure the client.
We recommend that you set the application identifier to a different value for each separately distributed software binary.
For example, suppose you have two mobile apps, one for iOS and one for Android. If you set the application identifier to "example-app" and the version to "1.0" in both SDKs, then when you create a flag targeting rule based only on application information, the flag will target both the iOS and Android application. This may not be what you intend. We recommend using different application identifiers in this situation, for instance, "example-app-ios" and "example-app-android."
You can also enable automatic environment attributes, and then create flag targeting rules based on both the application information and the device information. To learn more, read [Automatic environment attributes](/sdk/features/environment-attributes).
## Configure application metadata for engineering insights
Engineering insights is only available to customers on select plans. To learn more, [read about our pricing](https://launchdarkly.com/pricing/). To upgrade your plan, [contact Sales](https://launchdarkly.com/contact-sales/).
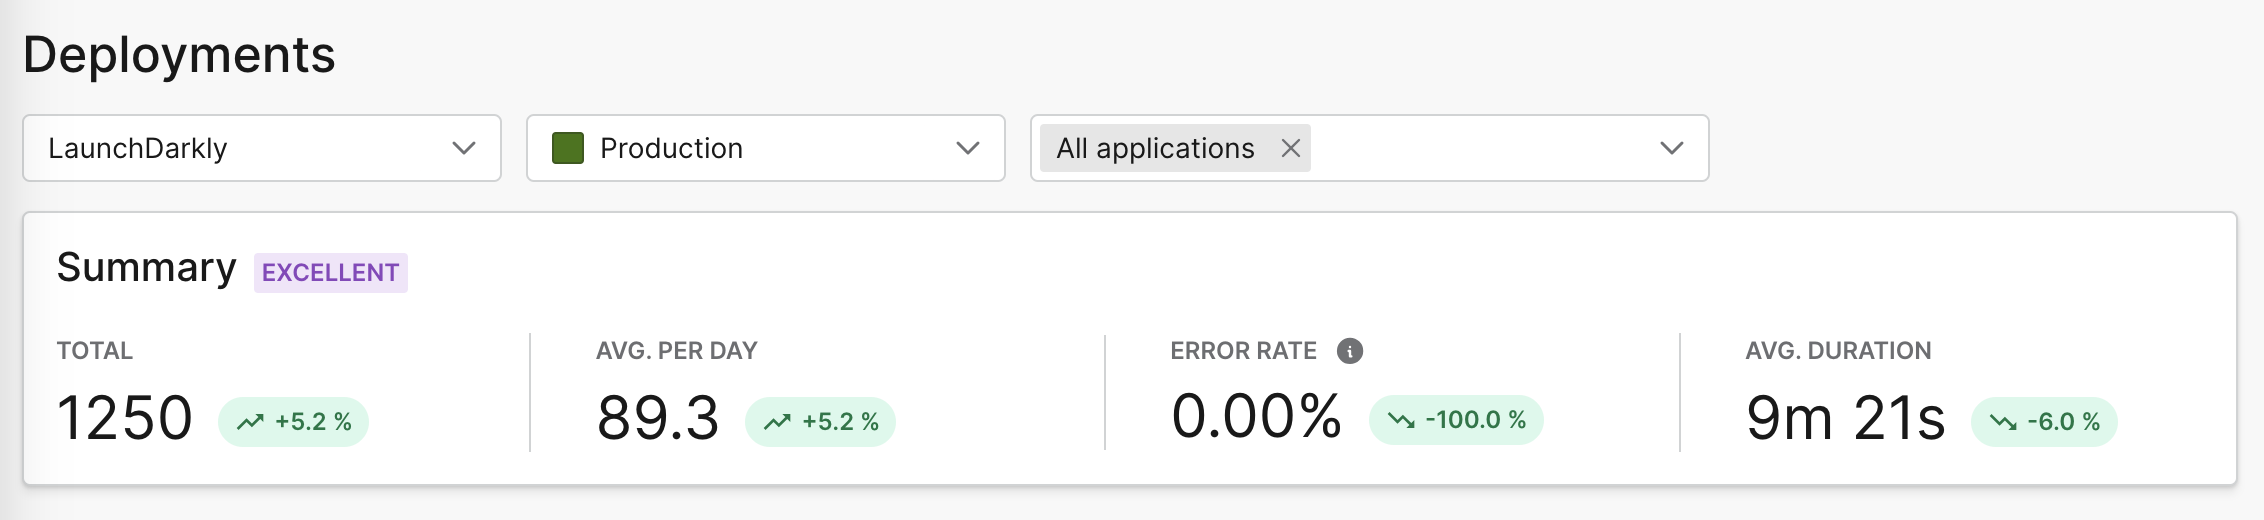
Configuring your application metadata to send deployment information lets engineering insights track the frequency and timing of your deployments. If you set the application version to a deployment SHA or tag from GitHub, engineering insights will also track which commits and pull requests are in your deployment.
To learn how to retrieve the SHA for your deployment, read [Set up automated deployment detection](/home/releases/config-deployment#option-1-set-up-automated-deployment-detection).
Details about each SDK's configuration are available in the SDK-specific sections below:
* [Client-side SDKs](#client-side-sdks)
* [Server-side SDKs](#server-side-sdks)
## Client-side SDKs
This feature is available in the following client-side SDKs:
* [.NET (client-side)](#net-client-side)
* [Android](#android)
* [C++ (client-side)](#c-client-side)
* [Flutter](#flutter)
* [iOS](#ios)
* [JavaScript](#javascript)
* [Node.js (client-side)](#nodejs-client-side)
* [React Native](#react-native)
* [React Web](#javascript): The React Web SDK relies on the JavaScript SDK for this functionality.
* [Roku](#roku)
### .NET (client-side)
This code sample shows you how to configure the application information:
```csharp title="C#" theme={null}
var config = Configuration
.Builder("example-mobile-key", ConfigurationBuilder.AutoEnvAttributes.Enabled)
.ApplicationInfo(Components.ApplicationInfo()
.ApplicationId("authentication-service")
.ApplicationName("Authentication-Service")
.ApplicationVersion("1.0.0")
.ApplicationVersionName("v1")
)
.Build();
```
The application information is supported in .NET SDK v3.1.0 and later.
If you configure the application information and have enabled automatic environment attribute collection, the values you set will override any values collected automatically. The application identifier, name, version, and version name you set explicitly will be included in the `ld_application` context. To learn more, read [Automatic environment attributes and application metadata configuration](/sdk/features/environment-attributes#automatic-environment-attributes-and-application-metadata-configuration).
To learn more about the configuration option, read [`ApplicationInfoBuilder`](https://launchdarkly.github.io/dotnet-core/pkgs/sdk/client/api/LaunchDarkly.Sdk.ApplicationInfoBuilder.html).
### Android
This code sample shows you how to configure the application information:
```java title="Java" theme={null}
LDConfig config = new LDConfig.Builder(AutoEnvAttributes.Enabled)
.applicationInfo(
Components.applicationInfo()
.applicationId("authentication-service")
.applicationName("Authentication-Service")
.applicationVersion("1.0.0")
.applicationVersionName("v1")
)
.build();
```
```kotlin title="Kotlin" theme={null}
val ldConfig: LDConfig = LDConfig.Builder(AutoEnvAttributes.Enabled)
.applicationInfo(
Components.applicationInfo()
.applicationId("authentication-service")
.applicationName("Authentication-Service")
.applicationVersion("1.0.0")
.applicationVersionName("v1")
)
.build()
```
The application identifier and version are supported in Android SDK v4 and later. The application name and version name are supported in Android SDK v5 and later.
If you configure the application information and have enabled automatic environment attribute collection, the values you set will override any values collected automatically. The application identifier, name, version, and version name you set explicitly will be included in the `ld_application` context. To learn more, read [Automatic environment attributes and application metadata configuration](/sdk/features/environment-attributes#automatic-environment-attributes-and-application-metadata-configuration).
To learn more about the configuration option, read [`ApplicationInfoBuilder`](https://launchdarkly.github.io/android-client-sdk/com/launchdarkly/sdk/android/integrations/ApplicationInfoBuilder.html).
### C++ (client-side)
This code sample shows you how to configure the application identifier and application version:
```cpp title="C++ SDK v3.0 (native)" theme={null}
auto config_builder = client_side::ConfigBuilder("example-mobile-key");
config_builder.AppInfo().Identifier("authentication-service").Version("1.0.0")
auto config = config_builder.Build();
```
```c title="C++ SDK v3.0 (C binding)" theme={null}
LDClientConfigBuilder builder = LDClientConfigBuilder_New("example-mobile-key");
LDClientConfigBuilder_AppInfo_Identifier(builder, "authentication-service");
LDClientConfigBuilder_AppInfo_Version(builder, "1.0.0");
LDClientConfig config;
LDStatus status = LDClientConfigBuilder_Build(builder, &config);
if (!LDStatus_Ok(status)) {
/* an error occurred, config is not valid */
}
```
To learn more, read [`AppInfoBuilder`](https://launchdarkly.github.io/cpp-sdks/libs/client-sdk/docs/html/classlaunchdarkly_1_1config_1_1shared_1_1builders_1_1AppInfoBuilder.html).
### Flutter
This code sample shows you how to configure the application information:
```dart title="Flutter SDK v4" theme={null}
final config = LDConfig(
CredentialSource.fromEnvironment(),
AutoEnvAttributes.enabled,
applicationInfo: ApplicationInfo(
applicationId: 'authentication-service',
applicationName: 'Authentication-Service',
applicationVersion: '1.0.0',
applicationVersionName: 'v1',
),
)
```
```dart title="Flutter SDK v3.x" theme={null}
LDConfig config = LDConfigBuilder('example-mobile-key', AutoEnvAttributes.Enabled)
.applicationId('authentication-service')
.applicationName('Authentication-Service')
.applicationVersion('1.0.0')
.applicationVersionName('v1')
.build();
```
```dart title="Flutter SDK v2.x" theme={null}
LDConfig config = LDConfigBuilder('example-mobile-key')
.applicationId('authentication-service')
.applicationVersion('1.0.0')
.build();
```
The application identifier and version are supported in Flutter SDK v2 and later. The application name and version name are supported in Flutter SDK v3 and later.
If you configure the application information and have enabled automatic environment attribute collection, the values you set will override any values collected automatically. The application identifier, name, version, and version name you set explicitly will be included in the `ld_application` context. To learn more, read [Automatic environment attributes and application metadata configuration](/sdk/features/environment-attributes#automatic-environment-attributes-and-application-metadata-configuration).
To learn more, read [`LDConfig`](https://pub.dev/documentation/launchdarkly_flutter_client_sdk/latest/launchdarkly_flutter_client_sdk/LDConfig-class.html).
### iOS
This code sample shows you how to configure the application identifier and application version:
```swift title="Swift" theme={null}
var applicationInfo = ApplicationInfo()
applicationInfo.applicationIdentifier("authentication-service")
applicationInfo.applicationName("Authentication-Service")
applicationInfo.applicationVersion("1.0.0")
applicationInfo.applicationVersionName("v1")
var config = LDConfig(mobileKey: mobileKey, autoEnvAttributes: .enabled)
config.applicationInfo = applicationInfo
```
```objc title="Objective-C" theme={null}
LDApplicationInfo *applicationInfo = [[LDApplicationInfo alloc] init];
[applicationInfo applicationIdentifier:@"authentication-service"];
[applicationInfo applicationName:@"Authentication-Service"];
[applicationInfo applicationVersion:@"1.0.0"];
[applicationInfo applicationVersionName:@"v1"];
LDConfig *config = [[LDConfig alloc] initWithMobileKey:mobileKey autoEnvAttributes:true];
config.applicationInfo = applicationInfo;
```
The application identifier and version are supported in iOS SDK v8 and later. The application name and version name are supported in iOS SDK v9 and later.
If you configure the application information and have enabled automatic environment attribute collection, the values you set will override any values collected automatically. The application identifier, name, version, and version name you set explicitly will be included in the `ld_application` context. To learn more, read [Automatic environment attributes and application metadata configuration](/sdk/features/environment-attributes#automatic-environment-attributes-and-application-metadata-configuration).
To learn more about the specific configuration options available in this SDK, read the [SDK's API docs](https://launchdarkly.github.io/ios-client-sdk/Structs/LDConfig.html).
### Java
Script
This code sample shows you how to configure the application identifier and application version:
```js title="JavaScript SDK v4.x" theme={null}
const options = {
applicationInfo: {
id: 'authentication-service',
version: '1.0.0',
},
};
// Create client
const client = createClient('example-client-side-id', context, options);
// Then start the client
client.start();
```
```js title="JavaScript SDK v3.x" theme={null}
const options = {
application: {
id: 'authentication-service',
version: '1.0.0',
},
};
const client = LDClient.initialize('example-client-side-id', context, options);
```
```ts title="JavaScript SDK v3.x (TypeScript)" theme={null}
import * as LDClient from 'launchdarkly-js-client-sdk';
const options: LDClient.LDOptions = {
application: {
id: 'authentication-service',
version: '1.0.0',
},
};
const client = LDClient.initialize('example-client-side-id', context, options);
```
To learn more about the specific configuration options available in this SDK, read the [`LDOptions`](https://launchdarkly.github.io/js-core/packages/sdk/browser/docs/interfaces/LDOptions.html).
### Node.js (client-side)
This code sample shows you how to configure the application identifier and application version:
```js title="JavaScript" theme={null}
const options = {
application: {
id: "authentication-service",
version: "1.0.0"
}
};
const client = LDClient.initialize('example-client-side-id', context, options);
```
```ts title="TypeScript" theme={null}
import * as LDClient from 'launchdarkly-node-client-sdk';
const options: LDClient.LDOptions = {
application: {
id: "authentication-service",
version: "1.0.0"
}
};
const client = LDClient.initialize('example-client-side-id', context, options);
```
To learn more, read [`application`](https://launchdarkly.github.io/node-client-sdk/interfaces/LDOptions.html#application).
### React Native
This code sample shows you how to configure the application information:
```js title="React Native SDK v10" theme={null}
const options: LDOptions = {
applicationInfo: {
id: 'authentication-service',
name: 'Authentication-Service',
version: '1.0.0',
versionName: 'v1',
}
}
const client = new ReactNativeLDClient('example-mobile-key', AutoEnvAttributes.Enabled, options);
```
The application identifier and version are supported in React Native SDK v7 and later. The application name and version name are supported in React Native SDK v8 and later.
If you configure the application information and specify the application id, all application information will be added to the `ld_application` context. Otherwise, the `ld_application` context will not be included. To learn more, read [Automatic environment attributes and application metadata configuration](/sdk/features/environment-attributes#react-native).
To learn more about the specific configuration options available in this SDK, read [`LDOptions`](https://launchdarkly.github.io/js-core/packages/sdk/react-native/docs/interfaces/LDOptions.html).
### Roku
This code sample shows you how to configure the application identifier and application version:
```brightscript title="BrightScript" theme={null}
' for a legacy Roku application
config = LaunchDarklyConfig("example-mobile-key")
' for a SceneGraph Roku Application
config = LaunchDarklyConfig("example-mobile-key", CLIENT_SCENEGRAPH_NODE)
' configure the application identifier and application version
config.setApplicationInfoValue("id", "authentication-service")
config.setApplicationInfoValue("version", "1.0.0")
```
## Server-side SDKs
This feature is available for the following server-side SDKs:
* [.NET (server-side)](#net-server-side)
* [C++ (server-side)](#c-server-side)
* [Erlang](#erlang)
* [Go](#go)
* [Haskell](#haskell)
* [Java](#java)
* [Lua](#lua)
* [Node.js (server-side)](#nodejs-server-side)
* [PHP](#php)
* [Python](#python)
* [Ruby](#ruby)
* [Rust](#rust)
### .NET (server-side)
This code sample shows you how to configure the application identifier and application version:
```csharp title=".NET SDK v8 (C#)" theme={null}
var config = Configuration.Builder("YOUR_SDK_KEY")
.ApplicationInfo(Components.ApplicationInfo()
.ApplicationId("authentication-service")
.ApplicationName("Authentication-Service")
.ApplicationVersion("1.0.0")
.ApplicationVersionName("v1")
)
.Build();
var client = new LdClient(config);
```
For a complete list of configuration options, read the documentation for [`ConfigurationBuilder`](https://launchdarkly.github.io/dotnet-core/pkgs/sdk/server/api/LaunchDarkly.Sdk.Server.ConfigurationBuilder.html).
### C++ (server-side)
This code sample shows you how to configure the application identifier and application version:
```cpp title="C++ SDK v3.0 (native)" theme={null}
auto config_builder = server_side::ConfigBuilder("YOUR_SDK_KEY");
config_builder.AppInfo().Identifier("authentication-service").Version("1.0.0")
auto config = config_builder.Build();
if (!config) {
/* an error occurred, config is not valid */
}
```
```c title="C++ SDK v3.0 (C binding)" theme={null}
LDServerConfigBuilder builder = LDServerConfigBuilder_New("YOUR_SDK_KEY");
LDServerConfigBuilder_AppInfo_Identifier(builder, "authentication-service");
LDServerConfigBuilder_AppInfo_Version(builder, "1.0.0");
LDServerConfig config;
LDStatus status = LDServerConfigBuilder_Build(builder, &config);
if (!LDStatus_Ok(status)) {
/* an error occurred, config is not valid */
}
```
To learn more, read [`AppInfoBuilder`](https://launchdarkly.github.io/cpp-sdks/libs/server-sdk/docs/html/classlaunchdarkly_1_1config_1_1shared_1_1builders_1_1AppInfoBuilder.html).
### Erlang
This code sample shows you how to configure the application identifier and application version:
```erlang title="Erlang" theme={null}
ldclient:start_instance("YOUR_SDK_KEY", #{
application => #{
id => <<"authentication-service">>,
version => <<"1.0.0">>
}
})
```
For a complete list of configuration options, read the documentation for the [`ldclient_config` module](https://hexdocs.pm/launchdarkly_server_sdk/ldclient_config.html).
### Go
The code in this sample configures the application identifier and application version:
```go title="Go" theme={null}
var config ld.Config
config.ApplicationInfo.ApplicationID = "authentication-service"
config.ApplicationInfo.ApplicationVersion = "1.0.0"
```
To learn more about the configuration options, read [`Config`](https://pkg.go.dev/gopkg.in/launchdarkly/go-server-sdk.v5#Config).
### Haskell
This code sample shows you how to pass custom parameters to the client by creating a custom configuration object.
The code in this sample configures the application identifier and application version:
```haskell title="Haskell" theme={null}
{-# LANGUAGE OverloadedStrings #-}
import LaunchDarkly.Server.Config
import Data.Function ((&))
config :: Config
config = makeConfig "YOUR_SDK_KEY" & configSetApplicationInfo appInfo
where appInfo = makeApplicationInfo
& withApplicationValue "id" "authentication-service"
& withApplicationValue "version" "1.0.0"
```
### Java
This code sample shows you how to configure the application identifier and application version:
```java title="Java" theme={null}
LDConfig config = new LDConfig.Builder()
.applicationInfo(
Components.applicationInfo()
.applicationId("authentication-service")
.applicationVersion("1.0.0")
).build();
```
For a complete list of configuration options for the client, including proxy settings, timeouts, and streaming/polling options, read the Javadoc for [`LDConfig.Builder`](https://launchdarkly.github.io/java-core/lib/sdk/server/com/launchdarkly/sdk/server/LDConfig.Builder.html).
### Lua
This code sample shows you how to configure the application identifier and application version:
```lua title="Lua SDK v2" theme={null}
local config = {
appInfo = {
identifier = "authentication-server",
version = "1.0.0"
}
}
```
To learn more about the configuration options, read [`clientInit`](https://launchdarkly.github.io/lua-server-sdk/modules/launchdarkly-server-sdk.html#clientInit).
### Node.js (server-side)
This code sample shows you how to configure the application identifier and application version:
```ts title="Node.js SDK v8.x (TypeScript)" theme={null}
import * as ld from '@launchdarkly/node-server-sdk';
const options: ld.LDOptions = {
application: {
id: 'authentication-service',
version: '1.0.0'
}
};
const client = ld.init('YOUR_SDK_KEY', options);
```
```js title="Node.js SDK v7.x (JavaScript)" theme={null}
var options = {
application: {
id: 'authentication-service',
version: '1.0.0'
}
};
client = ld.init('YOUR_SDK_KEY', options);
```
```ts title="Node.js SDK v7.x (TypeScript)" theme={null}
import * as ld from 'launchdarkly-node-server-sdk';
const options: ld.LDOptions = {
application: {
id: 'authentication-service',
version: '1.0.0'
}
};
const client = ld.init('YOUR_SDK_KEY', options);
```
To learn more about the specific configuration options available in this SDK, read the [SDK's API docs](https://launchdarkly.github.io/js-core/packages/sdk/server-node/docs/interfaces/LDOptions.html).
### PHP
This code sample shows you how to configure the application identifier and application version:
```php title="PHP" theme={null}
$appInfo = (new ApplicationInfo())->withId('authentication-service')->withVersion('1.0.0');
$config = [
"application_info" => $appInfo
];
$client = new LaunchDarkly\LDClient("YOUR_SDK_KEY", $config);
```
To learn more, read [`ApplicationInfo`](https://launchdarkly.github.io/php-server-sdk/classes/LaunchDarkly-Types-ApplicationInfo.html). For a complete list of configuration options, read the documentation for the [LDClient constructor](http://launchdarkly.github.io/php-server-sdk/classes/LaunchDarkly-LDClient.html#method___construct).
### Python
This code sample shows you how to configure the application identifier and application version:
```python title="Python" theme={null}
config = Config(sdk_key='YOUR_SDK_KEY',
application = {"id": "authentication-service", "version": "1.0.0"})
ldclient.set_config(config)
```
To learn more, read [`application`](https://launchdarkly-python-sdk.readthedocs.io/en/latest/api-main.html#ldclient.config.Config.application). For a complete list of configuration options, read the documentation for the [`ldclient.config` module](https://launchdarkly-python-sdk.readthedocs.io/en/latest/api-main.html#module-ldclient.config).
### Ruby
This code sample shows you how to configure the application identifier and application version:
```ruby title="Ruby" theme={null}
LaunchDarkly::Config.new({
application: {
id: "authentication-service",
version: "abc123def456"
}
})
```
To learn more about the specific configuration options available in this SDK, read the [SDK's API docs](https://launchdarkly.github.io/ruby-server-sdk).
### Rust
This code sample shows you how to configure the application identifier and application version:
```rust title="Rust" theme={null}
let mut application_info = ApplicationInfo::new();
application_info
.application_identifier("authentication-service")
.application_version("1.0.0");
let config = ConfigBuilder::new(&sdk_key)
.application_info(application_info)
.build();
```
The `Config` type lets you specify a variety of options. To learn more about the specific configuration options available in this SDK, read the [SDK's API docs](https://docs.rs/launchdarkly-server-sdk/latest/launchdarkly_server_sdk/struct.Config.html).