> ## Documentation Index
> Fetch the complete documentation index at: https://launchdarkly-preview.mintlify.site/llms.txt
> Use this file to discover all available pages before exploring further.
# BigQuery Data Export
> This topic explains how to create and test a BigQuery destination for Data Export.
> For the complete documentation index, see [llms.txt](/llms.txt). For the full documentation snapshot, see [llms-full.txt](/llms-full.txt).
Data Export is available as an add-on to select plans. To learn more, [read about our pricing](https://launchdarkly.com/pricing/). To add Data Export to your plan, [contact Sales](https://launchdarkly.com/contact-sales/).
## Overview
This topic explains how to create and test a BigQuery destination for Data Export. BigQuery is a cloud-based data processing and analysis platform that lets you work with large sets of data. By exporting your LaunchDarkly flag evaluation and experiment data to the same BigQuery warehouse as your other data, you can build custom reports in BigQuery to answer product behavior questions.
## Prerequisites
To configure the BigQuery Data Export integration, you must have the following prerequisites:
* You must have a [LaunchDarkly base role](/home/account/roles/role-concepts#base-roles) of Admin, Owner, or Writer, or a custom role with the following permissions:
* [integrations actions](/home/account/roles/role-actions#integration-actions): `createIntegration`, `updateConfiguration`, and `validateConnection`
* [destinations actions](/home/account/roles/role-actions#destination-actions): `createDestination`, `updateConfiguration`, and `updateOn`
\* You must [create a VPC firewall rule](https://docs.cloud.google.com/firewall/docs/using-firewalls#creating_firewall_rules) that allows LaunchDarkly's data transfer service’s static IP address: `35.192.85.117`
- You must [create a VPC firewall rule](https://docs.cloud.google.com/firewall/docs/using-firewalls#creating_firewall_rules) that allows LaunchDarkly's data transfer service’s static IP address: `35.241.154.37`
## Create a Google Cloud service account
To begin, we recommend that you use a Google Cloud service account to provide LaunchDarkly's export service account access to your BigQuery warehouse.
To do this, follow the Google Cloud instructions to [create a service account](https://docs.cloud.google.com/iam/docs/service-accounts-create#creating). In the "Permissions" step, grant the account the [**BigQuery User** role](https://cloud.google.com/iam/docs/roles-permissions/bigquery#bigquery.user).
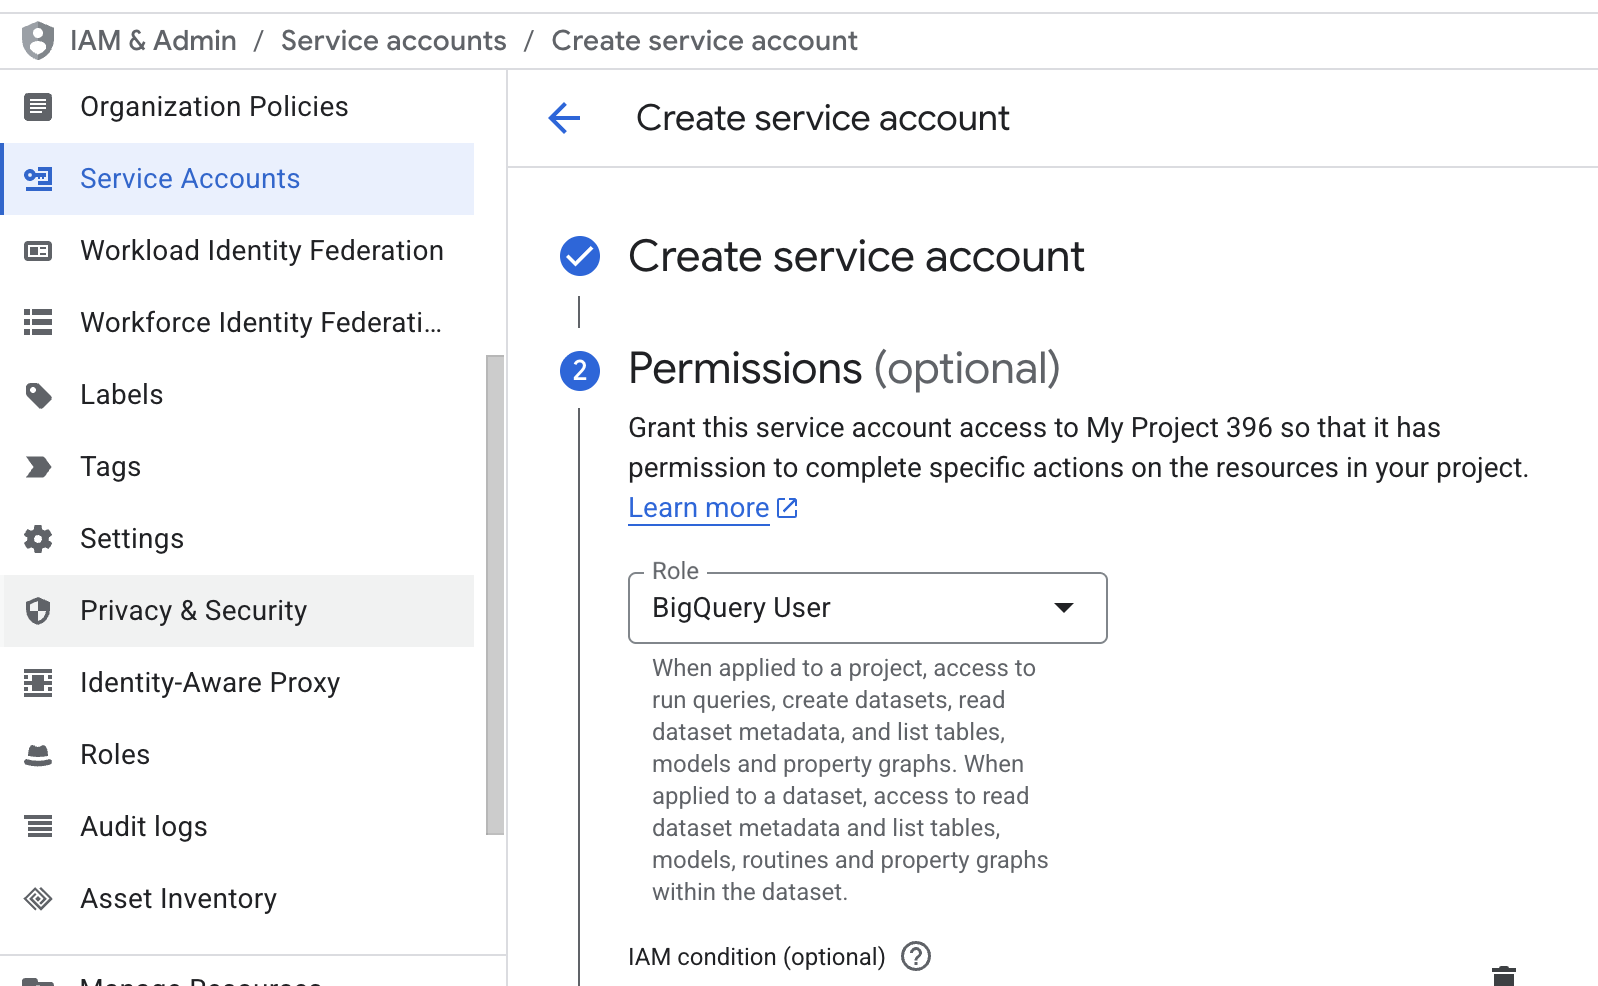
Save the service account email for use later when you [set up the integration in LaunchDarkly](#configure-the-bigquery-data-export-integration).
If you already have a Google Cloud service account, here's how to add the role:
1. In Google Cloud, navigate to **Service Accounts** under "IAM & Admin" and open your service account for the LaunchDarkly export service.
2. Click on the **Permissions** tab.
3. Click **Manage access**.
4. In the **Role** field, select "BigQuery User."
5. Click **Save**.Your service account now has permission to act as a BigQuery user.
### Grant Launch
Darkly access to your Google Cloud service accountThen, grant your LaunchDarkly export service account access to your Google Cloud service account.
To find your LaunchDarkly export service account email address:
1. In LaunchDarkly, navigate to the [**Integrations**](https://app.launchdarkly.com/settings/integrations) page and find "BigQuery Data Export."
2. Click **Add integration**. The "Create a destination" panel appears.
3. Copy the **Export service account email** address and save it for use in the next step.
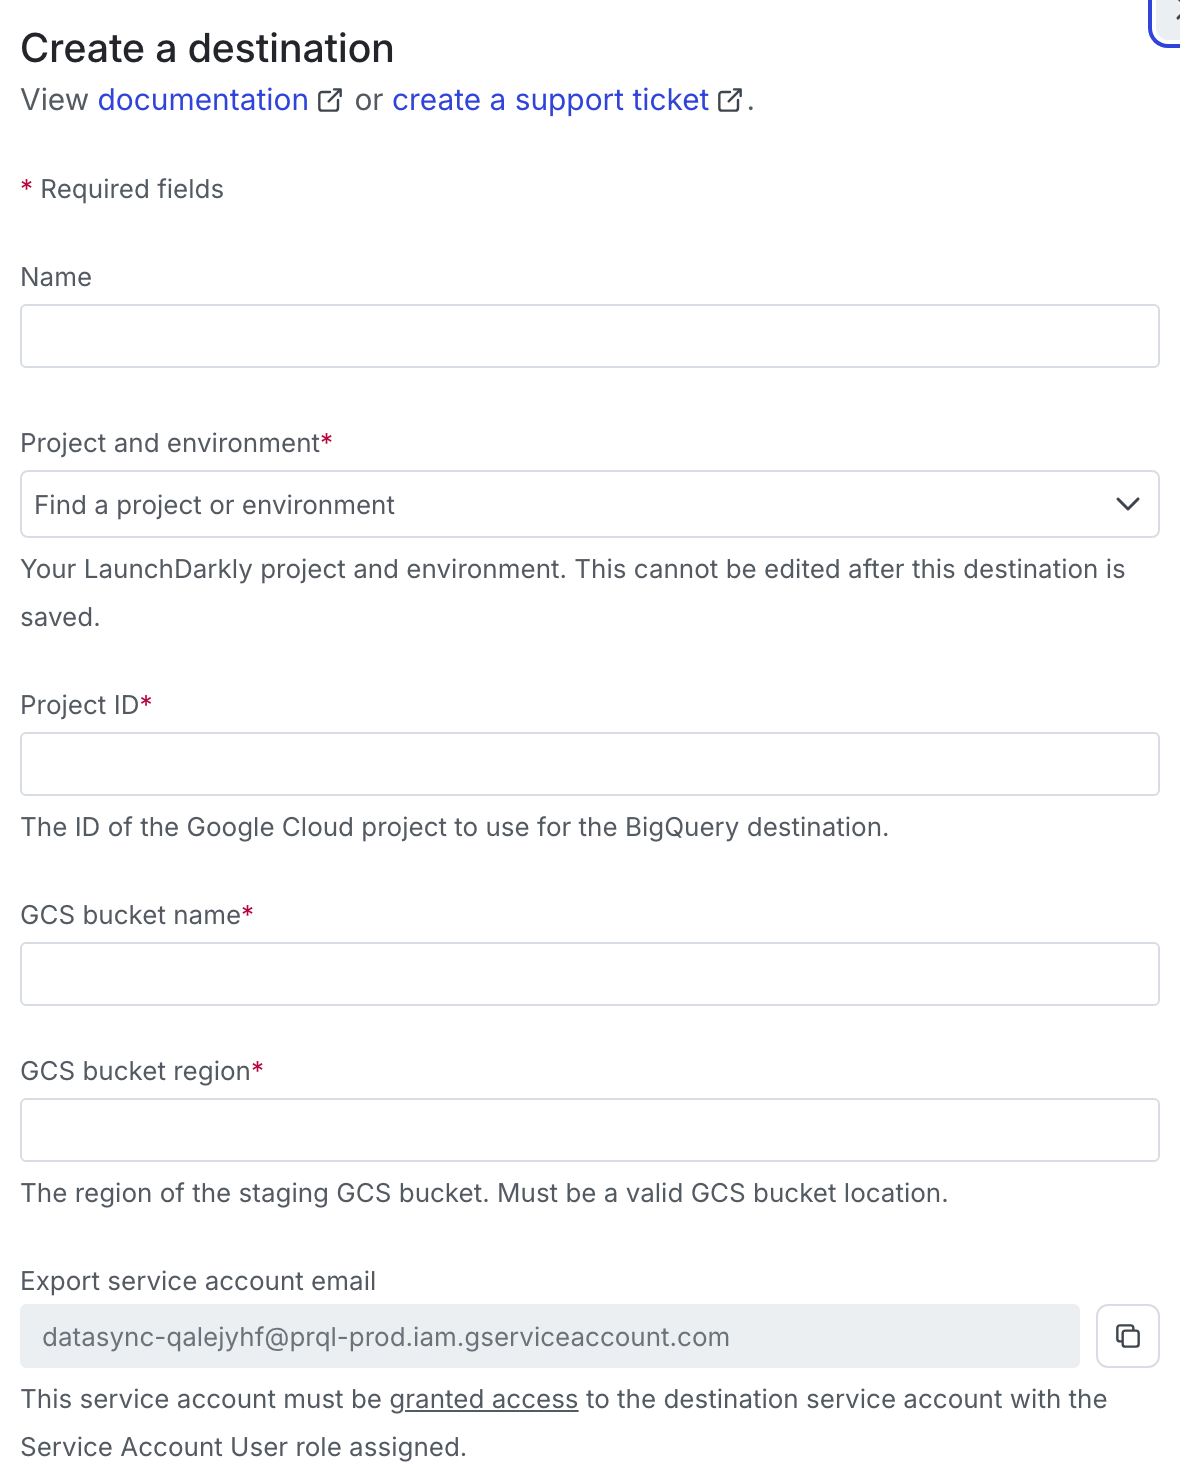
Then, in Google Cloud, [grant LaunchDarkly’s export service account access](https://cloud.google.com/iam/docs/granting-changing-revoking-access#grant-single-role) to your Google Cloud service account:
1. In Google Cloud, navigate to **Service Accounts** and select the service account you created or configured in the previous section.
2. Click the **Principals with access** tab.
3. Click **Grant access**.
4. In the "Add principals" section, paste your LaunchDarkly export service account email address into the **New principals** field.
5. In the "Assign roles" section, assign the "Service Account User" role in the **role** field.
6. Click **Add another role**.
7. Assign the **Service account token creator** role in the second **Role** field.
8. Click **Save**.
## Create staging bucket
Next, create a Google Cloud storage bucket for staging data, and grant your service account access to it.
To do this:
1. [Create a Google Cloud storage bucket](https://cloud.google.com/storage/docs/creating-buckets). Save the bucket name for use later when you [set up the integration in LaunchDarkly](#configure-the-bigquery-data-export-integration).
2. In the "Choose where to store your data" section, choose a **Region** that matches the location of your destination dataset in BigQuery. Save this region for use later when you [set up the integration in LaunchDarkly](#configure-the-bigquery-data-export-integration).
3. From the bucket's **Permissions** tab, grant your service account [access to the bucket](https://cloud.google.com/storage/docs/access-control/using-iam-permissions#bucket-add)
* In the **Select a role** field, assign the ["Storage Admin" role](https://cloud.google.com/storage/docs/access-control/iam-roles#storage.admin).
## Configure the Big
Query Data Export integrationFinally, in LaunchDarkly, configure the BigQuery Data Export integration.
To do this, you first need to retrieve the following information from your Google Cloud account:
* Your [BigQuery project ID](https://docs.cloud.google.com/resource-manager/docs/creating-managing-projects#identifying_projects).
* The [GCS bucket name and region](https://docs.cloud.google.com/storage/docs/locations) from the bucket you created in the [previous step](#create-staging-bucket).
* Your [Destination service account email](https://docs.cloud.google.com/iam/docs/service-accounts-list-edit#listing) from the service account you created in a [previous step](#create-a-google-cloud-service-account). It will be formatted like `accountname@abc123.gserviceaccount.com`.Then configure the integration:
1. In LaunchDarkly, return to the [**Integrations**](https://app.launchdarkly.com/settings/integrations) page and find "BigQuery Data Export."
2. Click **Add integration**. The "Create a destination" panel appears.
3. Give the integration a human-readable **Name**.
4. Select a LaunchDarkly **Project and environment** to export data from.
5. Enter the BigQuery **Project ID**.
6. Enter your **GCS bucket name**.
7. Enter your **GCS bucket region**.
8. Enter your **Destination service account email**.
9. Enter a **Schema** name for your dataset. If your dataset does not already exist, it will be created automatically.
10. Click **Test connection** to ensure your configuration is correct.
11. After reading the Integration Terms and Conditions, check the **I have read and agree to the Integration Terms and Conditions** checkbox.
12. Click **Save destination**. The new destination appears in the list of destinations.
Your BigQuery Data Export integration is now complete.
To view the different event kinds for BigQuery Data Export destinations, read [Warehouse Data Export schema reference](/integrations/data-export/warehouse-schema-reference).