> ## Documentation Index
> Fetch the complete documentation index at: https://launchdarkly-preview.mintlify.site/llms.txt
> Use this file to discover all available pages before exploring further.
# Creating workflows
> This topic explains how to create and view workflows in LaunchDarkly.
> For the complete documentation index, see [llms.txt](/llms.txt). For the full documentation snapshot, see [llms-full.txt](/llms-full.txt).
The Workflows feature is in maintenance mode, and is planned for future deprecation at a date not yet specified. We will work with existing customers using workflows to migrate to a replacement solution when deprecation occurs.
## Overview
This topic explains how to create and view workflows in LaunchDarkly.
You can create three kinds of workflows:
* [Progressive rollout workflows](#create-progressive-rollout-workflows) gradually increase the percentage of contexts targeted by a flag.
* [Maintenance windows](#create-maintenance-window-workflows) let you temporarily toggle targeting on or off.
* [Custom workflows](#create-custom-workflows) manage a specific rollout process that you define.
You can also save a workflow as a template to reuse later. To learn how, read [Workflow templates](/home/releases/workflow-templates).
You can also use the REST API: [Workflows](/api-reference/workflows/get-workflows)
## Create progressive rollout workflows
If you are interested in gradually rolling out a particular flag variation to more contexts over a defined period of time, we recommend that you use the separate progressive rollout feature instead of setting up a progressive rollout workflow.
Progressive rollouts are an option on a flag's targeting rule to serve a given flag variation to a specified percentage of contexts, and gradually increase that percentage over a specified time. They are a built-in feature that supports the most common use case for workflows. We recommend using progressive rollouts instead of workflows if they meet your needs, because progressive rollouts are easier to set up, and because the flag variation that any particular customer encounters changes only once over the course of the rollout. To learn more, read [Progressive rollouts](/home/releases/progressive-rollouts).
To create a progressive rollout workflow:
1. Navigate to a feature flag.
2. Click **Manage workflows** in the right sidebar.
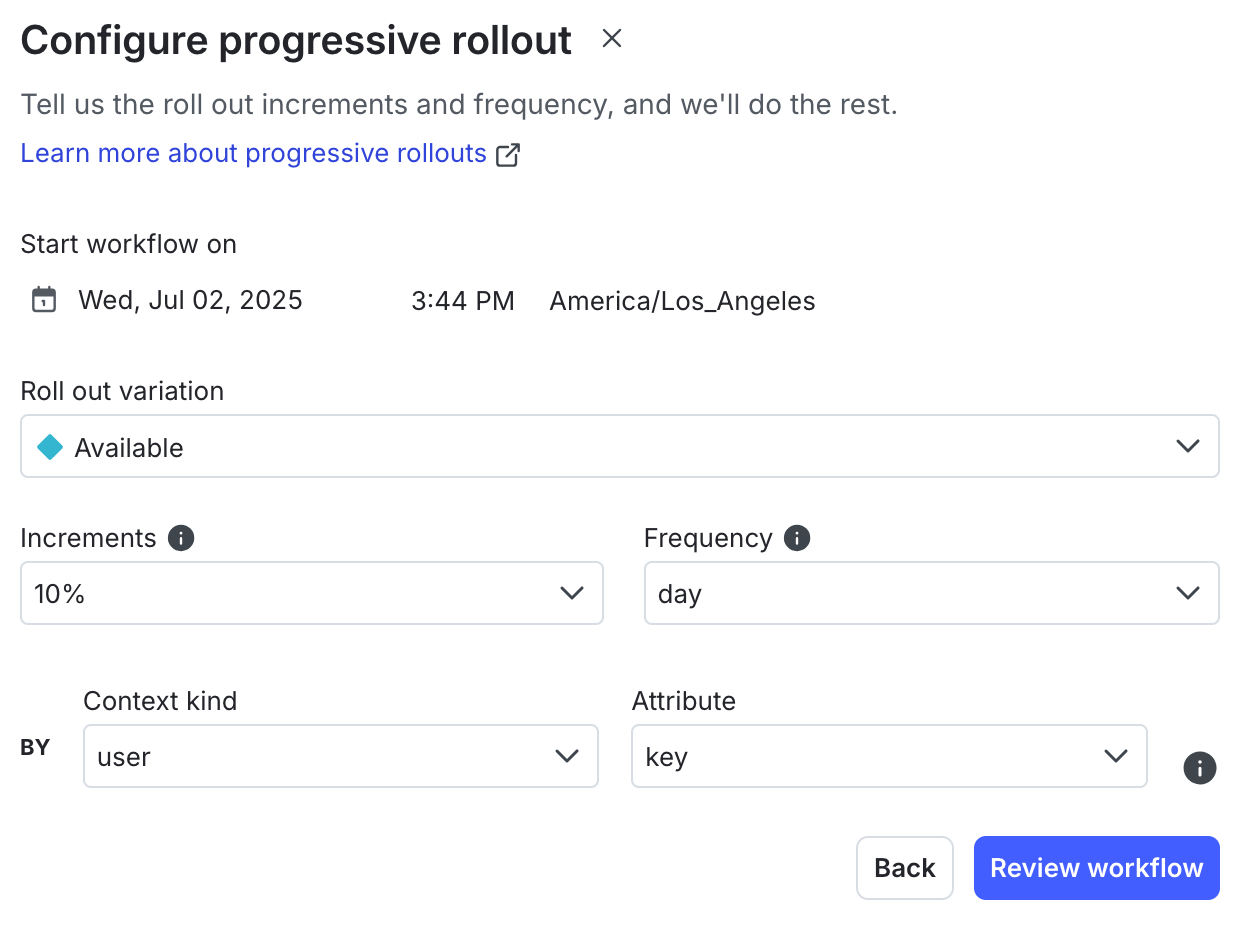
3. Click **Progressive rollout**. A "Configure progressive rollout" dialog appears.
4. Configure your progressive rollout:
* Choose when to start the workflow.
* Choose the default variation to roll out to contexts.
* Choose how much to increase the percentage of the rollout, starting at 0%. This setting overwrites any previously-defined rollouts for the default variation, so you should check to ensure that the default variation will not be reduced. Each increase is a step change, just as if you changed the percentage manually.
* Choose how frequently to increase the rollout percentage.
* Choose which context attribute to roll out by.
5. Click **Review workflow**. An overview of the workflow appears.
6. (Optional) Click the **pencil** icon next to the title to edit the title.
7. (Optional) Click the **pencil** icon next to "Add a description" to add a description.
8. (Optional) If you have an approvals process, you can remove the first "Schedule" step, add an approval step, and then re-add the schedule step.
If you have an approvals process, you can add an approval step to your workflow.
Here's how:
1. Click the **overflow menu** in the first first "Schedule" step.
2. Choose "Delete step." The **Request approval** and **Schedule date and time** options appear.
3. Click **Request approval**.
4. Click into the **Reviewers** menu and choose an approver.
5. Enter a description in the **Description** field.
You must add approval steps before you add schedule steps.
9. Click **Start workflow**.
For multivariate workflows, LaunchDarkly decreases and recalculates the variations that are not selected for the rollout. You should confirm the auto-calculated percentage rollouts and adjust them to your preferences if needed.
## Create maintenance window workflows
You can use workflows to create maintenance windows that toggle a flag's targeting on or off, and then back off or on, during a scheduled date and time.
To create a maintenance window workflow:
1. Navigate to the **Flags** list and select the flag you want to create a workflow for.
2. Click **Manage workflows** in the right sidebar.
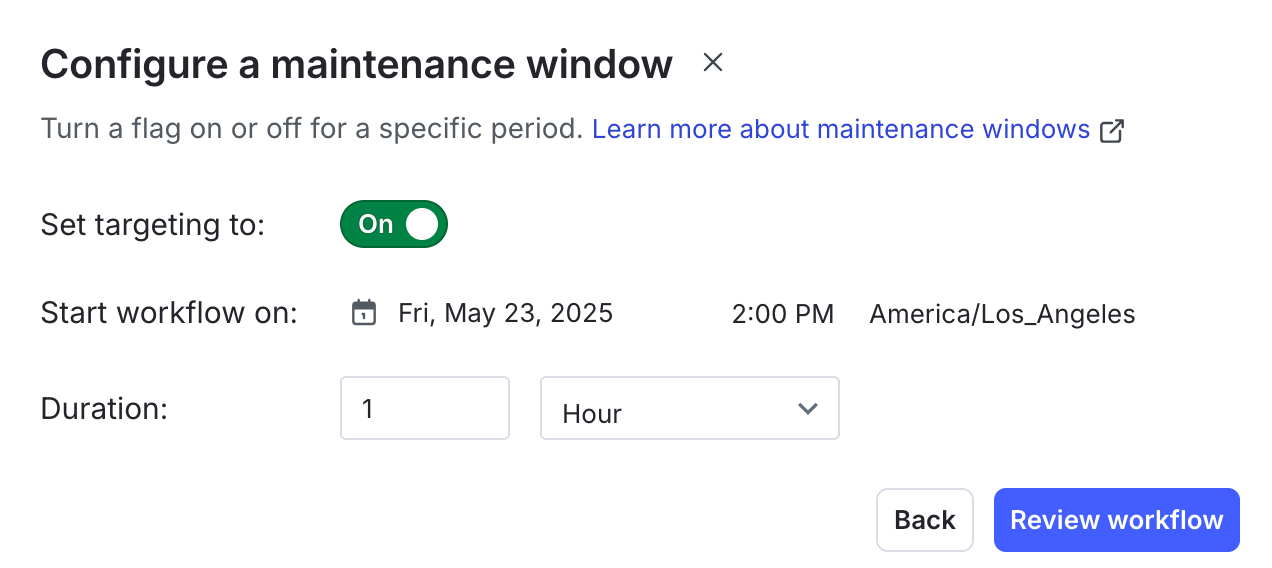
3. Click **Maintenance window**. A "Configure a maintenance window" dialog appears.
4. Configure your maintenance window:
* Choose whether to toggle the flag's targeting on or off during the maintenance.
* Choose when to start the maintenance.
* Choose the length of the maintenance period.
5. Click **Review workflow**. An overview of the workflow appears.
6. (Optional) Click the **pencil** icon next to the title to edit the title.
7. (Optional) Click the **pencil** icon next to "Add a description" to add a description.
8. (Optional) If you have an approvals process, you can remove the first "Schedule" step, add an approval step, and then re-add the schedule step.
## Create custom workflows
To create a custom workflow:
1. Navigate to the **Flags** list and select the flag you want to create a workflow for.
2. Click **Manage workflows** in the right sidebar.
3. Click **Custom build**. A "Name the workflow" dialog appears.
4. Add a **Name** and an optional **Description**.
5. Click **Next**.
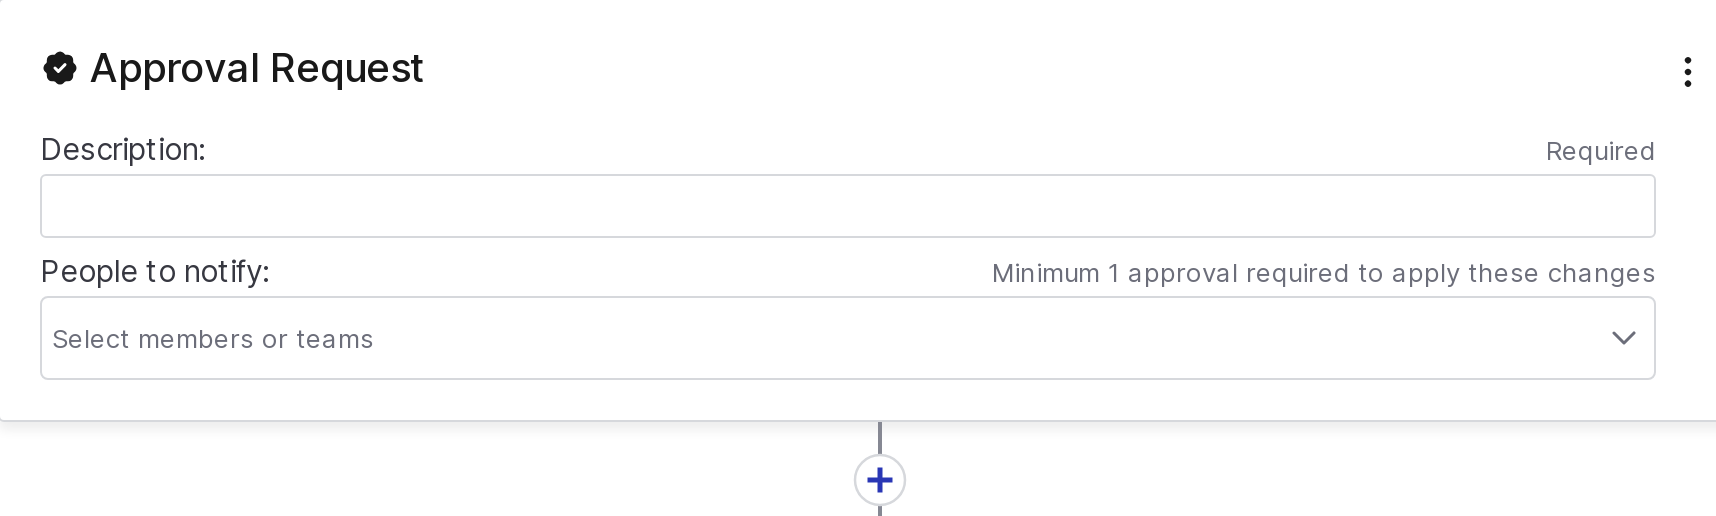
6. (Optional) If you have an approvals process, click **Request approval**.
* Click into the **Reviewers** menu and choose an approver.
* Enter a description in the **Description** field.
* You must add approval steps before you add schedule steps. If you accidentally add a schedule step first, delete the schedule step, and then add the approval step as the first step of that stage.
7. If you don't need to request approval, click **Schedule date and time**.
* Choose **Later** to schedule the stage to begin a specified amount of time after the previous stage, for example, one hour after the previous stage
* Choose **Specific date and time** to schedule the stage to begin at a specific time, for example, 4:00 PM on January 3, 2025
8. Click **plus (+)** to add another step to your workflow.
9. Add additional flag changes you want to make.
10. Add another approval or schedule condition step to create another stage of the workflow.
11. When you have added all of your release steps to the workflow, click **Start workflow**.
LaunchDarkly now processes the workflow steps for you based on the timeline and actions that you defined.
## View workflows
To view workflow details:
1. Navigate to the **Flags** list and select the flag with the workflow you want to view. The flag's **Targeting** tab appears.
2. Click **Manage workflows** in the right sidebar.
3. In the Workflows table, use the menu to show a table of **Active** or **Completed** workflows.
4. Click the name of the workflow you'd like to view.