> ## Documentation Index
> Fetch the complete documentation index at: https://launchdarkly-preview.mintlify.site/llms.txt
> Use this file to discover all available pages before exploring further.
# Creating release pipelines
> This topic explains how to create and configure release pipelines to use in automated releases.
> For the complete documentation index, see [llms.txt](/llms.txt). For the full documentation snapshot, see [llms-full.txt](/llms-full.txt).
Release pipelines are in beta, and are available only to certain customers with an Enterprise plan. Aspects of this feature may change without notice or become deprecated in favor of other release management features.
If release pipelines are not available to you and you want to try the feature, contact your LaunchDarkly account team.
## Overview
This topic explains how to create and configure release pipelines to use in automated releases.
After you create a release pipeline, you can create a release strategy by configuring automation unique to each phase in the pipeline. Then, you can add flags to your pipeline. To learn how, read [Adding and removing flags from release pipelines](/home/releases/adding-flags).
## Create release pipelines
You can only create and delete release pipelines if you have a role that allows the createReleasePipeline and deleteReleasePipeline actions. The LaunchDarkly Project Admin and Maintainer project roles, as well as the Admin and Owner base roles, all have this ability. To learn more, read [About member roles](/home/account/members#about-member-roles) and [Release pipeline actions](/home/account/roles/role-actions#release-pipeline-actions).
You can create up to ten phases in a release pipeline.
To create a release pipeline:
1. Navigate to **Release assistant**.
* If you have one or more release pipelines set up for your project, the default release pipeline and its releases appear. Click the release pipeline name, and select **Manage release pipelines**.
2. Click **Create release pipeline**.
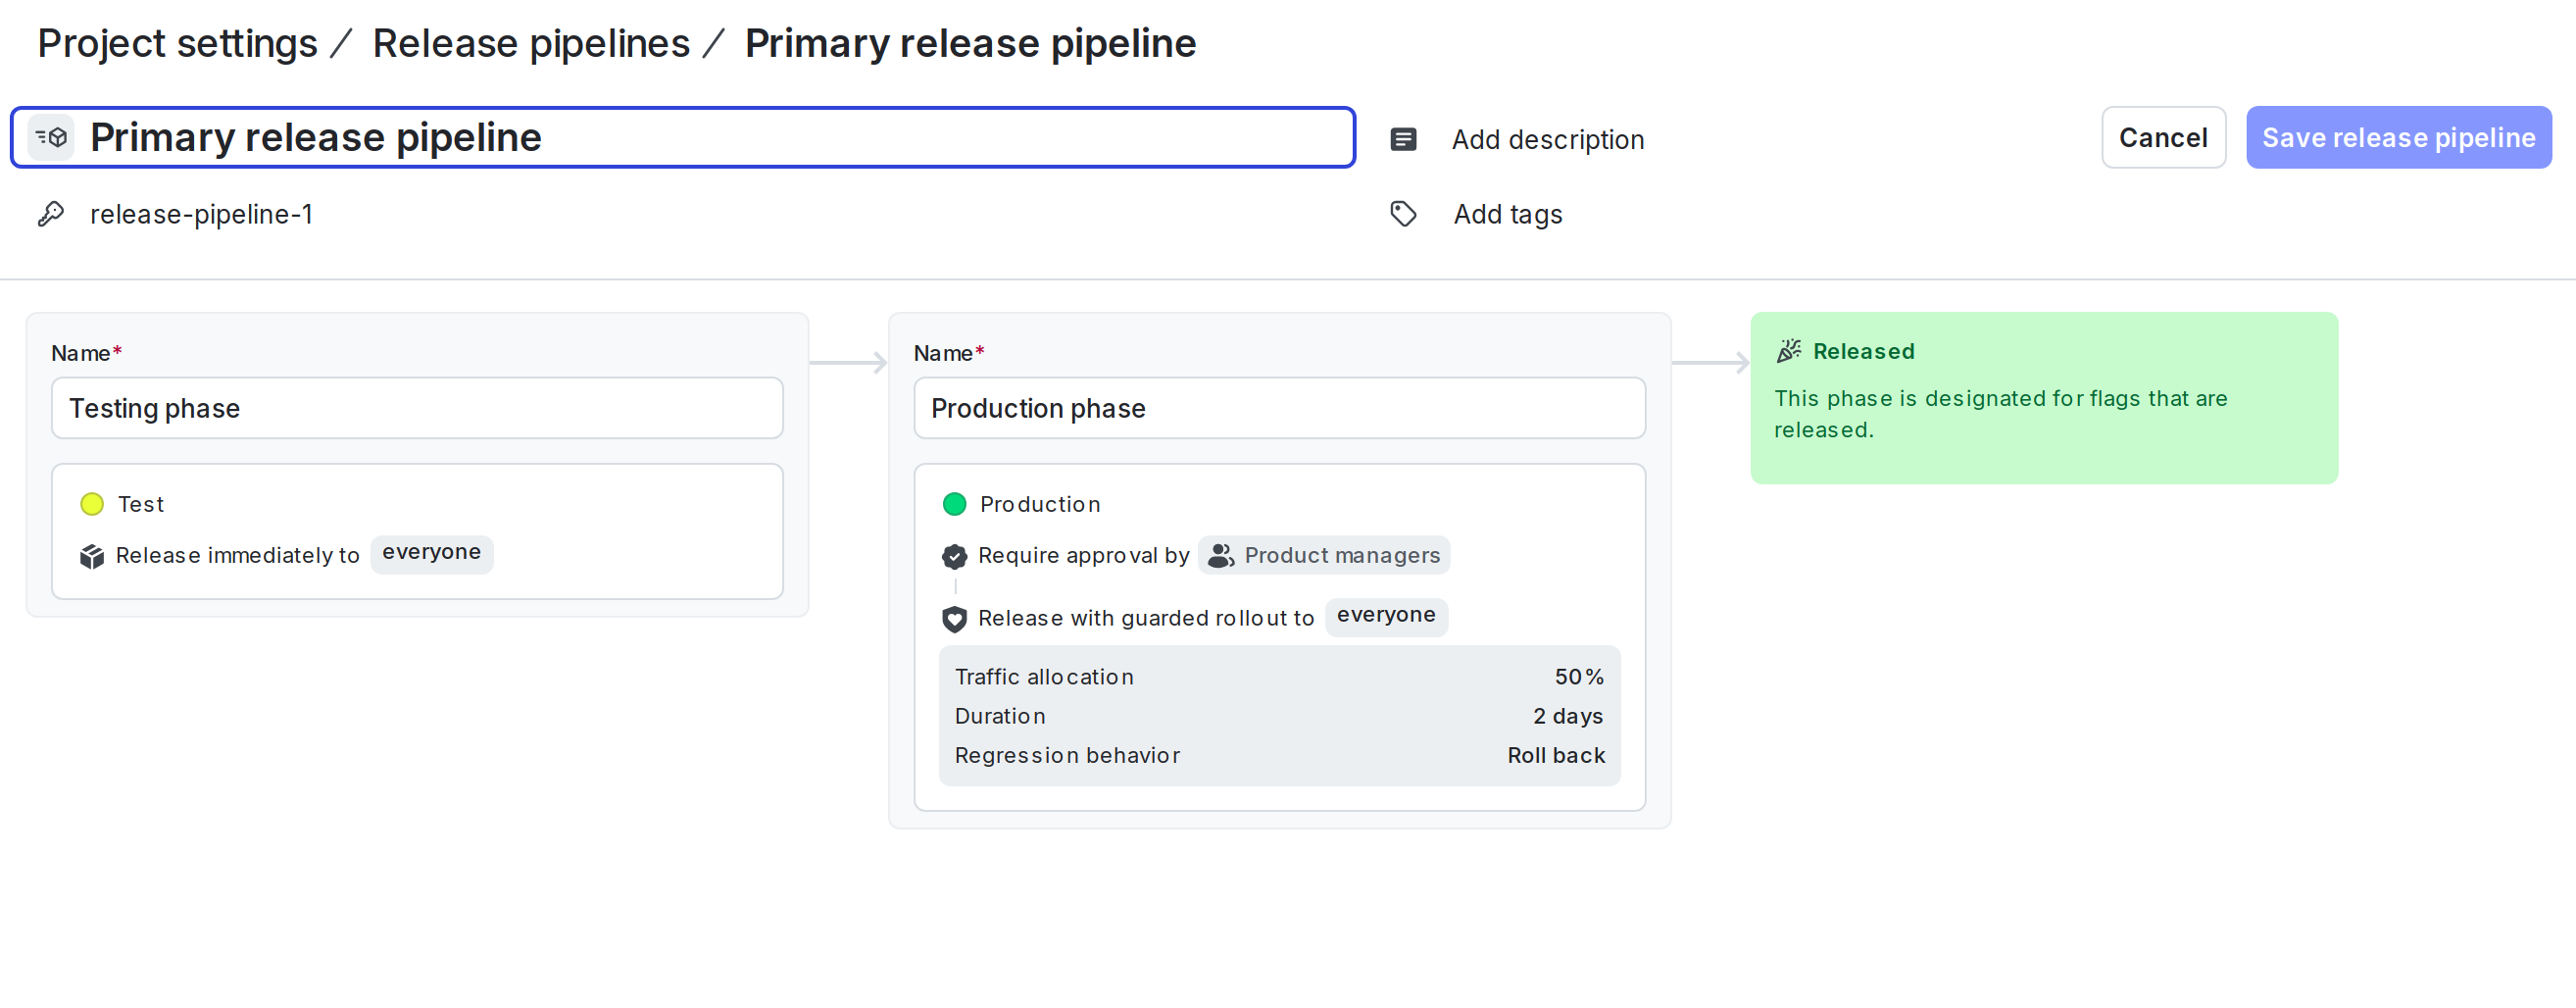
3. (Optional) Click into the title field to update the name.
4. (Optional) Click into the key field to update the automatically-generated key.
5. (Optional) Click **Add description** to add a description for this release pipeline.
6. (Optional) Click **Add tags** to choose from available tags.
The release pipeline automatically includes two phases: Testing and Production. You can add additional phases as needed, and configure release strategies for each phase.
If this is the first release pipeline in your project, it will be used as the default for all new flags created in this project.
After you create a release pipeline, you can edit any of its information, except for the release pipeline key, until you add flags to it. After you add flags to a release pipeline, you can only edit the pipeline name, description, tags, and phase names. This ensures that all flags are going through the same standardized release process.
You can also use the REST API: [Create a release pipeline](/api-reference/release-pipelines-beta/create-a-release-pipeline)
## Configure release strategies
Each phase in a pipeline can include multiple release strategies.
You can specify details on automation, approvals, and guarded rollouts for each phase:
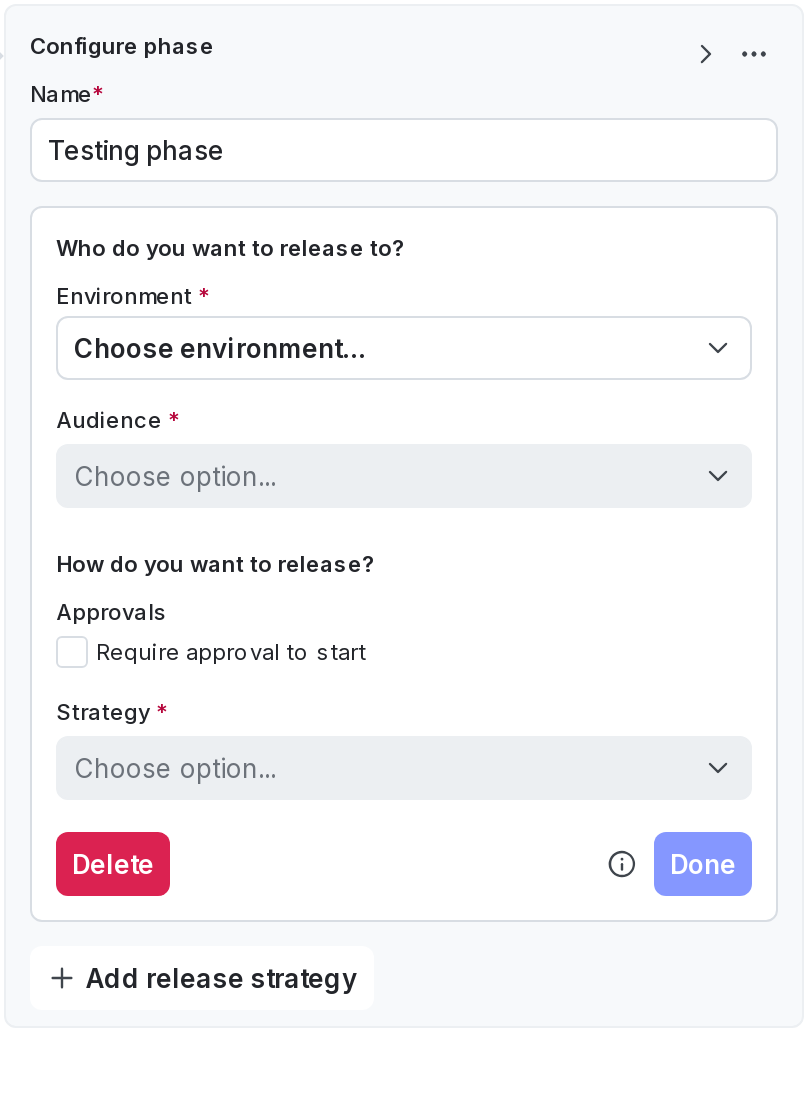
To configure a release strategy:
1. Select the **Environment** for the release strategy.
2. Select the **Audience** to decide if flags should be enabled for either:
* everyone targeted in each flag's default rules, or
* only certain segments. If you choose to release the flag to only certain segments, LaunchDarkly will automatically create a rule on your flag to target those segments when you start the release.
3. (Optional) Check **Require approval to start** to require approvals.
* Under Reviewers, click **+** and select approvers from the list.
4. Select a release **Strategy** of one of the following:
* an immediate rollout
* a [guarded rollout](/home/releases/guarded-rollouts). If you choose a guarded rollout, a guarded rollout will be added to the rule for the audience you selected in step 2.
5. Click **Done**.
6. (Optional) Click **Add another release strategy** to add an additional strategy.
To reorder phases, click the left and right arrows to "Move phase left" or "Move phase right."
To delete a phase, click the **three-dot** overflow menu and select **Delete phase**.
When you are finished adding phases and configuring release strategies, click **Create release pipeline**.