> ## Documentation Index
> Fetch the complete documentation index at: https://launchdarkly-preview.mintlify.site/llms.txt
> Use this file to discover all available pages before exploring further.
# LaunchDarkly local MCP server
> This topic describes how to get started with the LaunchDarkly local Model Context Protocol (MCP) server.
> For the complete documentation index, see [llms.txt](/llms.txt). For the full documentation snapshot, see [llms-full.txt](/llms-full.txt).
## Overview
This topic describes how to get started with the LaunchDarkly local Model Context Protocol (MCP) server.
## Get started
To get started, you need an API access token with permission to execute any of the MCP tools available. Then, you need to add the MCP server definition to your AI client.
You also need a JavaScript runtime that supports ECMAScript 2020 or newer.
### Authentication
First, create an API access token:
1. Click the **gear** icon in the left sidenav to view Organization settings.
2. Click **Authorization**.
3. In the "Access tokens" section, click **Create token**.
4. Give your token a human-readable **Name**.
5. Assign a **Role** to the token by choosing one from the menu.
* The LaunchDarkly MCP server provides tools for managing flags and AI Configs, so your token should have permission to create, read, update, and delete flags and AI Configs in the projects you want to work in. We recommend that you use a token with a Writer [base role](/home/account/roles/role-concepts#base-roles), a LaunchDarkly Developer [preset role](/home/account/roles/role-concepts#preset-roles), or another role that provides this access.
6. Click **Save token**. The new token appears in the **Authorization** page.
7. Copy and save the token somewhere secure. After you leave this page, the token is obscured.
To learn more, read [Creating API access tokens](/home/account/api-create).
#### Example roles recommended for MCP server access tokens
Customers on select plans can [create their own roles](/home/account/roles/role-create). If you have this ability, we recommend that you create the following role and assign it to the access token used for the LaunchDarkly MCP server:
```json title="Recommend role for MCP server access tokens" theme={null}
[
{
"effect": "allow",
"actions": ["*"],
"resources": ["proj/${roleAttribute/projectKey}:env/*:flag/*"]
},
{
"effect": "allow",
"actions": ["*"],
"resources": ["proj/${roleAttribute/projectKey}:env/*:aiconfig/*"]
},
{
"effect": "allow",
"actions": ["viewProject"],
"resources": ["proj/${roleAttribute/projectKey}"]
}
]
```
### Installation methods
You can install the LaunchDarkly MCP server in any AI client that supports the MCP protocol. For most AI clients, this means creating or updating an MCP server `.json` configuration file. LaunchDarkly customers on the EU or Federal instances of LaunchDarkly may want to use this method so they can include the correct server URLs.
Here's what the .json file looks like:
```json title="LaunchDarkly MCP server JSON configuration" theme={null}
{
"mcpServers": {
"LaunchDarkly": {
"command": "npx",
"args": [
"-y", "--package", "@launchdarkly/mcp-server", "--", "mcp", "start",
"--api-key", "api-xxxxxxxx-xxxx-xxxx-xxxx-xxxxxxxxxxxx"
]
}
}
}
```
Replace `api-xxxxxxxx-xxxx-xxxx-xxxx-xxxxxxxxxxxx` with your API access token.
Depending on how you use the LaunchDarkly MCP server, your AI client may end up listing the details of this configuration file in your conversation. This can be a security risk because the configuration file includes your API key. We strongly recommend using environment variables instead if your AI client supports their use with MCP servers.
For example, GitHub Copilot can use variables prefixed with `COPILOT_MCP_` in the .json file to import secrets from your environment.
Follow the instructions below to install the MCP configuration to Cursor, Claude, or Copilot. For other IDEs, refer to your client's instructions to learn where this configuration is located.
A quick installer for the LaunchDarkly MCP server is available on Cursor's website.
Here's how to find and use it:
1. Navigate to Cursor's list of [supported MCP servers](https://cursor.com/docs/context/mcp/directory) and scroll to "LaunchDarkly."
2. Click **Add to Cursor**. On your local machine, Cursor launches and the "Cursor Settings" page opens, preconfigured to install LaunchDarkly's MCP server.
3. Replace the example API key `api-xxxxxxxx-xxxx-xxxx-xxxx-xxxxxxxxxxxx` with your LaunchDarkly API access token.
4. Click **Install**.
To install to Claude, update the `claude_desktop_config.json` file to include the LaunchDarkly MCP server .json configuration.
To install to GitHub Copilot:
1. Navigate to a target repository on GitHub.
2. Select **Settings -> Code and automation -> Copilot -> Coding agent**.
3. In the **MCP configuration** section, add the LaunchDarkly MCP server .json configuration.
4. Click **Save**.
#### Run the MCP server from a local build
Optionally, you can run LaunchDarkly's MCP server from a local build instead of from your AI client.
First, install and build the MCP server:
```bash title="Install LaunchDarkly's MCP server locally" theme={null}
git clone git@github.com:launchdarkly/mcp-server.git
npm install
npm run build
```
Then, configure your server definition to reference your local clone. For example:
```json title="Configure MCP server definition" theme={null}
{
"mcpServers": {
"LaunchDarkly": {
"command": "node",
"args": [
"/path/to/mcp-server/bin/mcp-server.js", "start",
"--api-key", "api-xxxxxxxx-xxxx-xxxx-xxxx-xxxxxxxxxxxx"
]
}
}
}
```
### Enable the MCP server
Depending on your client, after you update your `.json` configuration file, you may have additional steps to enable the LaunchDarkly MCP server:
* You may need to restart your AI client in order for the updates to the configuration file to take effect.
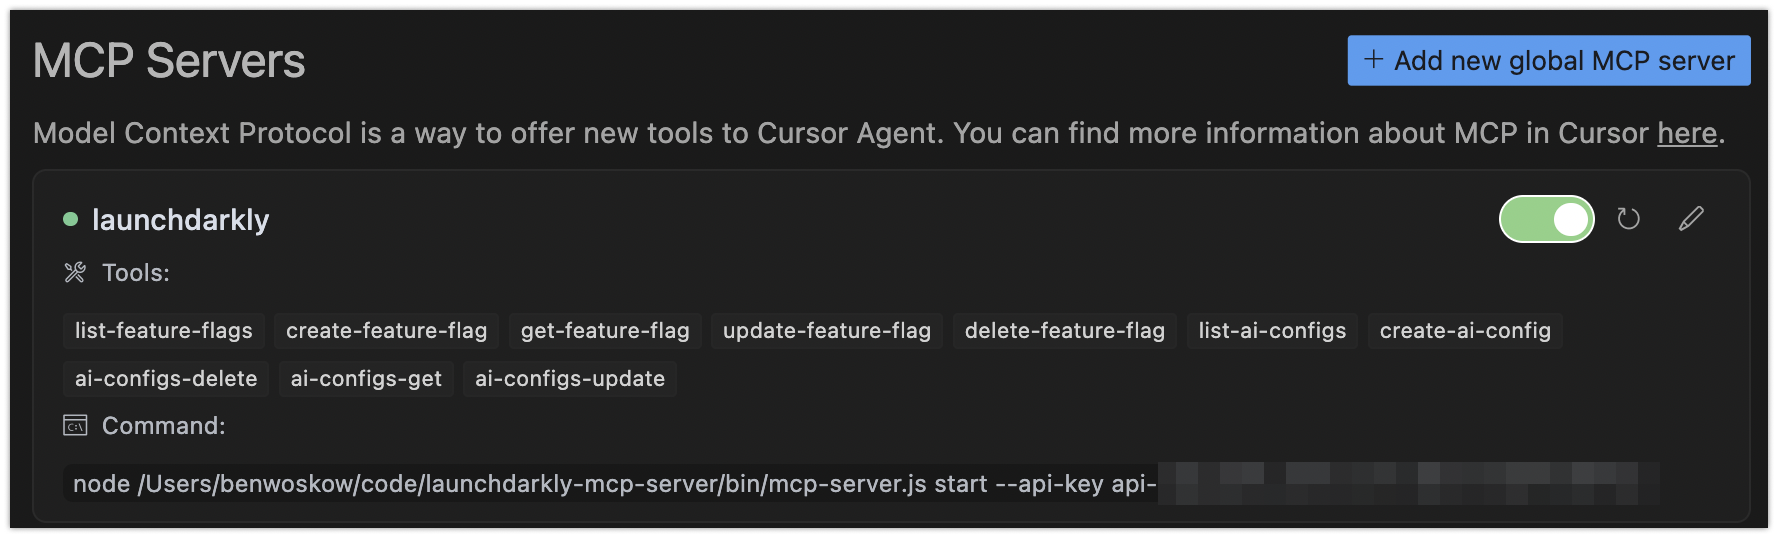
* You may need to toggle on the LaunchDarkly MCP server configuration. For example, in Cursor you must enable each MCP server separately:
## Restrict usage
You can specify additional options in your server configuration if you want to restrict the MCP server's access to your LaunchDarkly account.
To give the MCP server only read-only access, we recommend using both of the following options:
* When you [create your API access token](#authentication), specify a Reader base role, or another role with read-only access.
* In your server configuration, add `"--scope", "read"` to the `args` array. To enable only specific [tools](/home/getting-started/mcp#available-mcp-tools) in your server configuration, add `"--tool", ""` to the `args` array for each tool you want to enable. For example:
```json title="Enable only specific MCP tools" theme={null}
{
"mcpServers": {
"LaunchDarkly": {
"command": "npx",
"args": [
"-y", "--package", "@launchdarkly/mcp-server", "--", "mcp", "start",
"--tool", "create-feature-flag", "--tool", "update-feature-flag",
"--api-key", "api-xxxxxxxx-xxxx-xxxx-xxxx-xxxxxxxxxxxx"
]
}
}
}
```