> ## Documentation Index
> Fetch the complete documentation index at: https://launchdarkly-preview.mintlify.site/llms.txt
> Use this file to discover all available pages before exploring further.
# Creating migration flags
> This topic explains how you can create migration flags.
> For the complete documentation index, see [llms.txt](/llms.txt). For the full documentation snapshot, see [llms-full.txt](/llms-full.txt).
## Overview
This topic explains how to create migration flags. Migration flags are temporary flags you can use to migrate data or tech systems without causing outages or downtime.
Migration flags can have two, four, or six stages. To learn more about when to use different types of migrations, read [Performing multi-stage migrations with migration flags](/guides/flags/migrations).
Not all SDKs are compatible with migration flags. For a full list of compatible SDKs, read [supported SDKs](/home/flags/migration#supported-sdks).
## Create migration flags
Here's how to create a migration flag:
1. Click **Create** and choose **Flag**. The "Create flag" dialog appears.
2. Enter a unique, human-readable **Name**. A suggested key auto-populates from the name you enter, but you can customize it if you wish.
3. (Optional) Click **Edit key** to update the flag key. You'll use this key to reference the flag in your code.
4. (Optional) Enter a **Description** of the flag. A brief, human-readable description helps your account members understand what the flag is for.
5. (Optional) Click **No template** and select **2-**, **4-**, or **6-stage migration**.
* If you selected 6-stage migration, select a **Context kind**.
You must choose a context kind to create a six-stage migration. The context kind you choose should indicate how the migrated data is partitioned. It determines how rollouts are bucketed and which context kind to reference when you create cohorts.
6. (Optional) Click on your member name to change the flag maintainer.
7. (Optional) Click the **tag** icon to add one or more [tags](/home/account/tags).
8. (Optional) Click on the views icon to add the flag to a [view](/home/account/views).
9. (Optional) Click **All SDKs** to make the flag [unavailable to client-side or mobile SDKs](/home/flags/flag-settings). Flags are available to all SDKs by default.
10. (Optional) Click **Temporary** to change the flag from [temporary to permanent](/home/flags/flag-settings).
11. Click **Create flag**.The flag **Targeting** tab appears. After you create a flag, you can make further changes to it as needed, such as to [update flag targeting](/home/flags/target). To learn more, read [Creating new flags](/home/flags/new).
## Modify the migration flag template
To modify your migration flag template:
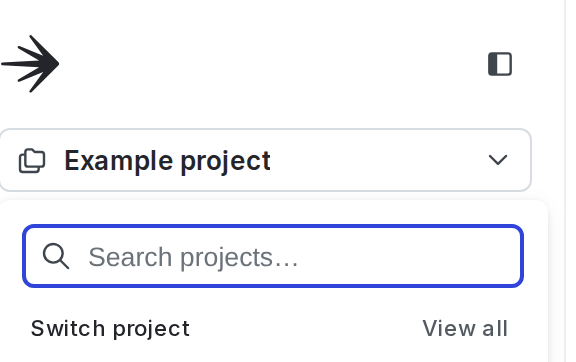
1. Click the project dropdown. The project menu appears:
2. Select **Project settings**.
3. Select **Flags**. The **Flags** settings list appears.
4. In the "Flag templates section, click the **pencil** icon next to "Migration."
5. In the "Tags" section, type to add tags to each new flag by default.
6. Click **Save**.Verify that the updated default template settings are correct by navigating to the **Flags** list and creating a new migration flag.