> ## Documentation Index
> Fetch the complete documentation index at: https://launchdarkly-preview.mintlify.site/llms.txt
> Use this file to discover all available pages before exploring further.
# Quickstart for Experimentation
> This topic explains how to complete the quickstart for LaunchDarkly's Experimentation product.
> For the complete documentation index, see [llms.txt](/llms.txt). For the full documentation snapshot, see [llms-full.txt](/llms-full.txt).
## Overview
This topic explains how to get started with LaunchDarkly's Experimentation product.
Follow the instructions below to complete the Experimentation quickstart and create your first experiment.
You can also use the [LaunchDarkly demo sandbox](https://demo.app.launchdarkly.com/).
## Important concepts
As you progress through the Experimentation quickstart, you may encounter terminology that's new to you. Here's a brief explanation of what some of these terms mean. If you want to go into more detail about anything in this section, read [Experimentation and metric events](/home/experimentation/events).
### Events and metrics
Two distinct, interconnected resources in LaunchDarkly are "events" and "metrics."
* **Events** are raw data that represent specific actions, such as a button click or a page view. They are instrumented in code, and used to create metrics.
* **Metrics** define how event data should be aggregated and interpreted so you can measure the effect of a change. They are created in the LaunchDarkly user interface (UI).
For example, an event can log each time a user clicks "Buy," while the metric measures the average conversion rate of this action for your website's visitors.
## Best practices for identifying useful data when designing experiments
Start by identifying actions relevant to most experiments, such as conversion rate or page load time, and create events representing those in LaunchDarkly. As you build experiments, gradually add additional specific events and corresponding metrics.
As you add events to LaunchDarkly, here are some tools you can use:
* The [event explorer](/home/metrics/view-incoming-events) lists the events your SDKs are sending to LaunchDarkly. Use it to view what events you're already sending from your app, and to confirm that new events are arriving as expected.
* You can use events from external warehouses, such as Snowflake. This lets you run [experiments using warehouse native metrics](/home/warehouse-native/creating).
When you define metrics in LaunchDarkly, here are some of the things to keep in mind:
* Consider the unit you're using. To use a given metric in an experiment, the metric's unit needs to be the same as the experiment's [randomization unit](/home/experimentation/randomization). If you're familiar with other aspects of LaunchDarkly, it will help you to know that the experiment's unit is synonymous with its context kind. The most common context kind and randomization unit is `user`.
* You can often derive additional helpful metrics from a single conversion event. Depending on the experiment's hypothesis, it might be helpful to measure the event occurrence (the portion of users who converted at least once), the event count (the average number of conversion events per user), or the average value associated with the given conversion event.
## Using the quickstart
This quickstart takes you through the core actions to create an experiment. You will choose and initialize a LaunchDarkly SDK, create a flag and metrics, and instrument events to monitor when your experiment gets interaction. These are the core steps to begin an experiment.
## Step 1: Connect your app
To begin, you must install a LaunchDarkly SDK locally. Here's how:
1. In LaunchDarkly, click the **question mark** in the left nav to open the help menu.
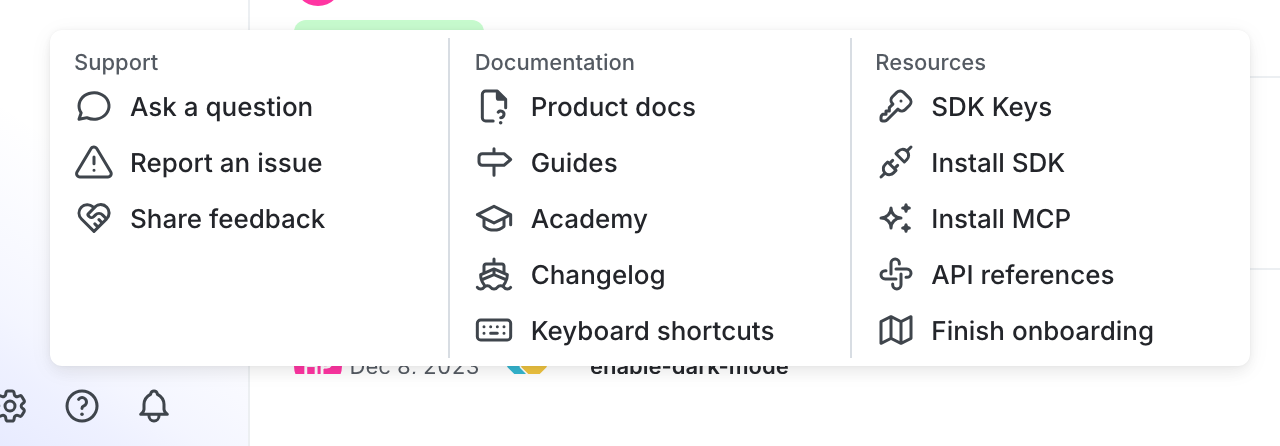
2. Select **Install SDK**. The "Connect your app to LaunchDarkly" screen opens.
3. Choose an SDK from the dropdown menu. Its installation instructions appear.
4. Install the SDK in your app:
```java title="Java (XML)" theme={null}
com.launchdarkly
launchdarkly-java-server-sdk
7.0.0
```
```java title="Java (Gradle)" theme={null}
implementation group: 'com.launchdarkly', name: 'launchdarkly-java-server-sdk', version: '7.0.0'
```
```js title="JavaScript (yarn)" theme={null}
yarn add launchdarkly-js-client-sdk
```
```js title="JavaScript (npm)" theme={null}
npm i launchdarkly-js-client-sdk
```
```csharp title=".NET (client) (C#)" theme={null}
Install-Package LaunchDarkly.ClientSdk
```
```js title="Node.js (server) (yarn)" theme={null}
yarn add @launchdarkly/node-server-sdk
```
```js title="Node.js (server) (npm)" theme={null}
npm i @launchdarkly/node-server-sdk
```
```python title="Python" theme={null}
pip install launchdarkly-server-sdk
```
```js title="React (yarn)" theme={null}
yarn add launchdarkly-react-client-sdk
```
```js title="React (npm)" theme={null}
npm i launchdarkly-react-client-sdk
```
4. Initialize the SDK:
```java title="Java" theme={null}
import com.launchdarkly.sdk.*;
import com.launchdarkly.sdk.server.*;
// A "context" is a data object representing users, devices, organizations, and
// other entities. You'll need this later, but you can ignore it for now.
final LDContext context = LDContext.builder("example-context-key")
.name("Sandy")
.build();
LDConfig config = new LDConfig.Builder().build();
// Set your LaunchDarkly SDK key.
// This is inlined as example only for onboarding.
// Never hardcode your SDK key in production.
final LDClient client = new LDClient("sdk-378e1611-aa33-4fa2-b477-9279c59a6c59", config);
if (client.isInitialized()) {
System.out.println("SDK successfully initialized!");
}
```
```js title="JavaScript (require)" theme={null}
const LDClient = require('launchdarkly-js-client-sdk')
// You'll need this context later, but you can ignore it for now.
const context = {
kind: 'user',
key: 'example-context-key'
};
const client = LDClient.initialize('66b5397ad23702105b8ab9fd', context);
client.on('initialized', function () {
console.log('SDK successfully initialized!');
});
```
```js title="JavaScript (es2015)" theme={null}
import * as LDClient from 'launchdarkly-js-client-sdk';
// You'll need this context later, but you can ignore it for now.
const context = {
kind: 'user',
key: 'example-context-key'
};
const client = LDClient.initialize('66b5397ad23702105b8ab9fd', context);
client.on('initialized', function () {
console.log('SDK successfully initialized!');
});
```
```ts title="JavaScript (TypeScript)" theme={null}
import * as LDClient from 'launchdarkly-js-client-sdk';
// You'll need this context later, but you can ignore it for now.
const context: LDClient.LDContext = {
kind: 'user',
key: 'example-context-key'
};
const client = LDClient.initialize('66b5397ad23702105b8ab9fd', context);
client.on('initialized', function () {
console.log('SDK successfully initialized!');
});
```
```csharp title=".NET (client) (C#)" theme={null}
using LaunchDarkly.Sdk;
using LaunchDarkly.Sdk.Client;
// A "context" is a data object representing users, devices, organizations, and
// other entities. You'll need this to initialize the client.
Context context = Context.New("example-context-key");
// Set your LaunchDarkly SDK key.
// This is inlined as example only for onboarding.
// Never hardcode your SDK key in production.
var timeSpan = TimeSpan.FromSeconds(5);
client = await LdClient.InitAsync("sdk-378e1611-aa33-4fa2-b477-9279c59a6c59", ConfigurationBuilder.AutoEnvAttributes.Enabled, context, timeSpan);
if (client.Initialized)
{
Console.WriteLine("SDK successfully initialized!");
}
```
```js title="Node.js (server)" theme={null}
import * as LaunchDarkly from '@launchdarkly/node-server-sdk';
// Set your LaunchDarkly SDK key.
// This is inlined as example only for onboarding.
// Never hardcode your SDK key in production.
const client = LaunchDarkly.init('sdk-be25999e-f94a-4125-950a-a40665de4605');
client.once('ready', function () {
console.log('SDK successfully initialized!');
});
```
```python title="Python" theme={null}
import os
import ldclient
from ldclient import Context
from ldclient.config import Config
if __name__ == '__main__':
# Set your LaunchDarkly SDK key.
# This is inlined as example only for onboarding.
# Never hardcode your SDK key in production.
ldclient.set_config(Config('sdk-be25999e-f94a-4125-950a-a40665de4605'))
if not ldclient.get().is_initialized():
print('SDK failed to initialize')
exit()
print('SDK successfully initialized')
# A "context" is a data object representing users, devices, organizations, and
# other entities. You'll need this later, but you can ignore it for now.
context = (
Context.builder('example-user-key')
.kind('user')
.email('biz@face.dev')
.build()
)
```
```js title="React" theme={null}
// Add the code below to the root of your React app.
import { StrictMode } from 'react';
import { createRoot } from 'react-dom/client';
import { LDProvider } from 'launchdarkly-react-client-sdk';
import App from './App.tsx';
// A "context" is a data object representing users, devices, organizations, and other entities.
// You'll need this later, but you can ignore it for now.
const context = {
kind: 'user',
key: 'example-user-key',
email: 'biz@face.dev',
};
// The clientSideID is your SDK key.
// This value is automatically retrieved from LaunchDarkly.
createRoot(document.getElementById('root')!).render(
,
);
```
## Step 2: Create a flag
Next, create a flag to track your experiment. Here's how:
1. Navigate to the **Flags** list in LaunchDarkly by opening the **Release** section in the left nav, then clicking **Flags**.
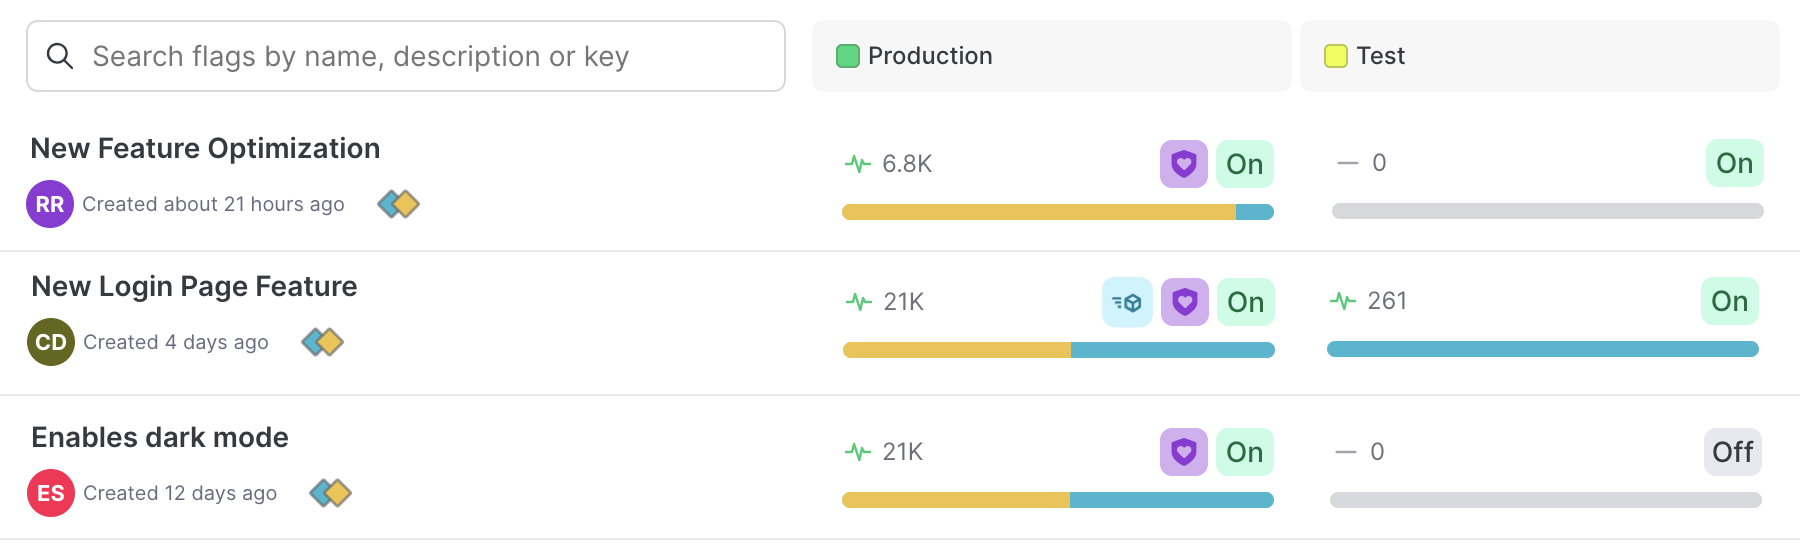
2. Click **Create flag**. The flag creation menu appears.
3. Enter "My cool flag" as the **Name**.
4. Click **Create flag**.
5. Test the flag by wrapping a feature in your app in the flag code. Here's how:
```java title="Java" theme={null}
// Set up the evaluation context.
final LDContext context = LDContext.builder("example-context-key")
.name("Sandy")
.build();
// Evaluate the feature flag for this context.
boolean flagValue = client.boolVariation("my-cool-flag", context, false);
if (flagValue) {
// TODO: Put your feature here
} else {
// TODO: Put your fallback behavior here
}
```
```js title="JavaScript" theme={null}
const flagKey = 'my-cool-flag';
const flagValue = ldclient.variation(flagKey, false);
if (flagValue) {
// TODO: Put your feature here
} else {
// TODO: Put your fallback behavior here
}
```
```c title=".NET (client)" theme={null}
// Evaluate the feature flag.
var flagValue = client.BoolVariation('my-cool-flag', false);
if (flagValue)
{
// TODO: Put your feature here
}
else
{
// TODO: Put your fallback behavior here
}
```
```js title="Node.js (server)" theme={null}
// Evaluate a context
const context = {
"kind": 'user',
"key": 'example-user-key',
"name": 'Sandy',
};
client.on('ready', () => {
client.variation('my-cool-flag', context, false, function(err, showFeature) {
if (showFeature) {
// TODO: Put your feature here
} else {
// TODO: Put your fallback feature here
}
});
});
```
```python title="Python" theme={null}
from ldclient import Context
# Create context using Context builder and use your own values here
context = Context.builder("example-context-key").name("Sandy").build()
flag_value = client.variation("my-cool-flag", context, False)
if flag_value:
# TODO: Put your feature here
else:
# TODO: Put your fallback behavior here
```
```js title="React" theme={null}
import { useFlags } from 'launchdarkly-react-client-sdk';
// We added your flag key. The React SDK uses camelCase for flag keys automatically
// useFlags is a custom hook which returns all feature flags
const { myCoolFlag } = useFlags();
// In your component, find where your feature is instantiated
if (myCoolFlag) {
// TODO: Put your feature here
} else {
// TODO: Put your fallback behavior here
}
```
5. Run your application to verify that it works as you expect.
6. Navigate to the flag's **Targeting tab** and turn the flag on. To learn more, read [Target with flags](/home/flags/target).
## Step 3: Instrument events
Events let you track the raw data that matters for your experiment, like clicks, pageviews, and custom events.
For this quickstart, we recommend you use custom events. You can send them using the [SDK's track](/sdk/features/events) method. Here's how:
```java title="Java" theme={null}
client.track("example-event-key", context);
```
```js title="JavaScript" theme={null}
client.track('example-event-key');
```
```csharp title=".NET (client)" theme={null}
client.Track("example-event-key");
```
```js title="Node.js (server)" theme={null}
client.track("example-event-key", context);
```
```python title="Python" theme={null}
ldclient.get().track("example-event-key", context)
```
```js title="React" theme={null}
const ldClient = useLDClient();
ldClient.get().track("example-event-key");
```
## Step 4: Create a metric
Metrics measure the outcome of an experiment. Conversion metrics compare two different versions against each other to see which produces a better result.
To learn more about how to create metrics, read [Creating and managing metrics](/home/metrics/create-metrics).
1. Navigate to the **Metrics** list in LaunchDarkly by opening the **Iterate** section in the left nav, then clicking **Metrics**.
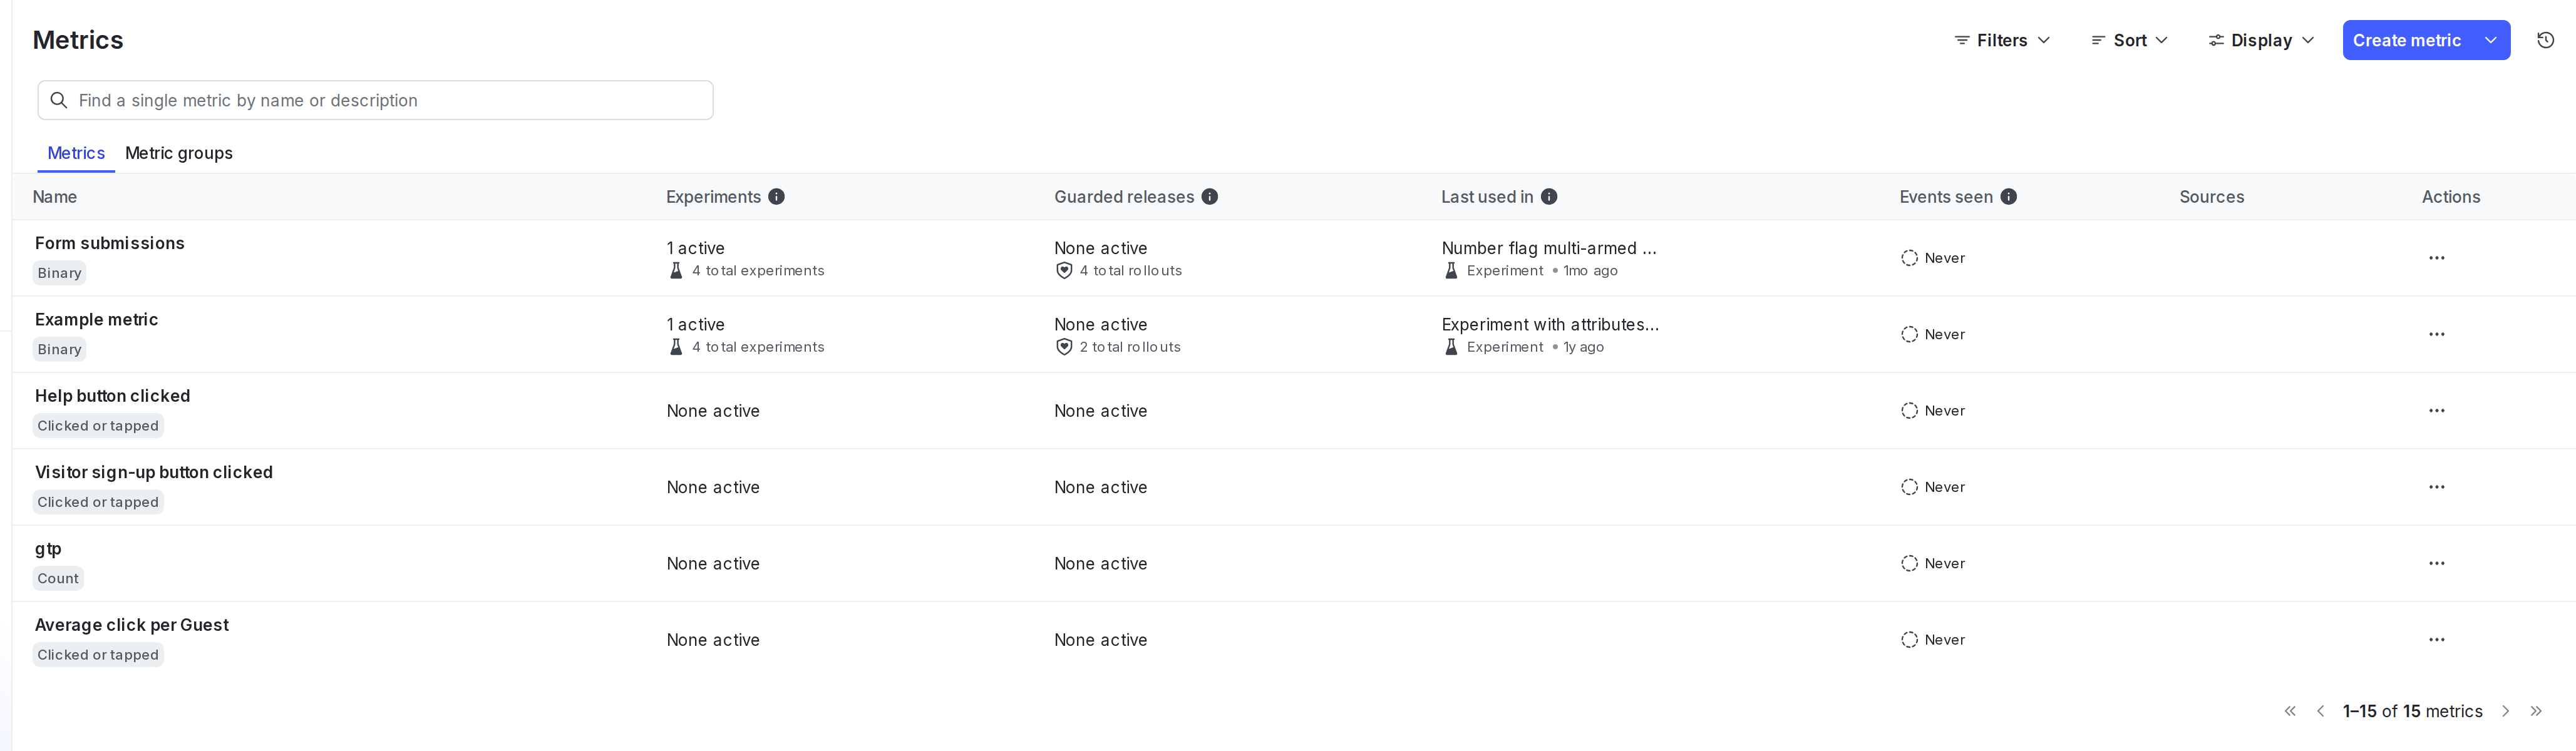
2. Click **Create metric**. The metric creation menu appears.
3. If you use [Snowflake native Experimentation](/home/warehouse-native/snowflake), you will have the option to select either **LaunchDarkly hosted** or **Warehouse native**.
* Select **LaunchDarkly hosted** if you plan to use the metric to measure events from LaunchDarkly SDKs.
* Select **Warehouse-native** if you plan to use the metric to measure events from an external warehouse, such as Snowflake.
* Select a LaunchDarkly environment for the **Metric data source**.
4. Enter the **Event key** you instrumented in the previous step.
5. Choose how you want to measure the conversion event: by Count, Occurrence, or Value / Size.
6. Give your metric a human-readable **Name**.
7. Click **Create metric**.
## Step 5: Create an experiment
Now it's time to create your experiment:
1. Navigate to the **Experiments** list in LaunchDarkly by opening the **Iterate** section in the left nav, then clicking **Experiments**.
2. Click **Create experiment**. The experiment builder appears, and now you're ready to go!
There are many ways to customize your experiment to track exactly the information you need. Here are some recommendations to create the simplest possible experiment:
1. Add a clear [hypothesis](/guides/experimentation/designing-experiments#formulate-a-hypothesis) to the experiment.
2. When you choose a randomization unit, try "users." Users are the most common randomization unit.
3. Set up a 50/50 traffic split to see accurate, significant results quickly.
To learn more, read [Experimentation](/home/experimentation).