> ## Documentation Index
> Fetch the complete documentation index at: https://launchdarkly-preview.mintlify.site/llms.txt
> Use this file to discover all available pages before exploring further.
# Creating experiments
> This topic explains how to create and configure an experiment in LaunchDarkly.
> For the complete documentation index, see [llms.txt](/llms.txt). For the full documentation snapshot, see [llms-full.txt](/llms-full.txt).
## Overview
This topic explains how to create and configure an experiment in LaunchDarkly.
Creating an experiment requires several steps:
1. Deciding on the kind of experiment to build
2. Creating the flag or AI Config and its variations
3. Creating the right type of metric for your experiment
4. Building the experiment
5. Turning on the flag or AI Config
6. Starting an iteration
These steps are explained in detail below.
## Prerequisites
Before you build an experiment, you must complete the following prerequisites.
### Decide on the kind of experiment to build
The kind of experiment you build is determined by the type of metric you attach to the experiment. You can use [LaunchDarkly hosted metrics](/home/experimentation/types#launchdarkly-hosted-metrics) or metrics from an [external warehouse you specify](/home/experimentation/types#warehouse-native-metrics).
You can run [A/B experiments](/home/getting-started/vocabulary#ab-experiment) and [A/A tests](/home/getting-started/vocabulary#aa-test) using any metric or [standard metric group](/home/metrics/metric-groups#standard-metric-groups). You can also run A/B experiments using [funnel metric groups](/home/metrics/metric-groups#funnel-metric-groups) or warehouse native metrics.
You can also choose to use [Data Export](/integrations/data-export) to export data from your experiments to a third-party analysis tool, which doesn't require you to select any metrics when you create the experiment.
### Create a metric
After you decide on an experiment type, you can create a new metric or reuse an existing metric in your experiment. To learn how, read [Metrics](/home/metrics).
LaunchDarkly automatically creates metrics from AI SDKs, which you can use in experiments on AI Configs. To learn more, read [Metrics generated from AI SDK events](/home/metrics/autogen/ai).
The default metric analysis method is "Average." The use of percentile analysis methods with LaunchDarkly experiments is in beta. If you use a metric with a percentile analysis method in an experiment with a large audience, the experiment results tab may take longer to load, or the results tab may time out and display an error message. Percentile analysis methods are also not compatible with [CUPED adjustments](/guides/statistical-methodology/cuped).
### Create a flag or AI Config
Before you begin an experiment, create a flag or AI Config with the variations you plan to test the performance of. You do not need to toggle on the flag before you create an experiment, but you do have to toggle on the flag before you [start an experiment iteration](#start-an-experiment-iteration). AI Configs are on by default.
To learn more, read [Creating new flags](/home/flags/new), [Creating flag variations](/home/flags/variations), [Create AI Configs](/home/ai-configs/create), and [Create and manage AI Config variations](/home/ai-configs/create-variation).
#### Limitations
You cannot run an experiment on a flag or AI Config if:
* any of its rules have an active [guarded rollout](/home/releases/guarded-rollouts)
* any of its rules have an active [progressive rollout](/home/releases/progressive-rollouts)
* any of its rules are in a running Data Export experiment
* any of its rules are in a running [experiment with warehouse native metrics](/home/warehouse-native/creating)
* the flag is a [migration flag](/home/flags/migration)
You can build and run multiple experiments on the same flag or AI Config as long as there is only one running experiment per rule. You cannot run multiple experiments on the same rule at the same time.
## Build the experiment
To build an experiment:
1. Click **Create** and choose **Experiment**. The "Create experiment" dialog appears.
2. Enter an experiment **Name**.
3. Enter a **Hypothesis**.
4. (Optional) Click **Add tags** in the right sidebar to add new or existing tags to the experiment.
5. Click **Create experiment**. The experiment **Design** tab appears.
6. Choose a context kind to **Randomize by**.
7. Select a **Metric source**.
* If you are creating an experiment using [warehouse native metrics](/home/warehouse-native/creating), select your external warehouse. Otherwise, select "LaunchDarkly."
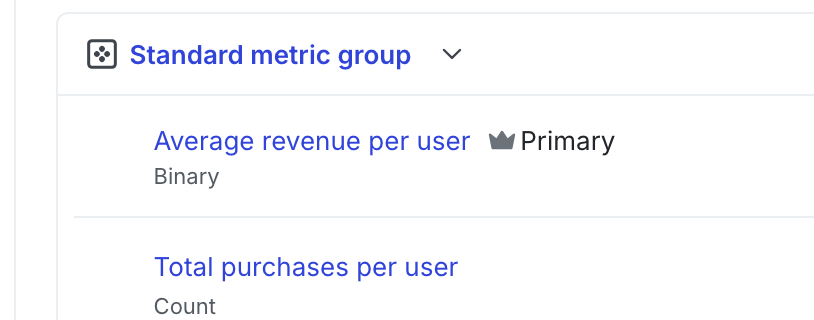
8. Select one or more **Metrics** or metric groups.
* (Optional) If you want to create a new metric, click **Create** to create and use a new metric or new [metric group](/home/metrics/metric-groups).
* You can add only one funnel metric group per experiment.
* If this experiment is a [Data Export experiment](/home/getting-started/vocabulary#data-export-experiment), click the **Data Export only** checkbox. Data Export experiments do not require a metric or statistical approach, and don't allow attribute selection.
9. (Optional) If you have added multiple metrics or a standard metric group and want to change the primary metric, hover on the metric name and click the **crown** icon.
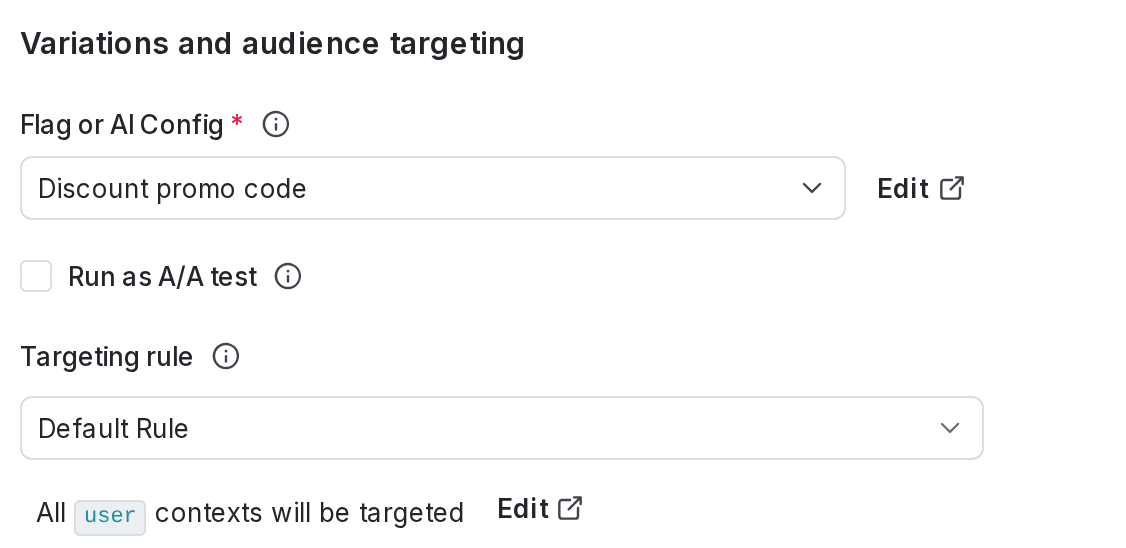
10. Choose a **Flag or AI Config** to use in the experiment.
* (Optional) If you want to create a new flag or AI Config, click **Create flag** or **Create AI Config** to create and use a new flag or AI Config.
* (Optional) Check the **Run as A/A** test if you plan to compare two different, but identical, variations. You must define these variations in your codebase in the exact same way.
11. Choose a targeting rule for the **Experiment audience**.
* If you want to restrict your experiment audience to only contexts with certain attributes, create a targeting rule on the flag or AI Config you include in the experiment and run the experiment on that rule.
* If you don't want to restrict the audience for your experiment, run the experiment on the default rule. If the flag or AI Config doesn't have any targeting rules, the default rule will be the only option.
12. (Optional) If you want to [exclude contexts in this experiment](/home/experimentation/mutually-exclusive) from other experiments you specify, click **Add experiment to exclusion layer** and select a layer.
A [layer](/home/experimentation/mutually-exclusive) is a set of experiments that cannot share traffic with each other. All of the experiments within a layer are mutually exclusive, which means that if a context is included in one experiment, LaunchDarkly will exclude it from any other experiments in the same layer.
To add the experiment to an existing layer:
1. Click **Select layer**.
2. Search for and choose the layer you want to add the experiment to.
3. Enter a **Reservation** amount. This is the percentage of the contexts within this layer you want LaunchDarkly to include in this experiment.
4. Click **Save layer**.
If you need to create a new layer:
1. Click **Create layer**.
2. Add a **Name** and **Description**.
3. Click **Create layer**.
4. Enter a **Reservation** amount. This is the percentage of the contexts within this layer you want LaunchDarkly to include in this experiment.
5. Click **Save layer**.
13. Choose the **Variation served to users outside this experiment**. Contexts that match the selected targeting rule but are not in the experiment will receive this variation.
14. Select the **Sample size** for the experiment. This is the percentage of all of the contexts that match the experiment's targeting rule that you want to include in the experiment.
15. (Optional) Click **Advanced** to edit variation reassignment. For most experiments, we recommend leaving this option on its default setting. To learn more, read [Variation reassignment](/home/experimentation/carryover).
16. (Optional) Click **Edit** to update the variation split for contexts that are in the experiment.
* You can **Split equally** between variations, or assign a higher percentage of contexts to some variations than others.
* Click **Save audience split**.
17. Select a variation to serve as the **Control**.
18. Select a **Statistical approach** of Bayesian or frequentist.
* If you selected a statistical approach of Bayesian, select a preset or **Custom** success threshold.
* If you selected a statistical approach of frequentist, select:
* a **Significance level**.
* a one-sided or two-sided **Direction of hypothesis test**.
You can select a statistical approach of **Bayesian** or **Frequentist**. Each approach includes one or more analysis options.
We recommend **Bayesian** when you have a small sample size of less than a thousand contexts, and we recommend **Frequentist** when you have a larger sample size of a thousand or more.
The Bayesian options include:
* **Threshold**:
* **90%** probability to beat control is the standard success threshold, but you can raise the threshold to **95%** or **99%** if you want to be more confident in your experiment results.
* You can lower the threshold to less than 90% using the **Custom** option. We recommend a lower threshold only when you are experimenting on non-critical parts of your app and are less concerned with determining a clear winning variation.
The frequentist options include:
1. **Enable sequential testing**: Sequential testing lets you act on the results of your experiment at any time, instead of waiting for a specific sample size. To learn more, read[Fixed-horizon versus sequential](/guides/statistical-methodology/choosing#fixed-horizon-versus-sequential).
2. **Significance level**:
* **0.05** p-value is the standard significance level, but you can lower the level to **0.01** or raise the level to **0.10**, depending on whether you need to be more or less confident in your results. A lower significance level means that you can be more confident in your winning variation.
* You can raise the significance level to more than 0.10 using the **Custom** option. We recommend a higher significance level only when you are experimenting on non-critical parts of your app and are less concerned with determining a clear winning variation.
3. **Direction of hypothesis test**:
* **Two-sided**: We recommend two-sided when you're unsure about whether the difference between the control and the treatment variations will be negative or positive, and want to look for indications of statistical significance in both directions.
* **One-sided**: We recommend one-sided when you feel confident that the difference between the control and treatment variations will be either negative or positive, and want to look for indications of statistical significance only in one direction.
4. (Optional) Select a [Multiple comparisons correction (MCC)](/guides/statistical-methodology/mcc) option:
* Select **Apply across treatments** to correct for additional comparisons from multiple treatments
* Select **Apply across metrics** to correct for additional comparisons across multiple metrics
* Select **Apply across both metrics and treatments** to correct for additional comparisons from multiple metrics and multiple treatments
To learn more, read [Bayesian versus frequentist statistics](/guides/experimentation/bayesian-frequentist).
19. (Optional) Check **Apply stratified sampling** if you want to [reduce covariate imbalance in your experiment treatments](/guides/statistical-methodology/stratified-sampling).
You can use stratified sampling to re-randomize the contexts in your experiment treatments. Re-randomization helps eliminate covariate imbalance and reduce false positives and false negatives in your experiment results.
Here's how:
1. Prepare a CSV file containing relevant context keys and covariate values. To learn how, read [Stratified sampling in LaunchDarkly experiments](/guides/statistical-methodology/stratified-sampling#stratified-sampling-in-launchdarkly-experiments).
2. Click **Upload CSV**. An "Upload CSV" dialog appears.
3. Click **Select CSV** and choose your CSV file.
4. Click **Upload file**.
LaunchDarkly stores the information you upload in your CSV files. For this reason, we recommend that you do not upload any personally identifying information (PII). If you have PII in LaunchDarkly that you want to delete, [contact Support](https://support.launchdarkly.com/hc/en-us).
20. (Optional) If you want to include the experiment in a [holdout](/home/holdouts), click **Advanced**, then select a **Holdout** name.
Experiments can either be in a holdout or in a layer, but not both. If you added the experiment to a layer, you will not see the option to add it to a holdout.
21. (Optional) If you want to be able to [filter your experiment results by attribute](/home/experimentation/filters), click **Advanced**, then select up to five context attributes to filter results by.
22. Scroll to the top of the page and click **Save**.
If needed, you can save your in-progress experiment design to finish later. To save your design, click **Save** at the top of the creation screen. Your in-progress experiment design is saved and appears on the **Experiments** list. To finish building the experiment, click on the experiment's name and continue editing.
After you have created your experiment, the next step is to toggle on the flag. AI Configs are on by default. Then, you can start an iteration.
You can also use the REST API: [Create experiment](/api-reference/experiments/create-experiment)
## Turn on the flag or AI Config
For an experiment to begin recording data, the flag or AI Config used in the experiment [must be toggled on](/home/flags/toggle). Targeting rules for AI Configs are on by default.
## Start an experiment iteration
After you create an experiment and toggle on the flag, you can start an experiment iteration in one or more environments. To learn how, read [Starting and stopping experiment iterations](/home/experimentation/start-stop-exp).
Experiment iterations allow you to record experiments in individual blocks of time. To ensure accurate experiment results, when you make changes that impact an experiment, LaunchDarkly starts a new iteration of the experiment.

To ensure accurate experiment results, when you make changes that impact an experiment, LaunchDarkly starts a new iteration of the experiment.
You can also use the REST API: [Create iteration](/api-reference/experiments/create-iteration)