> ## Documentation Index
> Fetch the complete documentation index at: https://launchdarkly-preview.mintlify.site/llms.txt
> Use this file to discover all available pages before exploring further.
# Single sign-on
> This topic explains what Single Sign-On (SSO) features are available in LaunchDarkly.
> For the complete documentation index, see [llms.txt](/llms.txt). For the full documentation snapshot, see [llms-full.txt](/llms-full.txt).
Single sign-on is only available to customers on select plans. To learn more, [read about our pricing](https://launchdarkly.com/pricing/). To upgrade your plan, [contact Sales](https://launchdarkly.com/contact-sales/).
## Overview
This topic explains what Single Sign-On (SSO) features are available in LaunchDarkly.
SSO allows your team to authenticate with LaunchDarkly using the same identity provider (IdP) you use for your other internal and external services. LaunchDarkly implements SSO with the SAML 2.0 protocol. You can use SSO with your IdP to manage access rights in LaunchDarkly. You can use SSO to manage both member login and member roles, or you can use SSO to manage member login only, and continue to manage member roles within LaunchDarkly.
As a customer on an Enterprise or Guardian plan, after you enable SSO, System for Cross-domain Identity Management (SCIM) becomes available. SCIM facilitates user provisioning, which means your IdP can use it to create, update, and deactivate members in LaunchDarkly. Administrators can optionally turn on and configure team sync with SCIM, which lets admins sync groups in their IdP with LaunchDarkly teams.
## Enable SSO in Launch
Darkly
To configure SSO in your LaunchDarkly account:
1. Enable SAML SSO in your account. Configure LaunchDarkly to use your IdP when account members request access. To learn how to do this, read [Configure SAML SSO](/home/account/saml).
2. (Enterprise and Guardian - Optional) Configure SCIM to enable the automation of user and group provisioning. To learn how to do this, read [Enable SCIM provisioning](/home/account/scim).
### Supported external identity providers
We provide support for the following IdPs:
|
Identity provider
|
SAML SSO integration: member and team provisioning
|
SCIM integration (Enterprise only)
|
Team sync with SCIM (Enterprise only)
|
|
ADFS
|

|
|
|
|
Entra ID
|
|
|
|
|
GitHub OAuth
|
|
|
|
|
Google Workspace
|
|
|
|
|
Google OAuth
|
|
|
|
|
Okta
|
|
|
|
|
OneLogin
|
|
|
|
Some customers use the following identity providers. Although we do not offer support for these providers, we can share some configuration guidance based on what has been successful for other customers:
* [PingIdentity](/home/account/pingidentity)
* Centrify
* SecureAuth
* DuoMobile
You can only use one identity provider per LaunchDarkly account.
### Default initial role
During account member provisioning, LaunchDarkly sets the default initial role for new members to a role that you specify.
To set a default initial role:
1. Click the **gear** icon in the left sidenav to view Organization settings.
2. Click **Security**.
3. Under "SSO Management," click **Configure SAML**. The SAML configuration panel appears.
4. Under "Default initial role," select the default **Role** for new members.
5. Click **Save**.
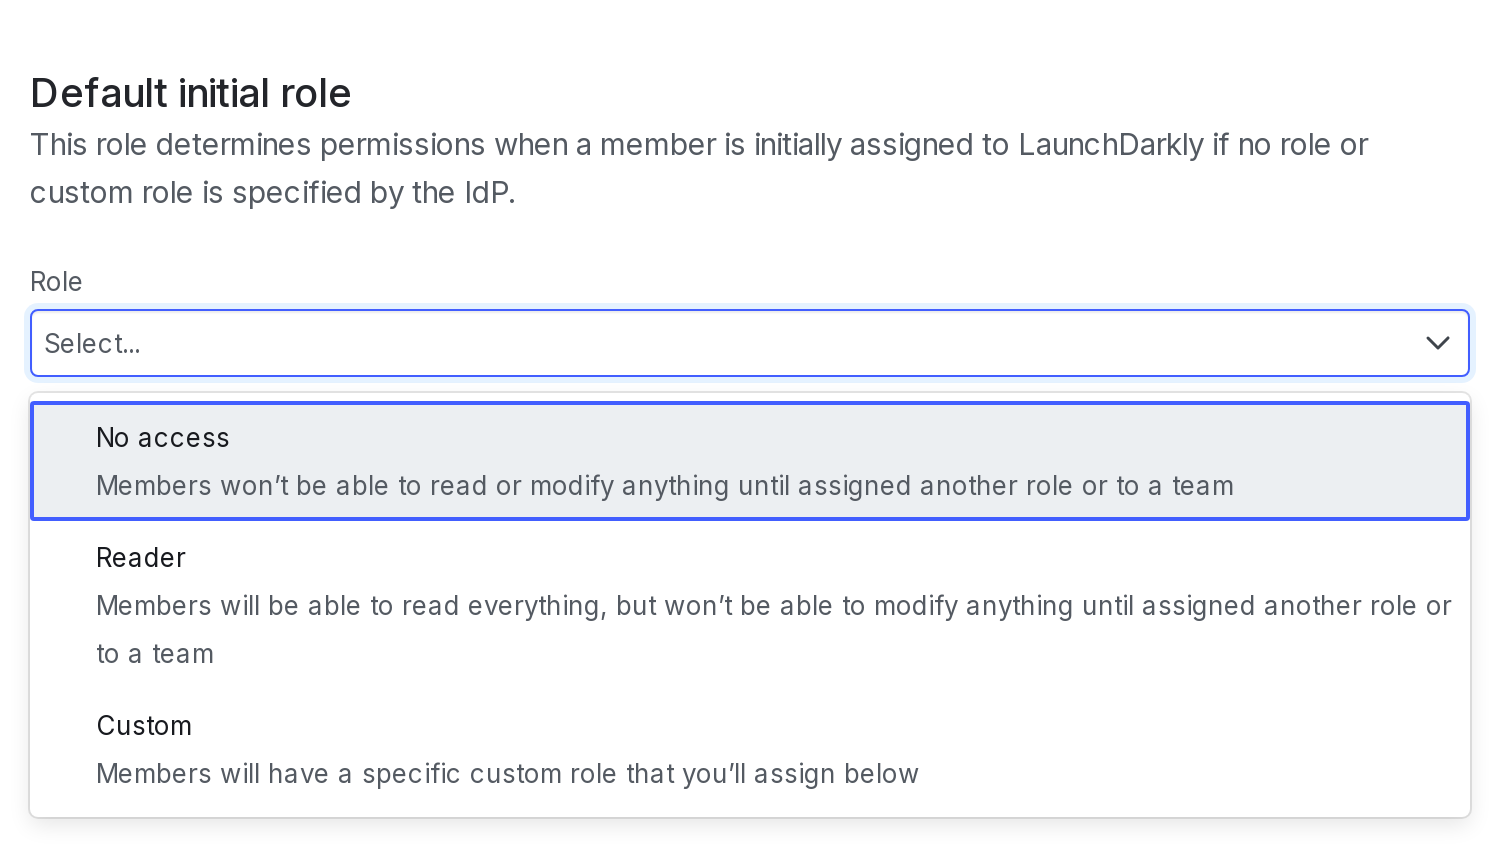
LaunchDarkly sets the default initial role for new members to the initial **Role** specified here, unless you have specified a different role in your IdP.
We recommend setting the default initial role to No access. The No access base role can help you mitigate risk, for instance if you have private projects that should be hidden from most members.
Developer and Foundation customers can only set the default role to the Reader base role.
To learn more about roles and their permissions, read [Roles](/home/account/roles). For an in-depth guide on how to use custom roles with IdPs, read [Creating roles](/guides/teams-roles/custom-roles).