> ## Documentation Index
> Fetch the complete documentation index at: https://launchdarkly-preview.mintlify.site/llms.txt
> Use this file to discover all available pages before exploring further.
# Your member profile
> This topic explains how to access and use the Profile page to manage the information associated with your member profile.
> For the complete documentation index, see [llms.txt](/llms.txt). For the full documentation snapshot, see [llms-full.txt](/llms-full.txt).
## Overview
This topic explains how to access and use the **Profile** page to manage the information associated with your member profile.
Every LaunchDarkly account member has a unique member profile.
From the profile, you can take the following actions:
* [View your member ID and account ID](#view-your-member-id-and-account-id)
* [View your roles and permissions](#view-your-roles-and-permissions)
* [Change your display name](#change-your-display-name-and-email-address)
* [Change the email address associated with your account](#change-your-display-name-and-email-address)
* [Change your password](#change-your-password), if your organization does not use single sign-on (SSO)
* [Switch between light and dark mode](#switch-between-light-and-dark-mode)
* [Update your notification settings](#update-your-notification-settings)
* [Enable or disable multi-factor authentication (MFA)](#enable-multi-factor-authentication)
* [Change your profile picture](#change-your-profile-picture)
## Access your profile
To access your account profile, click your member icon in the left sidenav and choose **Personal settings** from the menu.

## View your member ID and account IDSome Launch
Darkly APIs, as well as the LaunchDarkly onboarding sample code, require that you provide your member ID. Both your member ID and account ID appear in the "My account" section of your personal settings.

## View your roles and permissions
You can read about the permissions that you have from the **Access** tab for your member.
Navigate to the **Access** tab from your personal settings by clicking on the **Access** link under "My profile."
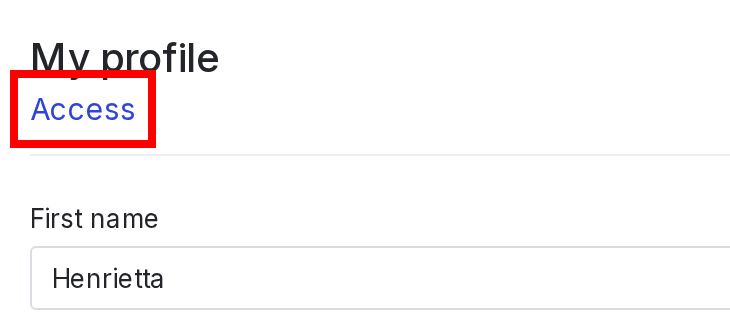
You can also navigate to the **Access** tab by clicking the **gear** icon in the left sidenav to view Organization settings, and then choosing **Members** from the left sidenav, and clicking on your name from the list of members.
The **Access** tab shows you the roles that have been assigned to you, either directly or because you are part of a team. To learn more, read [Roles](/home/account/roles).
## Change your display name and email address
You can change your display name or email address from your profile. Here's how:
1. Navigate to your profile.
2. In the "My profile" section, type in the **First name**, **Last name**, and/or **Email address** fields to change them.
3. Click **Update my info**.Your changes are confirmed. Test them by logging out and logging back in with your updated email address. If you changed your name, your new display name appears after you log in.
When you update your email address, the address is case sensitive. Future attempts to log in with that email address will fail if you use different casing.
For example, if you sign up as `example@your-work-email.com` and later log in as `EXAMPLE@Your-Work-Email.com`, the login attempt will fail.
When SAML SSO or SCIM is enabled for the account, account members are managed in the identity provider (IdP), and not from the profile page. This means you cannot change your email address or other member information.
To learn how to manage account members in the IdP, read [User provisioning with SAML](/home/account/saml#user-provisioning-with-saml). For additional information on updating members to a new email domain, read [How to update email addresses when switching to a new domain](https://support.launchdarkly.com/hc/en-us/articles/28868224354587-How-to-update-email-addresses-when-switching-to-a-new-domain).
If you have created your account using GitHub OAuth, you cannot change your email address. To learn more, read [GitHub OAuth](/home/account/oauth-github).
## Change your password
You can set your LaunchDarkly password from your profile, in the "My password" section. You must have your current password to reset your password while logged in. If you sign in to LaunchDarkly through an SSO provider, such as Okta, Google, or your organization's SSO, you can reset your password through that provider. To learn more, read [Single sign-on](/home/account/sso).
New LaunchDarkly passwords must have:
* at least eight characters, and *at least three of the four* following items
* one uppercase letter,
* one lowercase letter,
* one number, or
* one special character. To set a new password:
1. Click your member icon in the left sidenav. A menu appears.
2. Click **Personal settings**. Your profile page appears.
3. In the "My password" section, enter your password in the **Current password** field.
4. Enter a new password in the **New password** field.
5. Re-enter the password identically in the **Confirm new password** field.
6. Click **Update my password**.Your password is confirmed. You can test it by logging out and logging back in with the new password.
You can also reset your password by following this procedure. To learn more about why you may need to reset your password, read [Resetting your password](/home/account/reset-password).
## Switch between light and dark mode
To switch between light and dark mode, click your profile picture and hover on the "Theme" option. Then select **System**, **Light**, or **Dark**. **System** matches the mode you have set for your machine.
## Update your notification settings
You can customize which notifications you receive and what platforms you receive them on. The default notification settings send notifications on all available platforms.
You can receive notifications about the following events:
* Approvals: receive notifications when someone sends you an approval request, or when someone has approved, declined, or commented on an approval
* Follow flags: receive notifications when someone makes targeting updates to a feature flag you're following
* Follow experiments: receive notifications when someone makes updates to an experiment you're following
* Organization access: receive notifications when new members join your account through domain matching or matched seat provisioning
* Suggested invites: receive notifications when new members are invited to your accountYou can update your notification settings in the following ways:
* Check the "Inbox" checkbox to receive notifications in your LaunchDarkly inbox.
* Check the "Email" checkbox to receive emails at the email address associated with your LaunchDarkly account.
* Check the "Chat" checkbox to receive Slack notifications, if you have the Slack integration set up. To learn more, read [Slack](/integrations/slack).
## Enable multi-factor authentication
MFA is a security practice that requires someone to verify their identity through multiple methods before they can access an account. LaunchDarkly supports MFA. Individual members can enable or disable MFA from their profile.
LaunchDarkly account admins and owners can force all account members to use MFA. If MFA is enabled project-wide, you will not have the option to enable or disable MFA from your member profile.
To learn how to enable MFA from your profile, read [Multi-factor authentication](/home/account/mfa).
## Change your profile picture
Your member profile picture is generated from [Gravatar](https://gravatar.com/). To add or update your profile picture, update your Gravatar account.